
A. Space Settings
 ️ The Space Admin can easily manage and edit Space information, tags, member roles, etc.
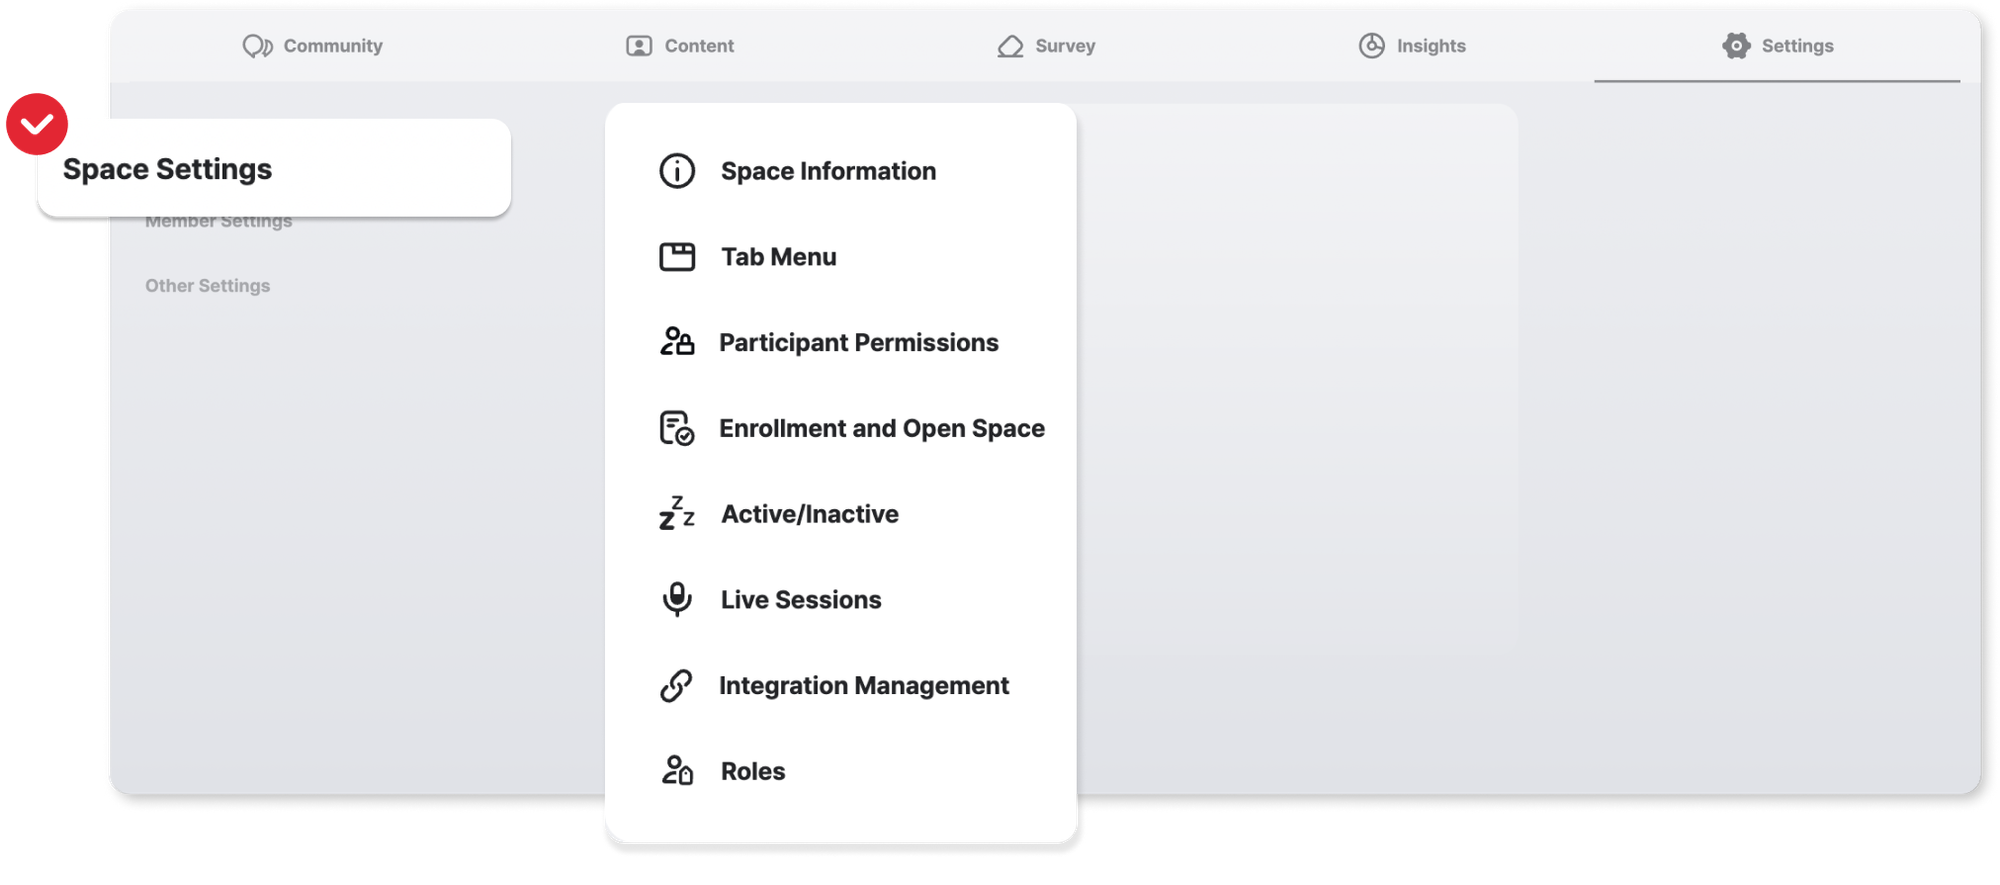
① Space Information
•
You can edit/manage basic Space information.
※ After editing the Space name, organization logo, Space owner name, semesters, etc, click Save to reflect the changes.
② Tab Menu
•
Select the Starting Tab
◦
You can set the tab menu to land first when entering the space.
◦
You can set it if two or more tab menus are in use.
•
You can set up the Tab Menu in the Space setting.
※ At least one function must be selected for a tab.
※ You can check the selected tab menu in the PC and mobile preview.

③ Participant Permissions
•
Activate the Allow uploading of content button to allow participants to also upload content.
※ This feature is recommend for spaces operating for the purposes of group activities, studies, and learning organizations!
※ Once permissions are granted, they cannot be taken back!
④ Enrollment space and Open space
•
Enrollment space: Only institution administrators can create it.
※ It is a space where administrators set the enrollment period and the number of people.
※ Once the set period or the number of people is reached, no more enrollment is allowed.
※ Only members whose course enrollment has been approved by the institution administrator can participate in the space.
•
Open space: Anyone with the code to create a space can create it.
※ Institution members can participate in the space directly without a separate invitation code.
※ Before entering the space, you can first look around the Discover Space to see what kind of activities are taking place in the Space.
⑤ (Space) Activate/Deactivate
•
Switch off the Space Status button to deactivate a space, and activate it by switching it on again.
※ Deactivated Spaces are excluded from payment.
※ Once a Space is deactivated, it disappears from the Space List.
※ Only Admins can find the deactivated Space in the Inactive Spaces List, but they cannot edit/delete any posts in the deactivated Space.
※ Moreover, participants (learners, students) will be unable to enter the Space.
※ Deactivated Spaces can be activated again at any time. However, if the number of users in the reactivated space exceeds the original number of users from the initial plan, an additional monthly fee will be charged.
⑥ Live Sessions
•
You can check the Zoom accounts connected to the space and connect or disconnect accounts as you wish.
⑦ Integration Management
•
When integrated with Slack, you can receive new posts, content, and comments in the DM of Slack from the CLASSUM space.
⑧ Roles
•
You can add or delete member roles.
※ Participants and the space admins have different levels of permission. Admins can view the real name of the writer of anonymous posts and can upload notice/feedback posts. They can also initiate real-time video lectures and have access to various analytics.
※ Admins can select roles for all the members in the Space. These roles will appear beside the writers’ names on each post.
※ You can also add more flourish to the role names by right-clicking the mouse to use the “pictures & emojis” function.
B. Member Settings

(Picture 1) The default screen for 'Settings → Members'
① Edit Members
•
Click Settings → Click Manage Members → Edit member permissions and roles.
•
In the Manage Members → Participant tab, press X to remove a member from the space.
•
In the Manage Members → Pending page, you can view members who were invited but have not entered the space yet.
•
Blocked users cannot enter the space until they have been unblocked.
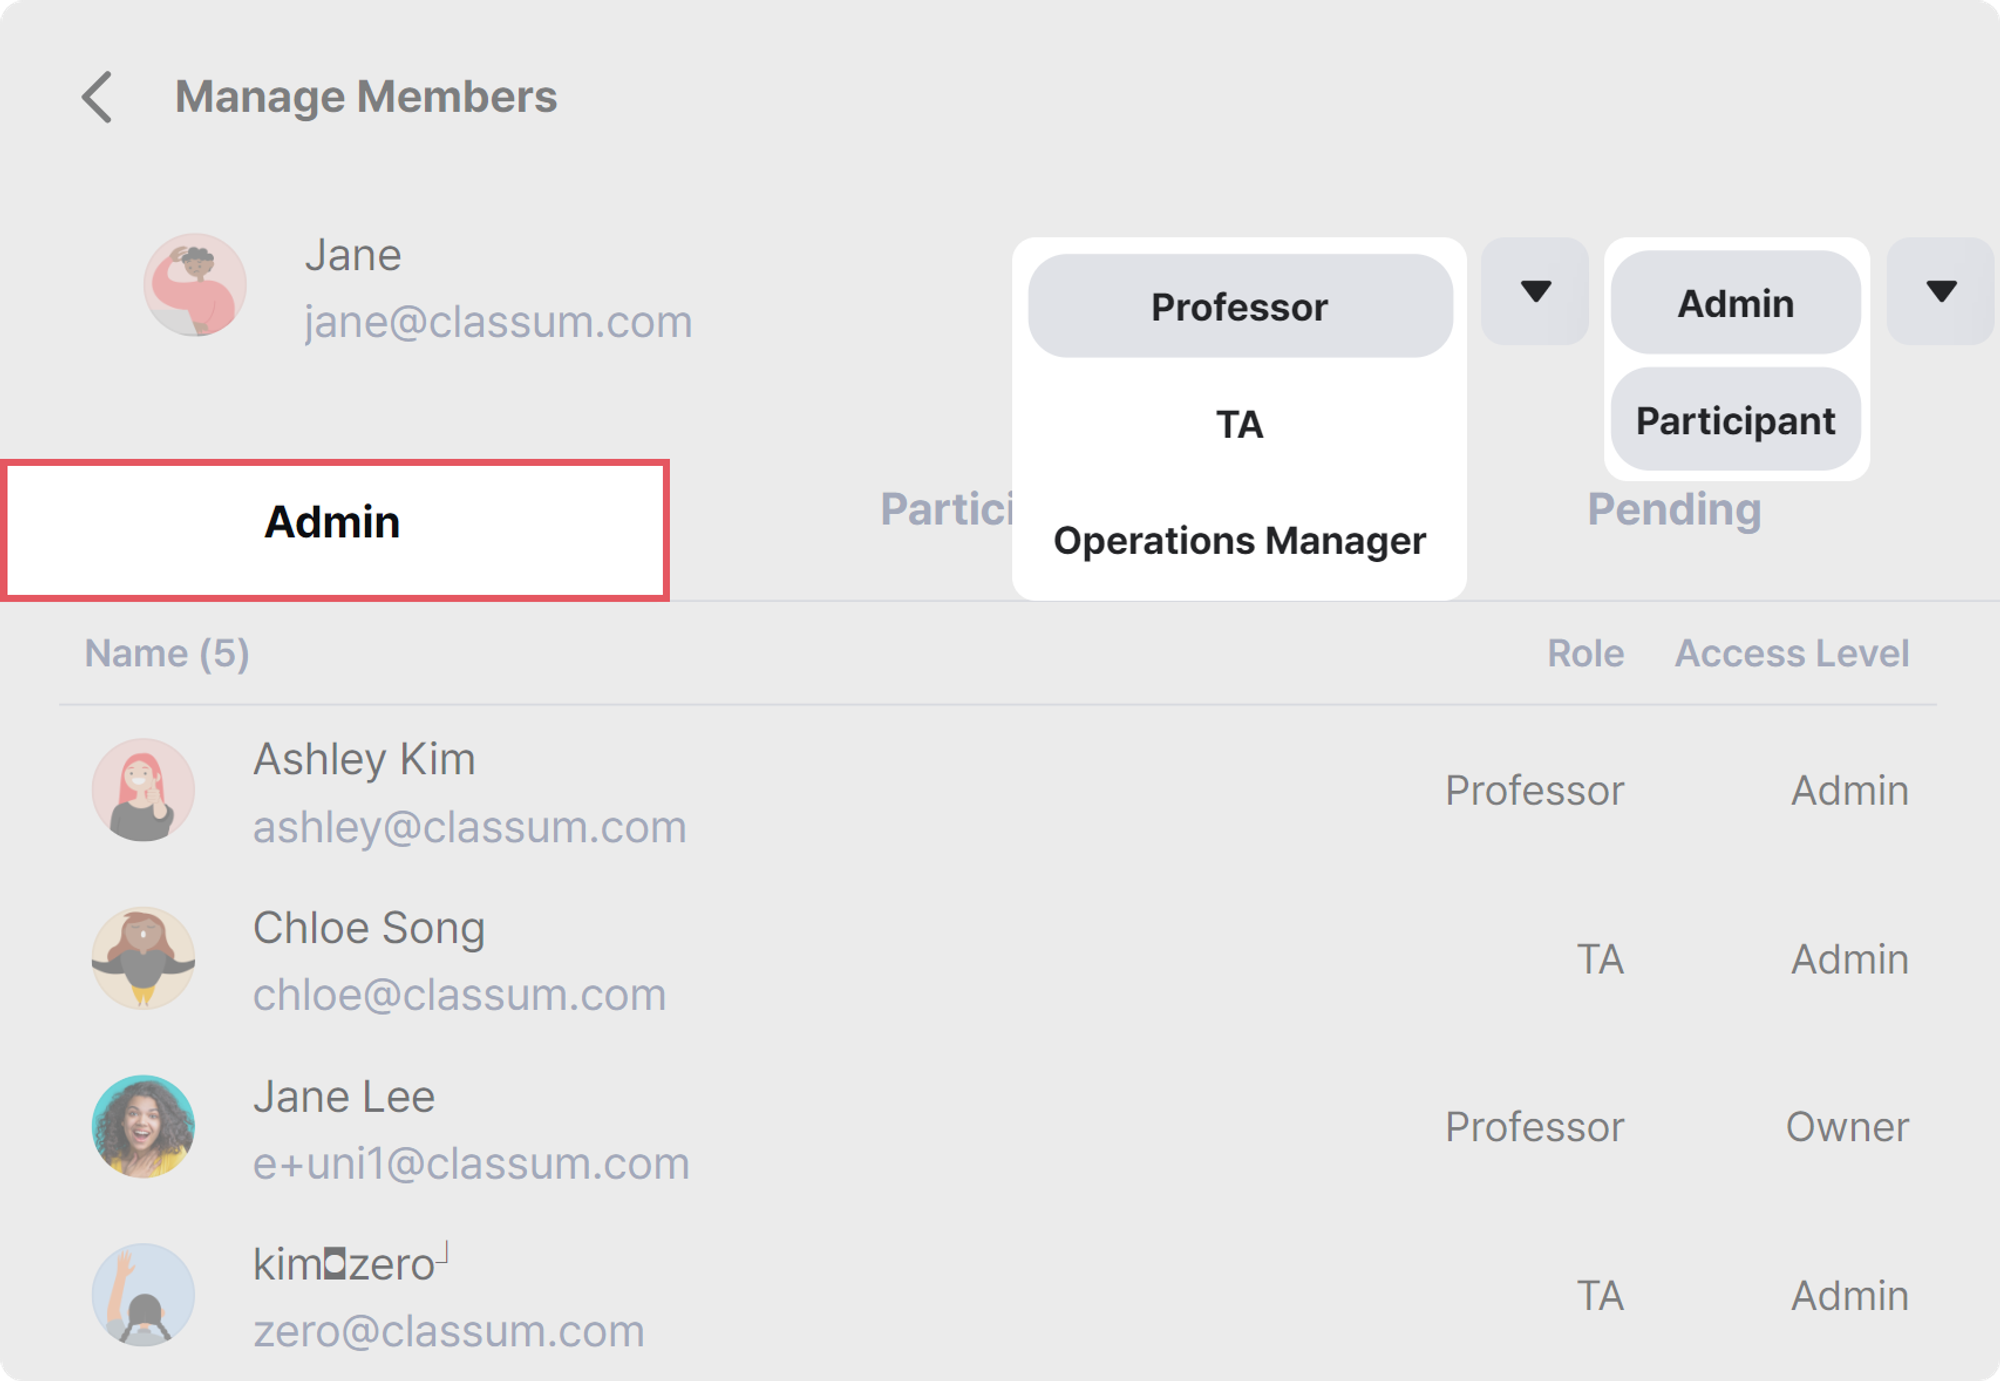
(Picture 1) Edit Admin permission, Role Names
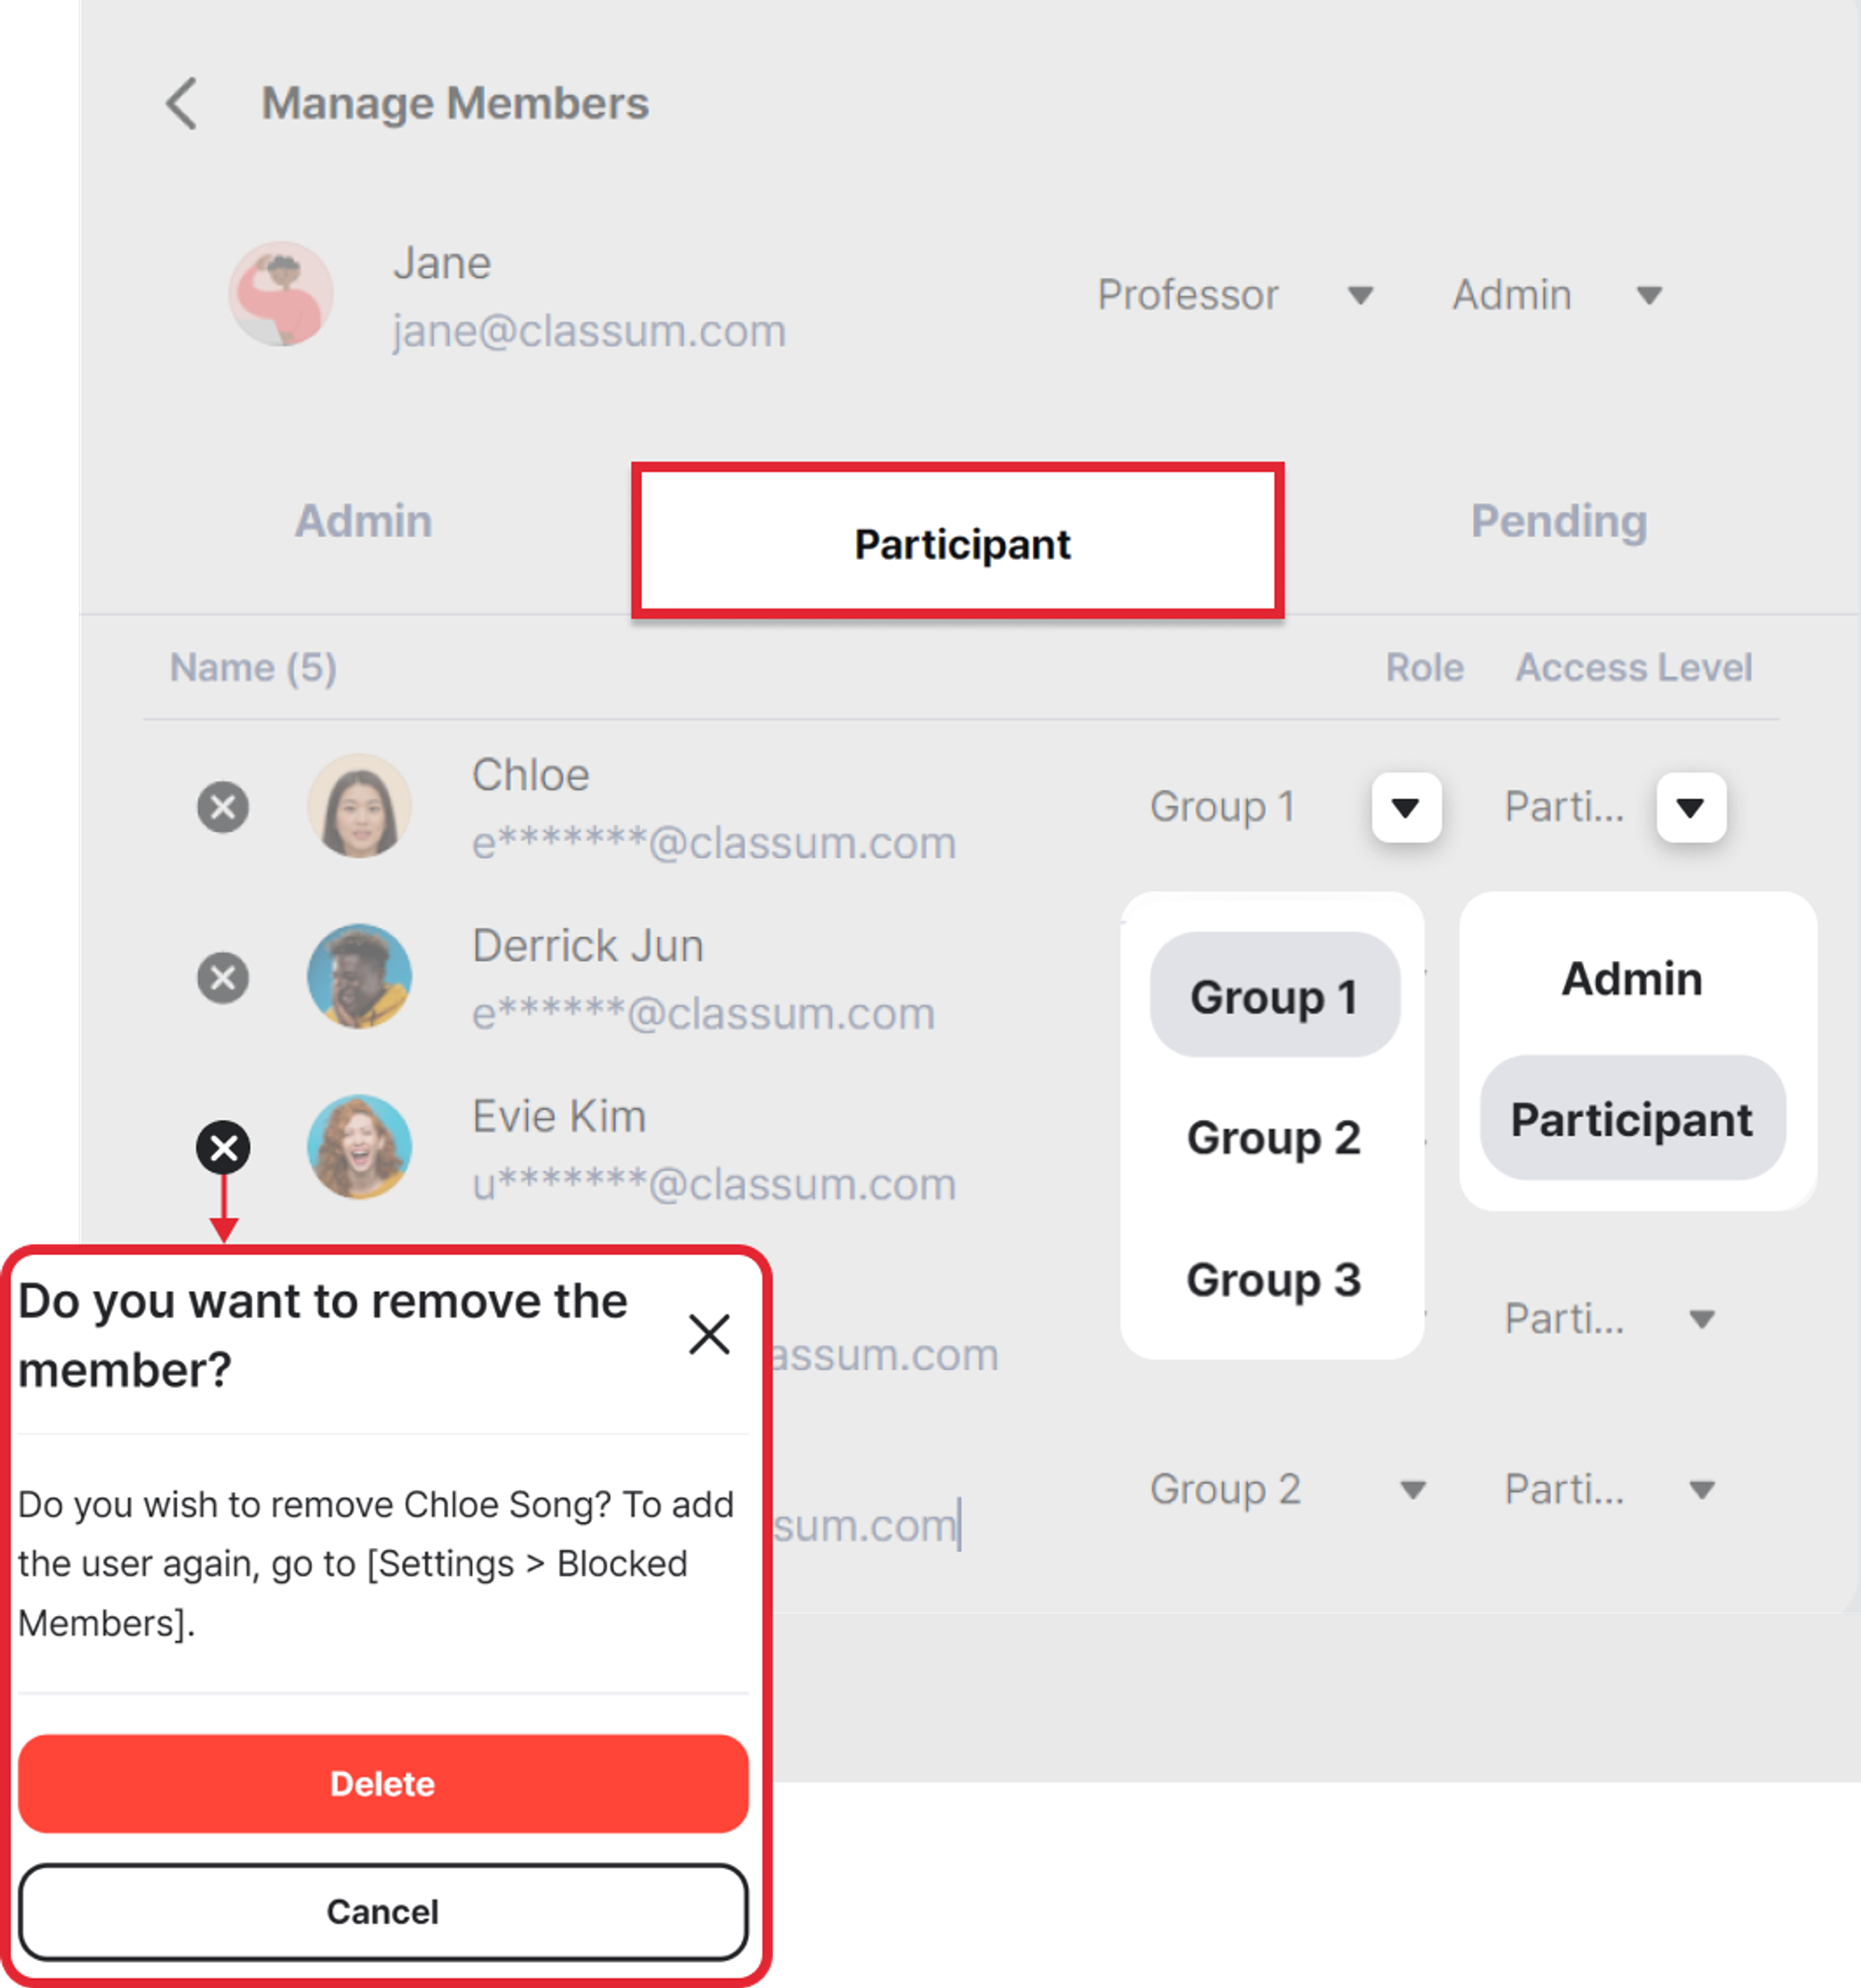
(Picture 2) Participant permission, edit role names, remove members
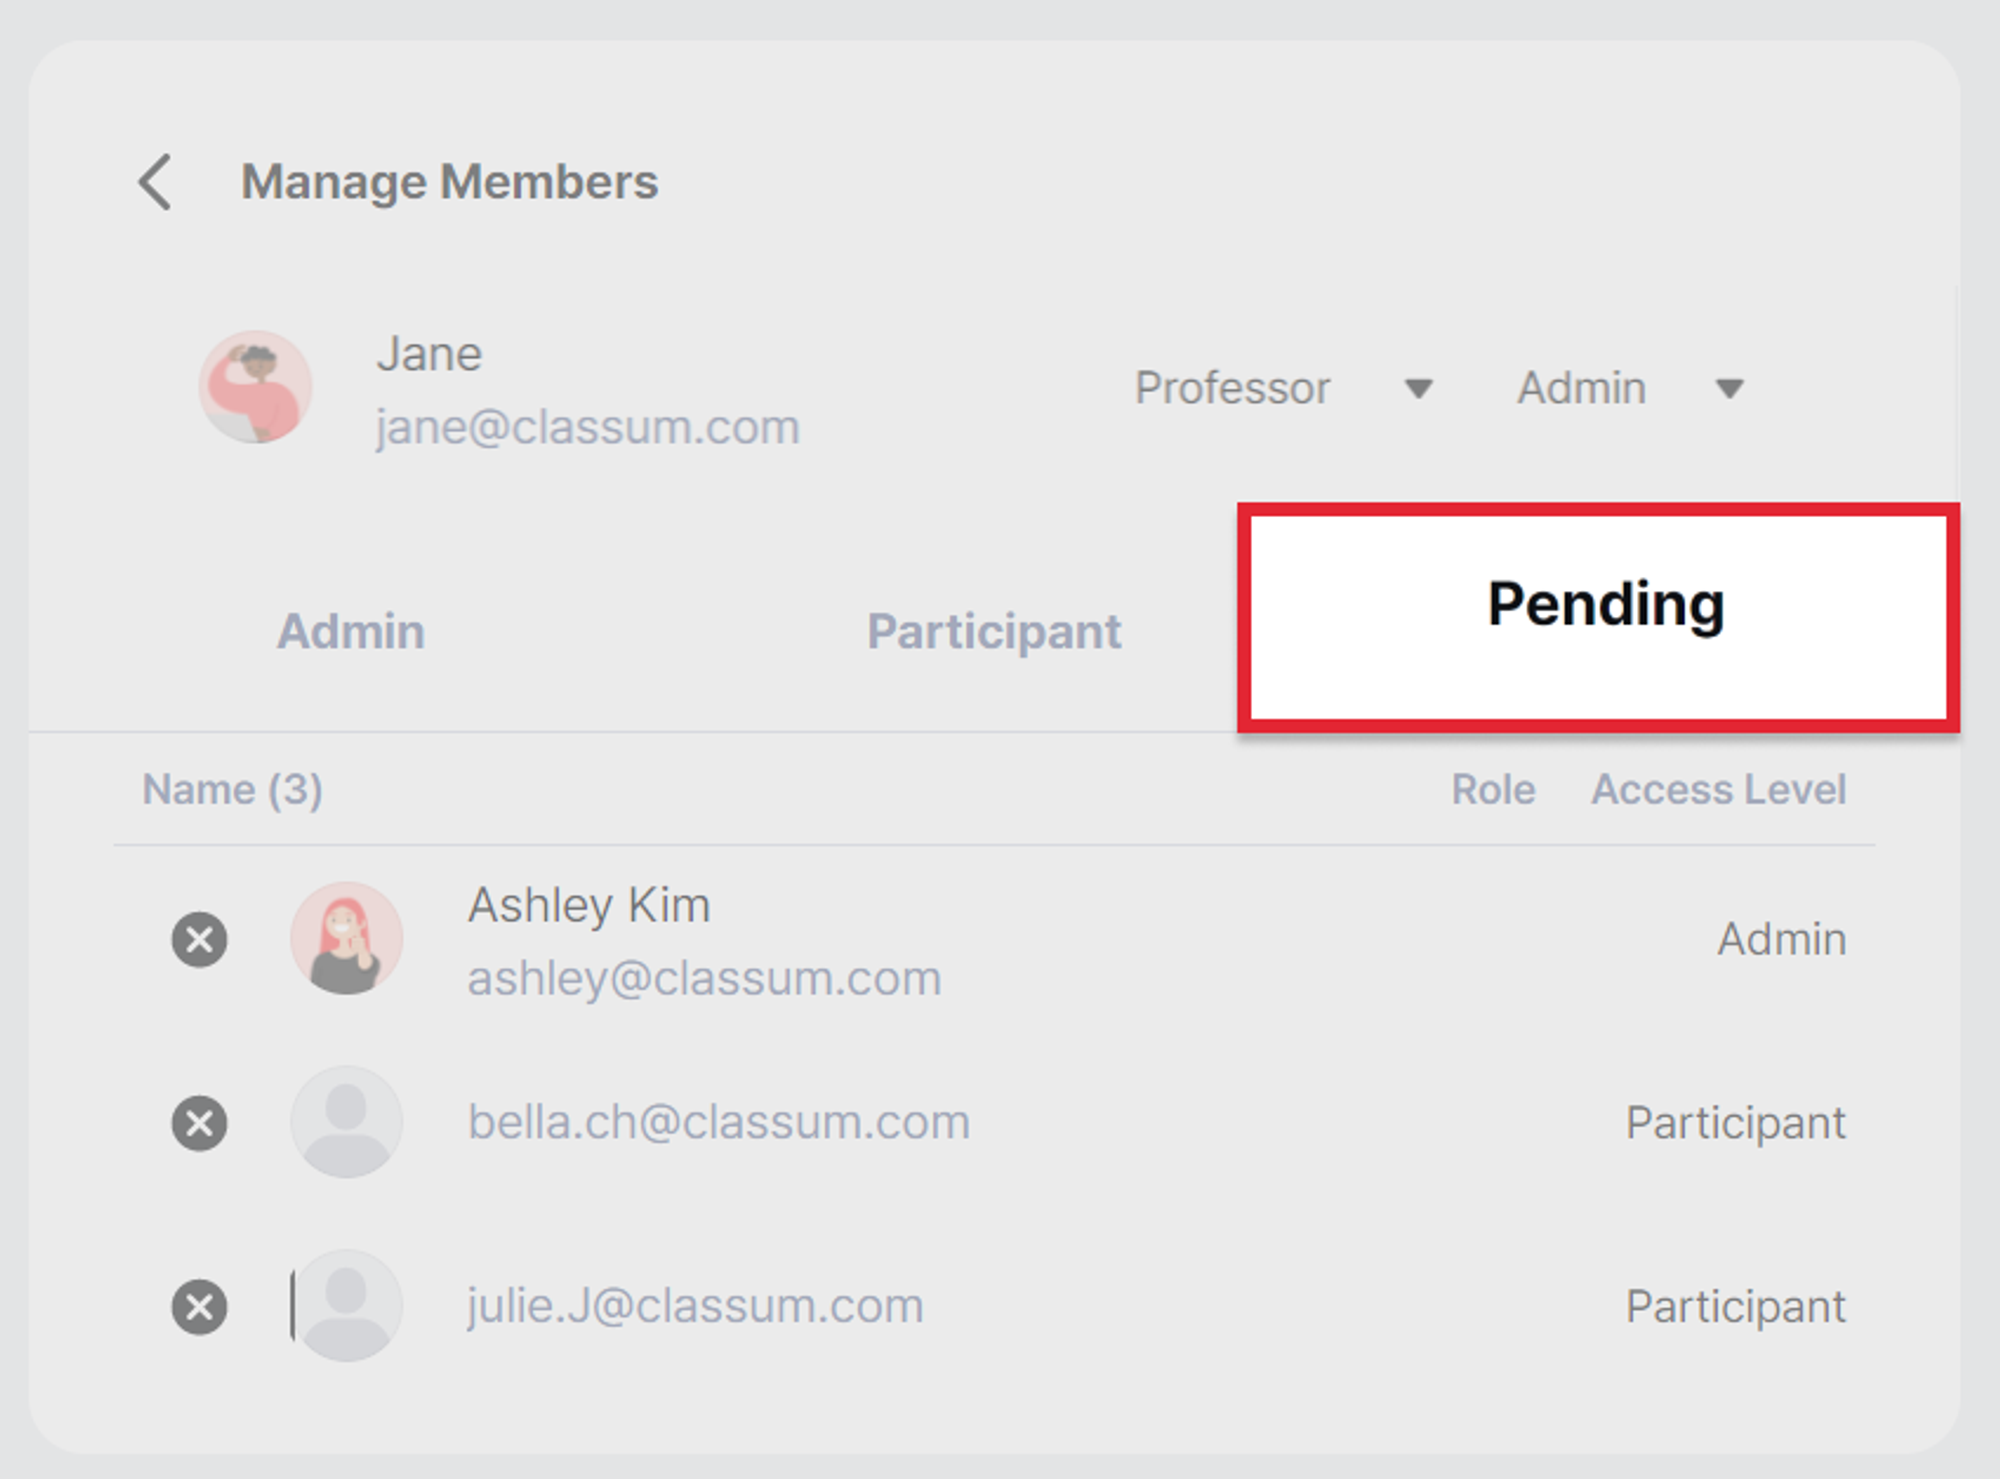
(Picture 3) Pending Invitations
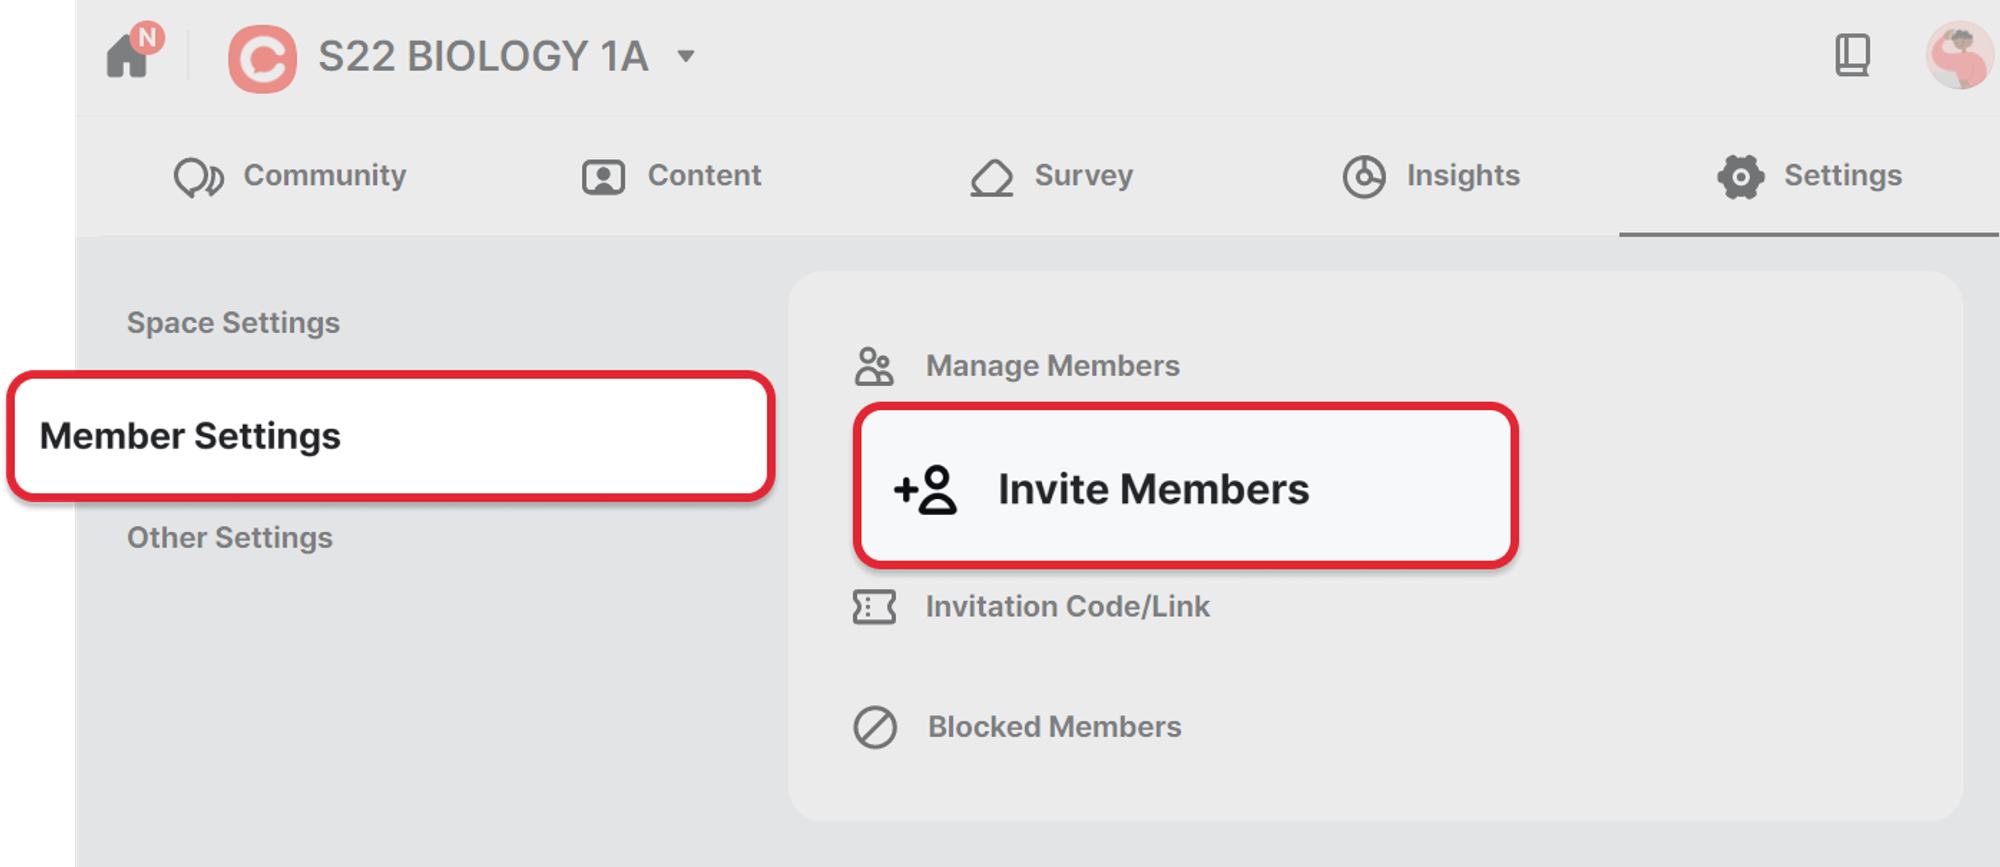
② Invite Members (via Email)
★ Use member emails to send invitations or let them into the space directly.
★ If you ‘copy+paste’ a list of emails from an Excel file, you can add multiple members at once.
⇒ Settings → Invite Members → Fill out email addresses, assign permissions and roles → Invite

③ Invite Members (via Invitation Code/Link)
⇒ Settings → Invitation Code/link → Share Invitation Code to Admins or Participants
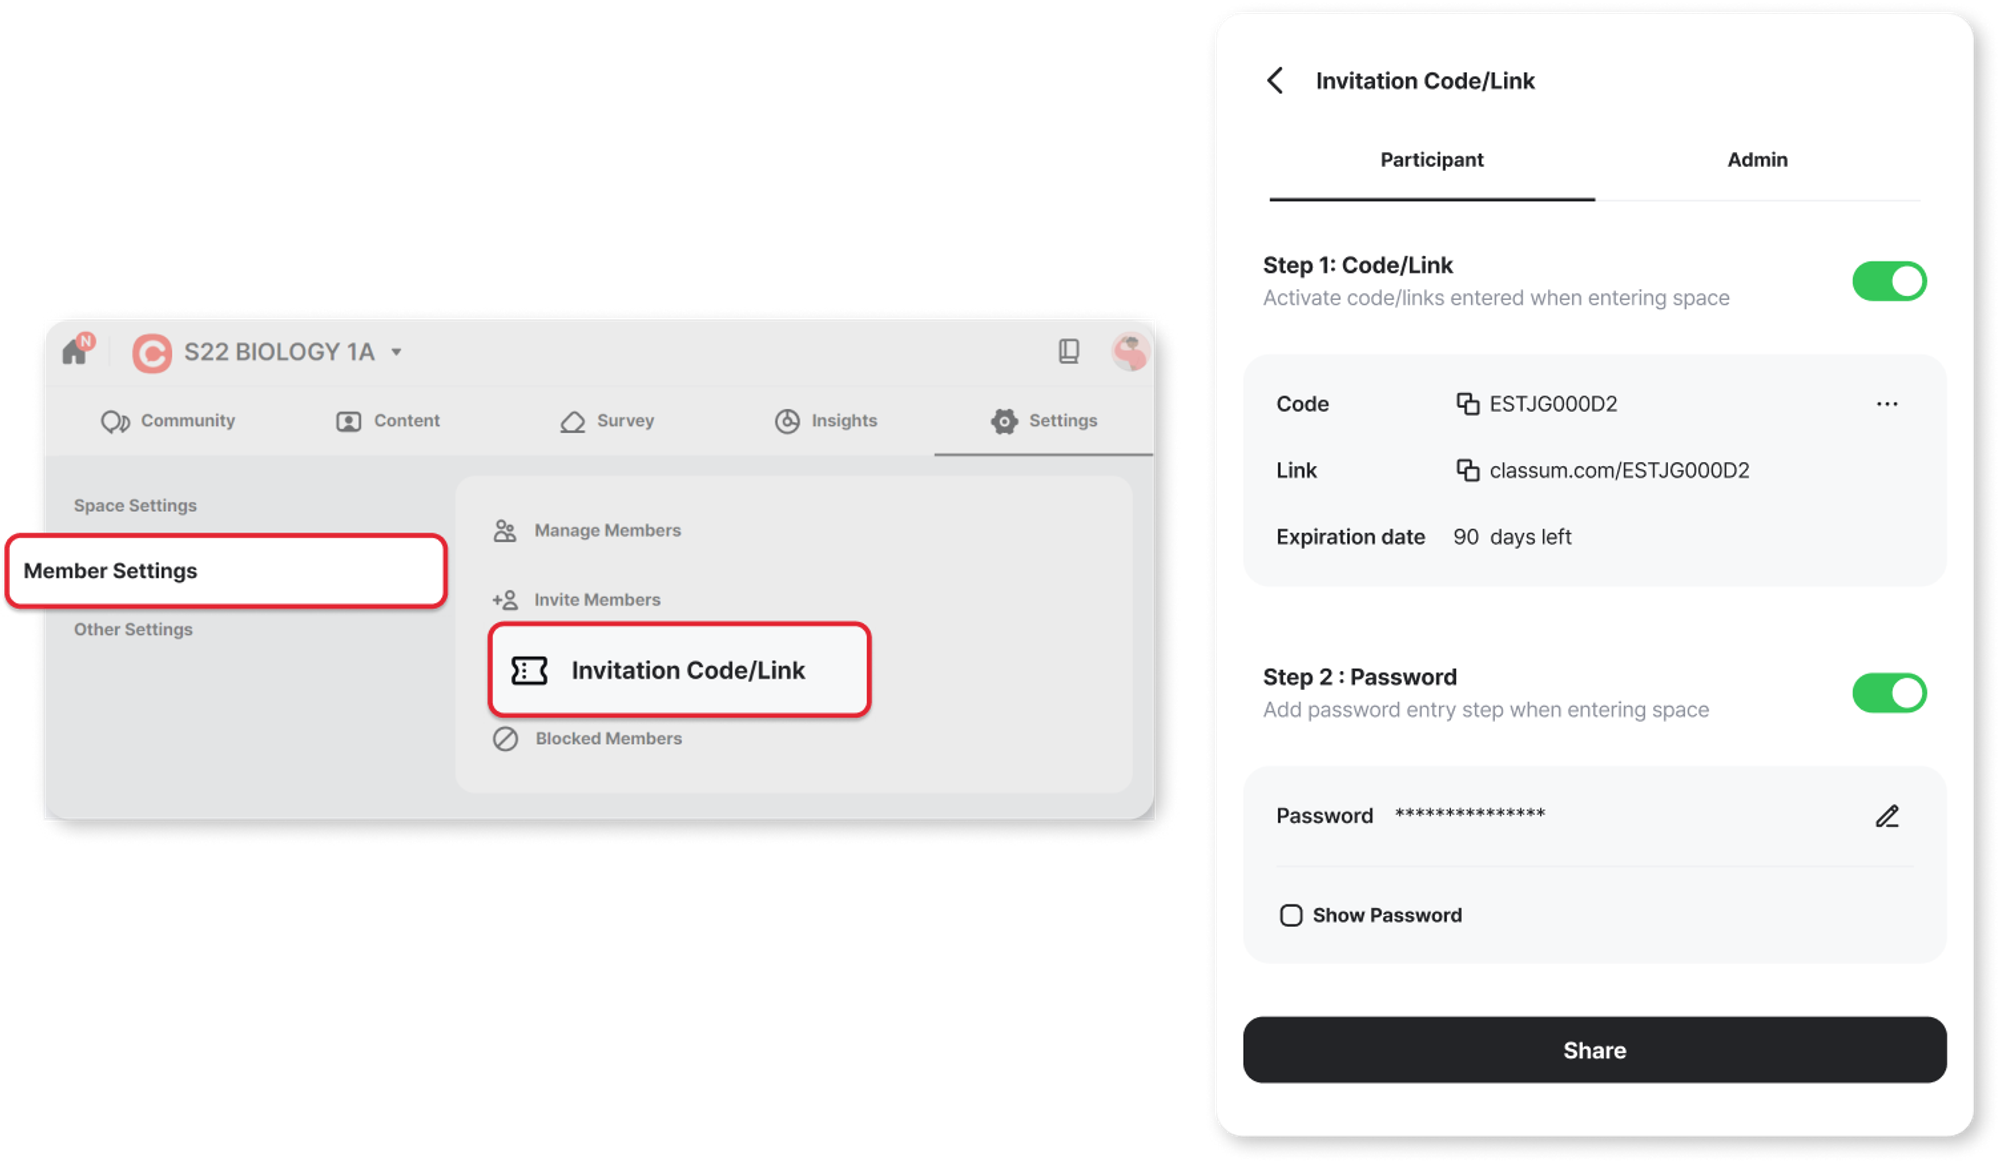
Copy and Paste Admin, Participant Invitation Code/Link
※ Tip : You can get a new Invitation Code/Link whenever you want by clicking on the Reset button. After inviting all your members to the space, reset the invitation code to block unrelated users from entering the space!
④ Blocked Users
•
Settings → Click Blocked Users → You can view the list of blocked users and unblock a member.
•
An unblocked member can rejoin the space.
•
However, they need to first receive an invitation email or a space Link to rejoin the space.
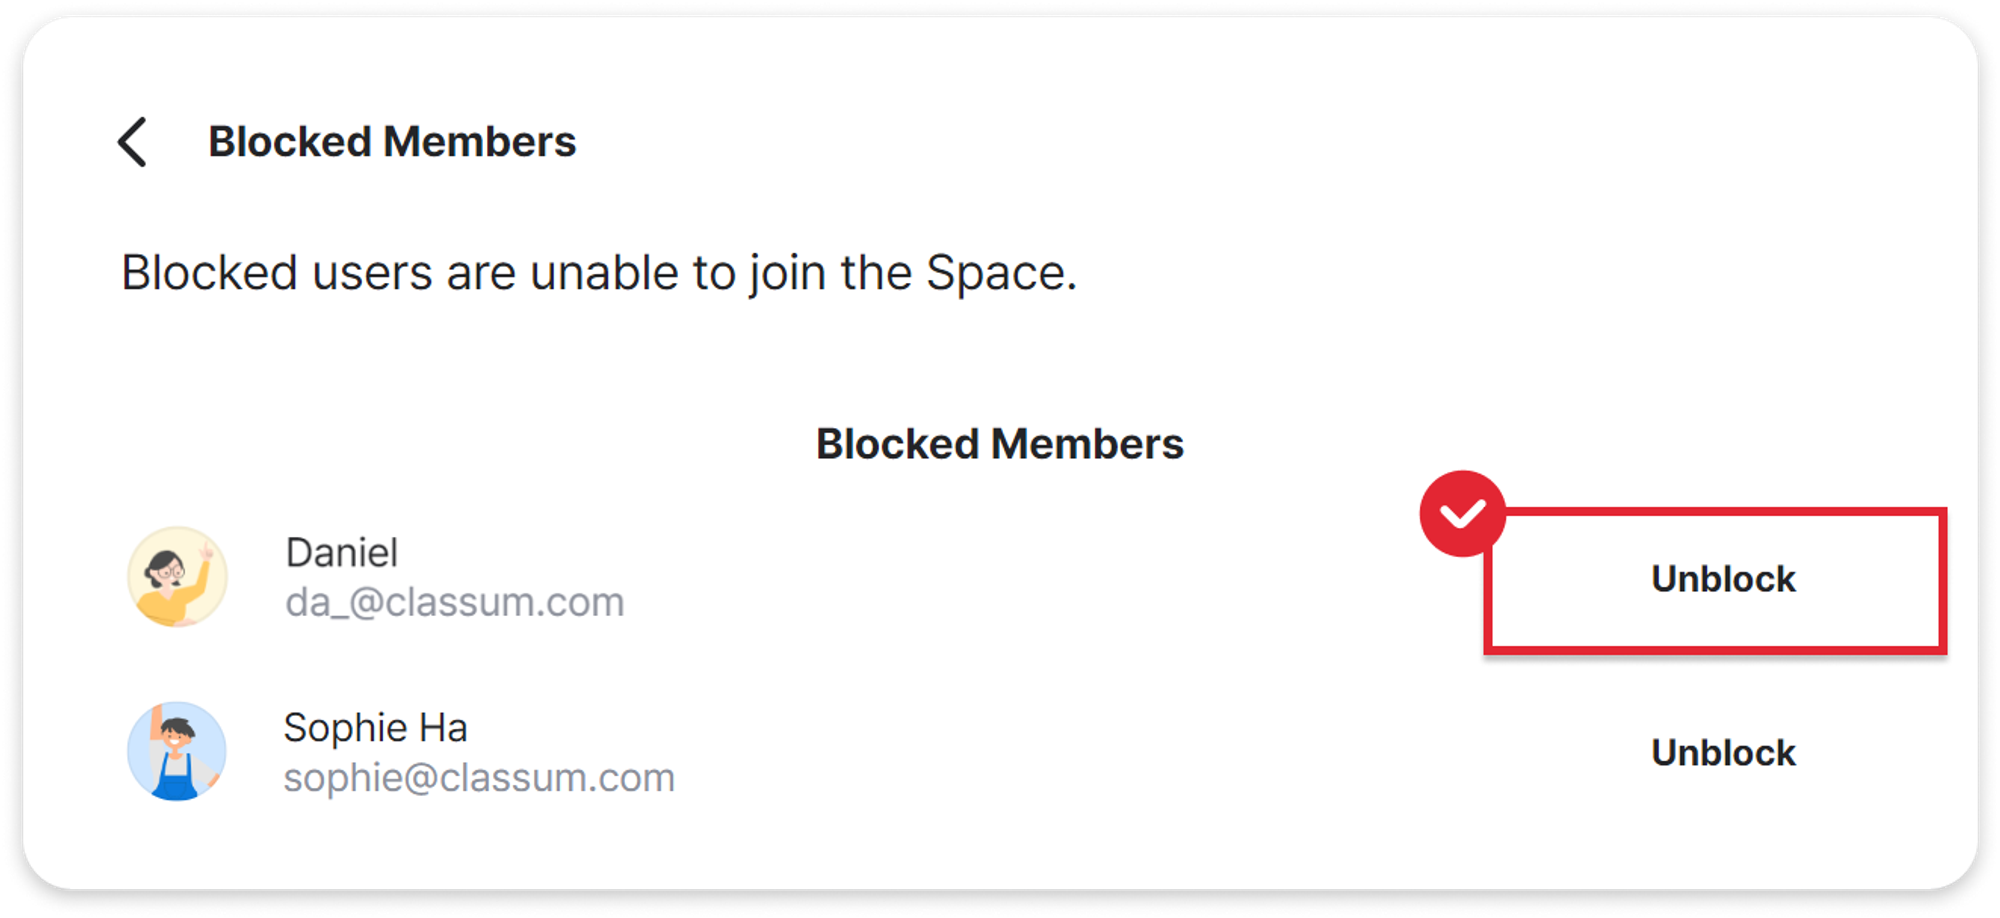
Unblock members
C. Other Settings
Delete & Leave Spaces
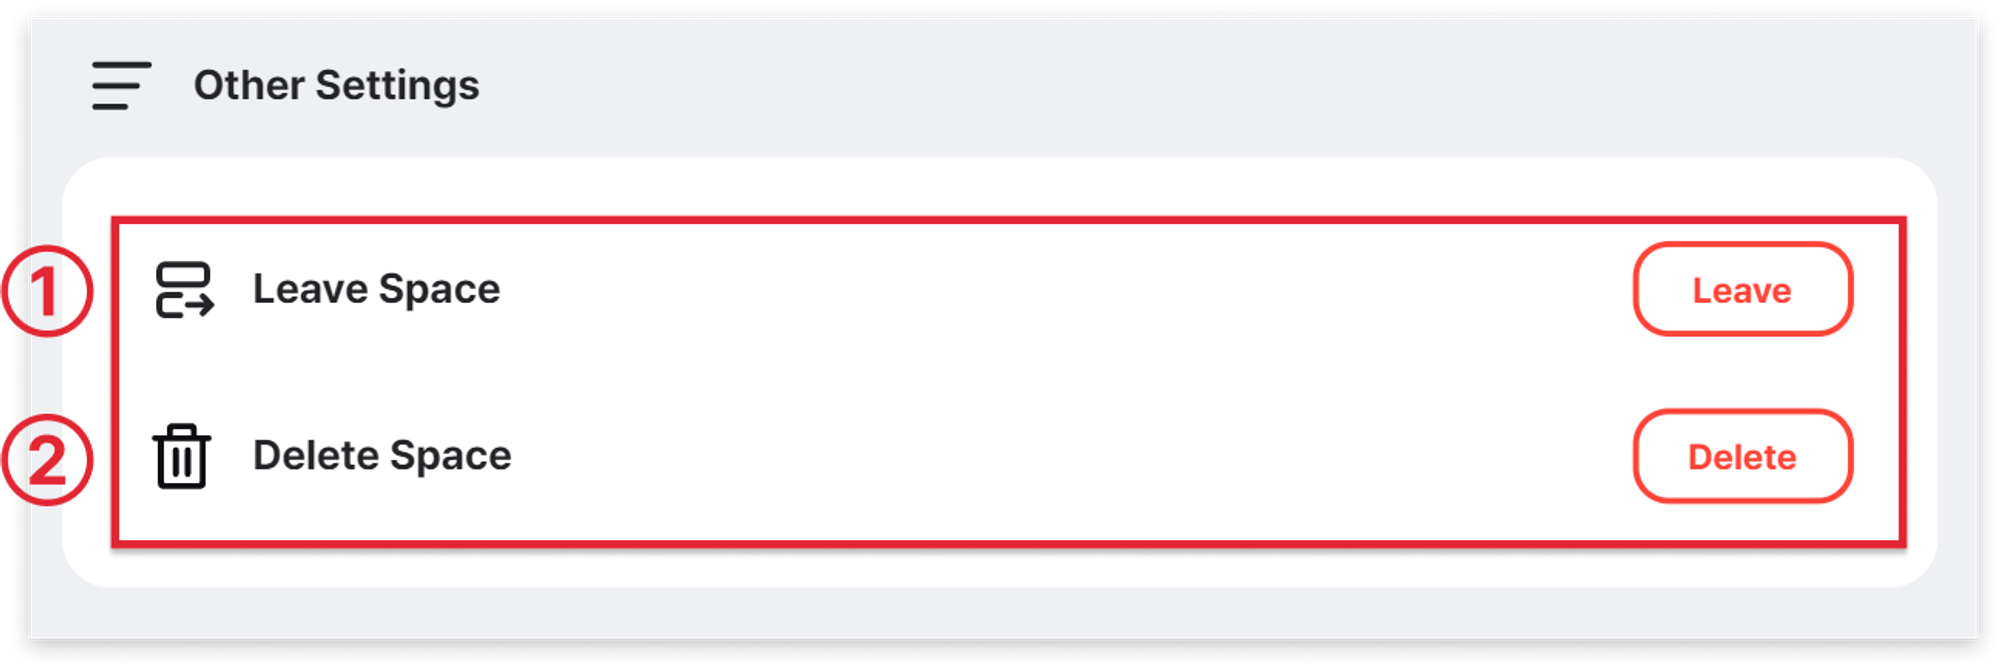
Delete & Leave Spaces
① Settings → Select Leave Space. Click Leave to leave the Space.
※ If you leave a space, all of your viewing progress of video content will be deleted. However, your posts and comments will remain. If you don’t want any of your content to remain, you need to delete it yourself before leaving the space.
※ If you are the space admin, there needs to be another admin in order for you to leave the space.
※ You can rejoin by receiving the space code or an invitation from the admin.
② Settings → Select Delete Space.Click Delete to delete the space.
※ Warning! Deleting a space is irreversible, and all of the related data is deleted as well.
※ Here’s a list of the data that becomes unrecoverable once you delete a space. If you are to delete a Space, we recommend that you save important information and data in advance.
List of Unrecoverable Data
Space posts and replies, attachments in posts and replies, edit history on posts and replies, Space info, Space statistics, Members List (incl. block and edit history), Tags, Notification, Role and authorization, Space descriptions
Please consult directly with our CLASSUM expert. We'll do our best to resolve your issue.
Speak to our CLASSUM expert via 1-on-1 support