

Gather UI Tour
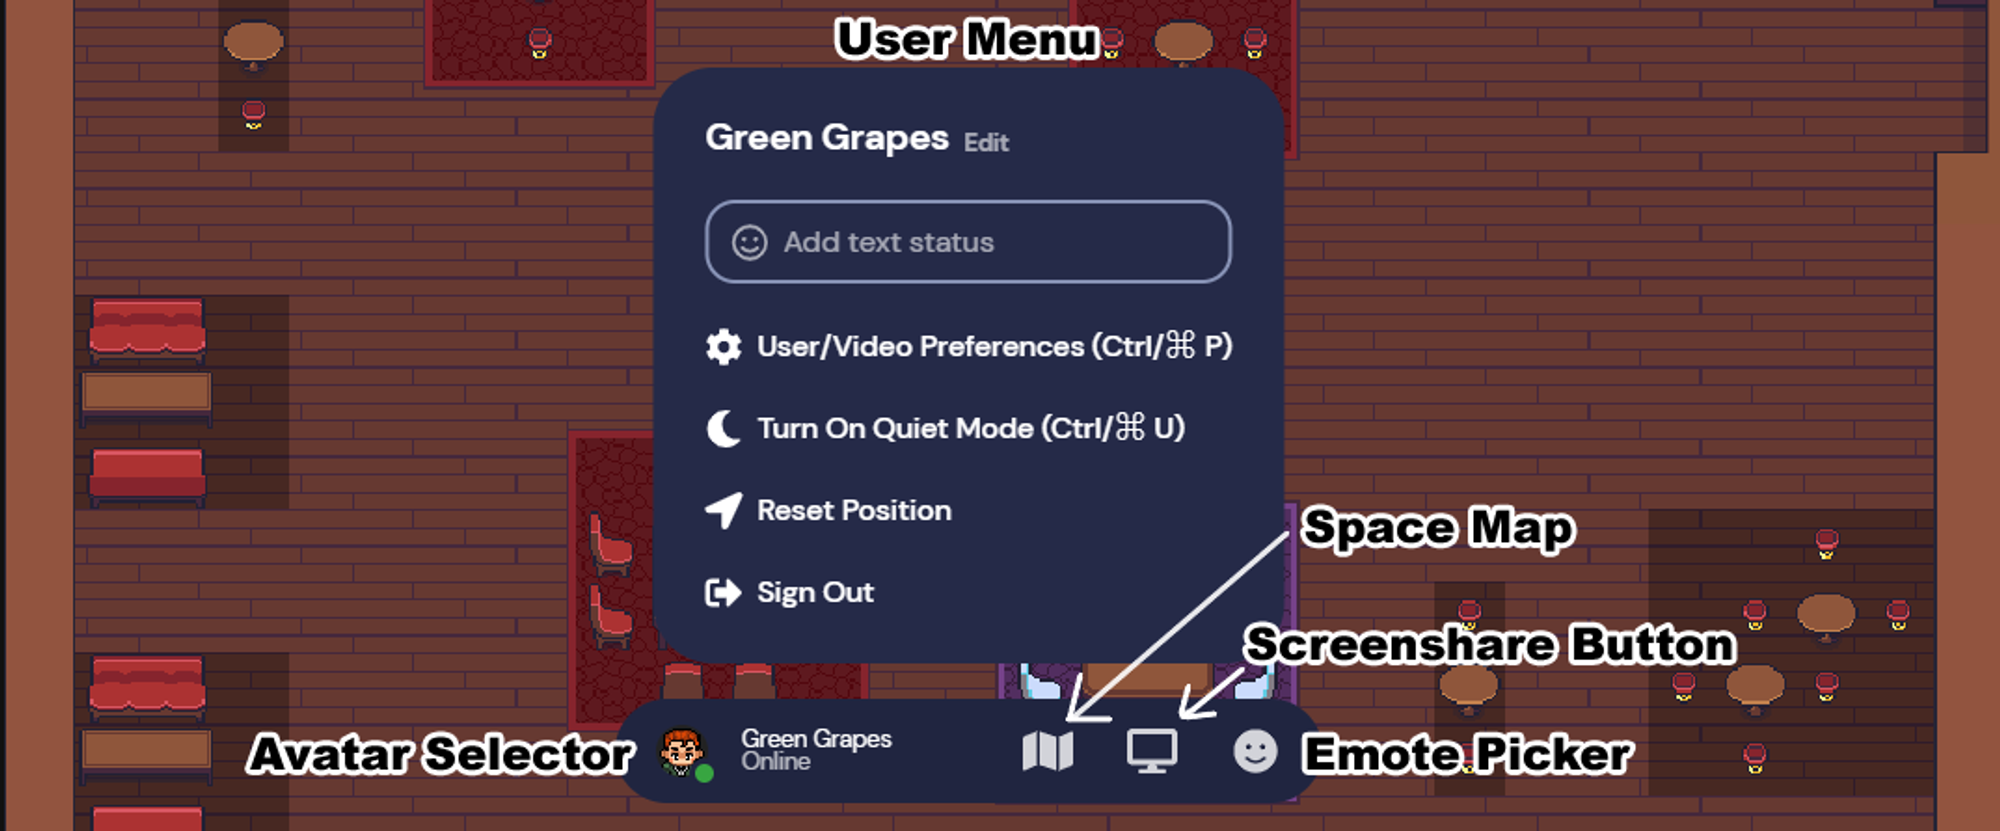
Below, find an exploded view of the Gather UI and its labeled parts.

•
Gather Icon - Where many support-related links can be found.
•
Grid Mode - Where the videos of other participants are placed in a grid rather than in a carousel at the top of your screen. (Note: Grid mode only supports 9 videos at a time. If you are in conversation with more than 9 people, you will need to click the arrows to see the next page of videos).
•
Settings - Where you can change various options.
•
Builder Mode - Where you can add or remove objects from the map (if you have the appropriate permissions).
•
Chat or Message Panel - Where you can see messages sent or received from other participants.
•
Participants List - Where you can see the list of online participants as well as their status messages. If you are in a remote office, the Participants list will be split into Members, Guests, and Offline Members. A member is a user logged into the Space with their Gather account who has been set as a moderator, builder, or owner in that Space.
Setting or Changing your Name and Character Style
First Time in Gather
1.
When you first visit a Gather Space, you get to choose your avatar, the digital character that represents you in the Space.
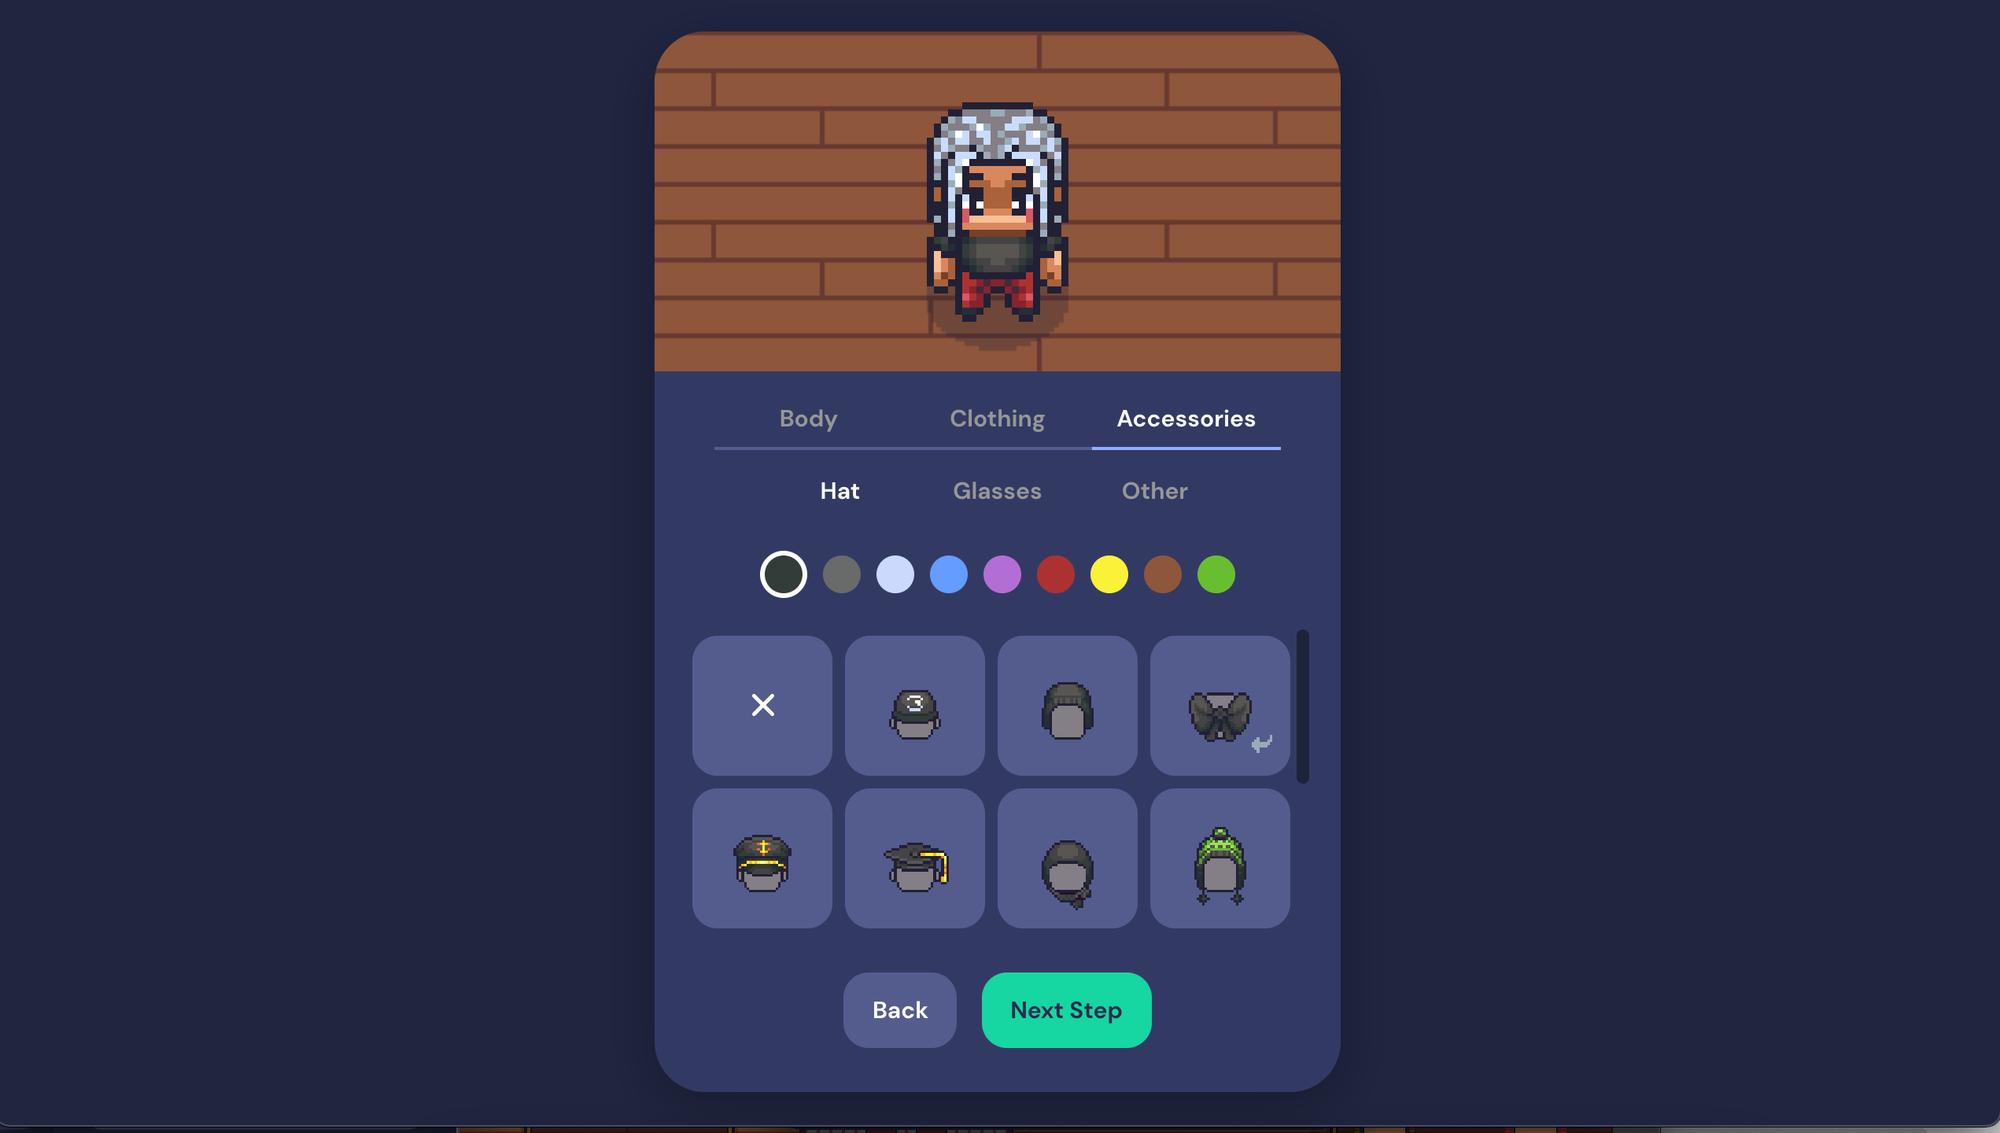
The first step when you enter a Gather Space is choosing your avatar. Select options for your body, clothing, and accessories to create the perfect digital character that represents you!
2.
When you've picked the perfects details for your body, clothing, and accessories, click Next Step. Enter a name for your character.
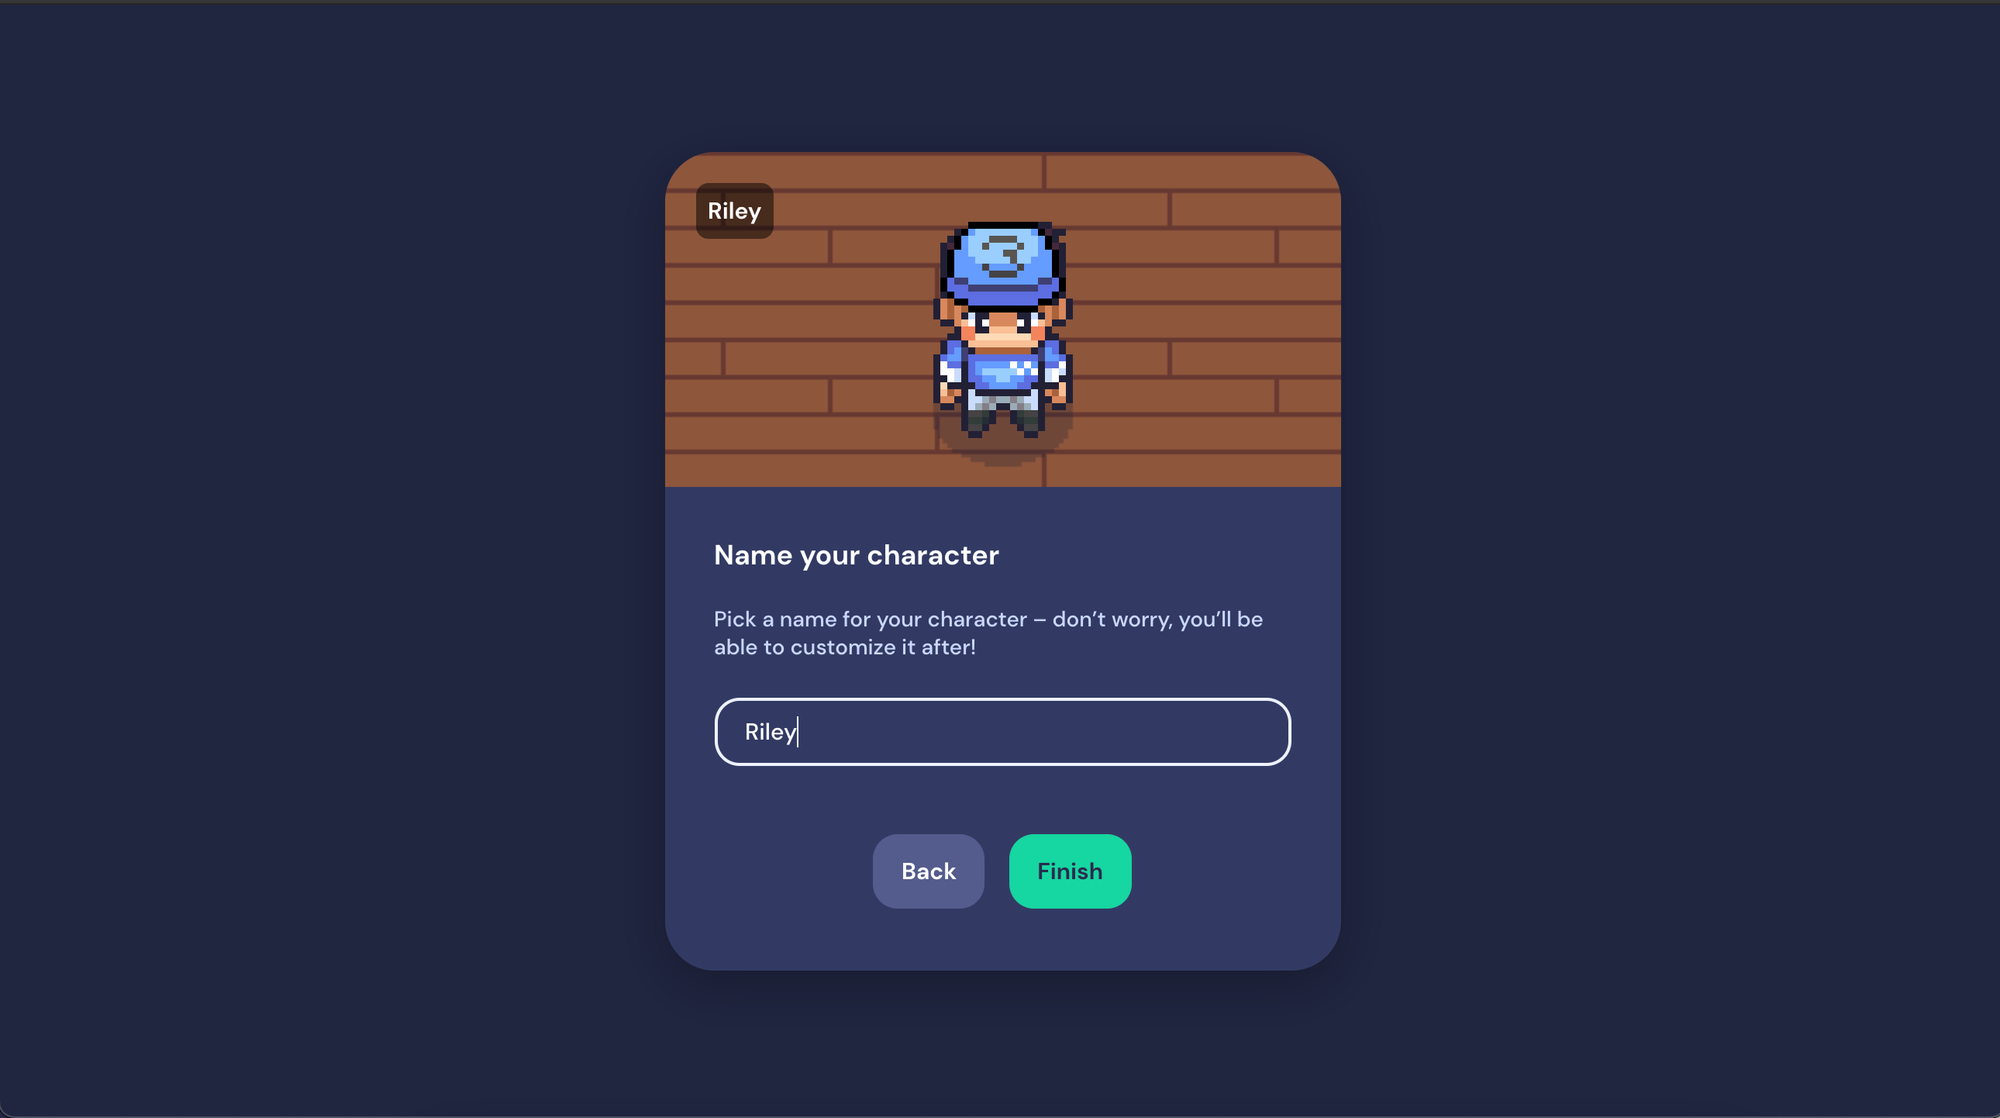
Enter a name for your character, then click Finish.

Note: The character you design and name you enter is tied to the Space. This means you can have a different default name for every Space that you enter. You can always change your name and character at any time, for any Space.
3.
When you're satisfied with your character and name, click Finish. The Check Your Hair screen (as we call it) displays with a preview of your character and a preview of your video feed, with the input/output options for your camera, mic, and speakers. When you're ready to continue, click Join the Gathering.
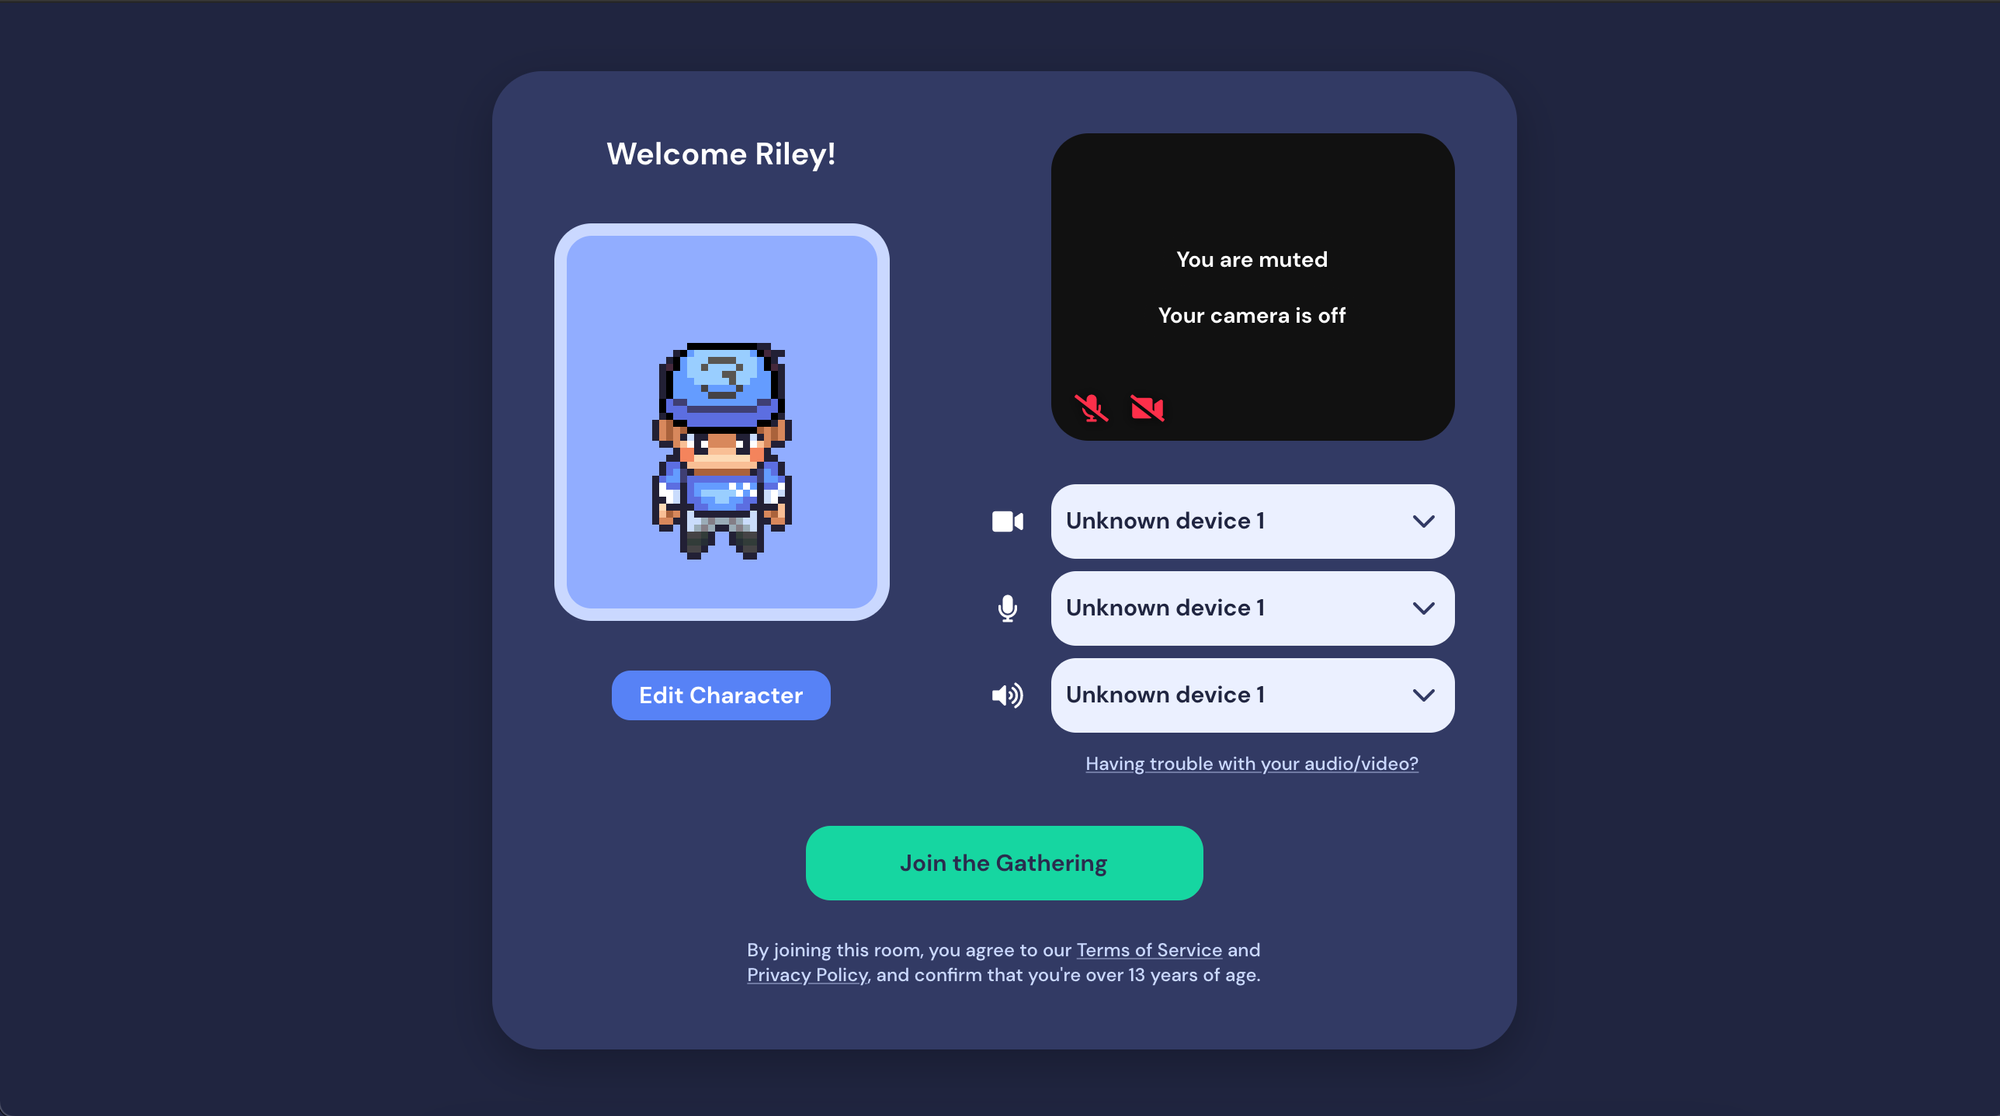
The "Check Your Hair" screen shows a preview of your character and name, as well as a preview of your video feed. Here you select your camera, mic, and speaker options. When you're ready, click Join the Gathering.
Edit Character & Name
1.
When you return to Gather or visit other Gather Spaces, you can always change your name by clicking Edit Character on the Check Your Hair screen, which will take you to the character picker.
You can also change your name and character when you're in the Space. In the Bottom Command Bar, click on your character to open the character picker and change your avatar.

To change your name or status, click your name in the Bottom Action Bar. The Bottom Action Menu opens.
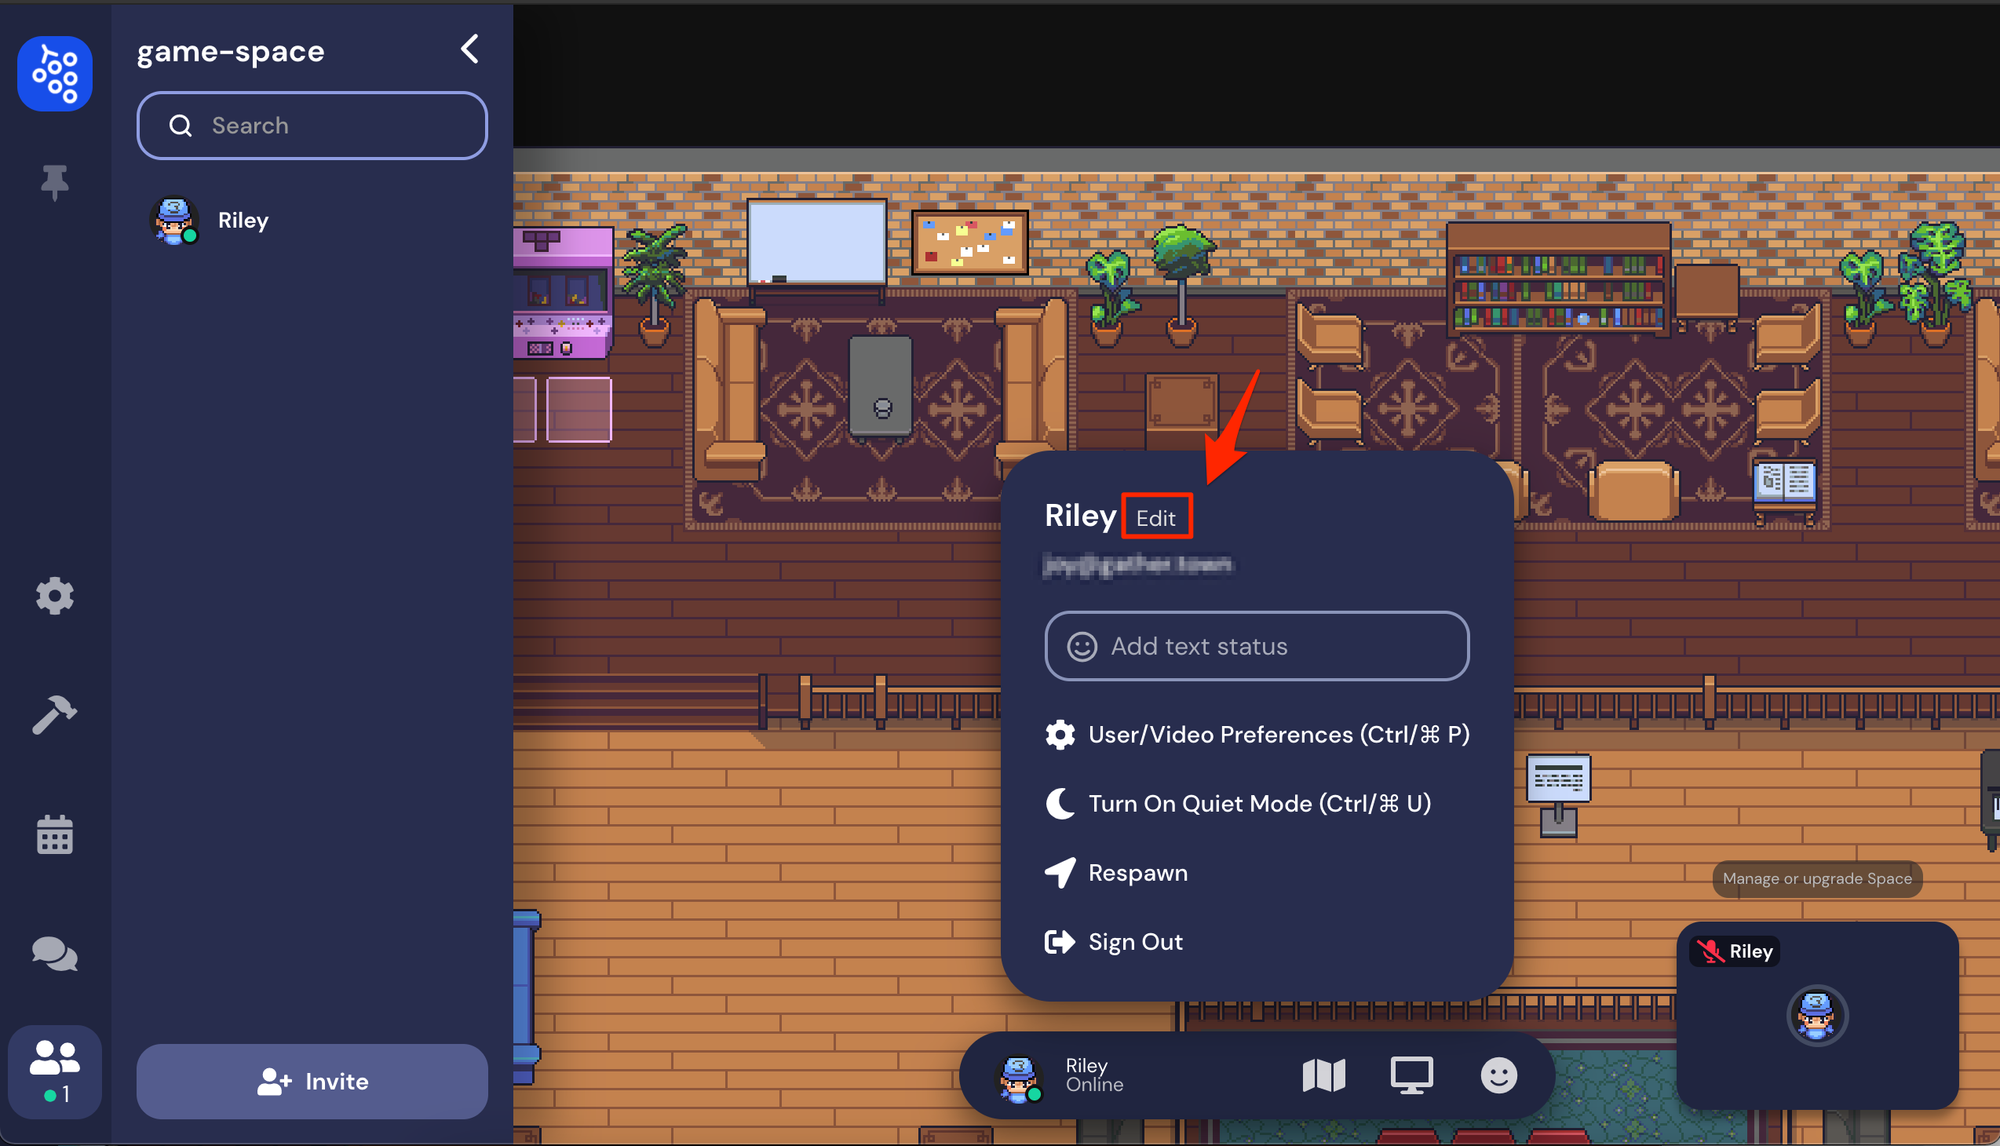
From the Bottom Command Bar, click your name. To update your name, click Edit.
2.
Click Edit to change your name. You can also return to the character picker by clicking Customize. If you're satisfied with your name and character, click Finish. Your changes are saved.
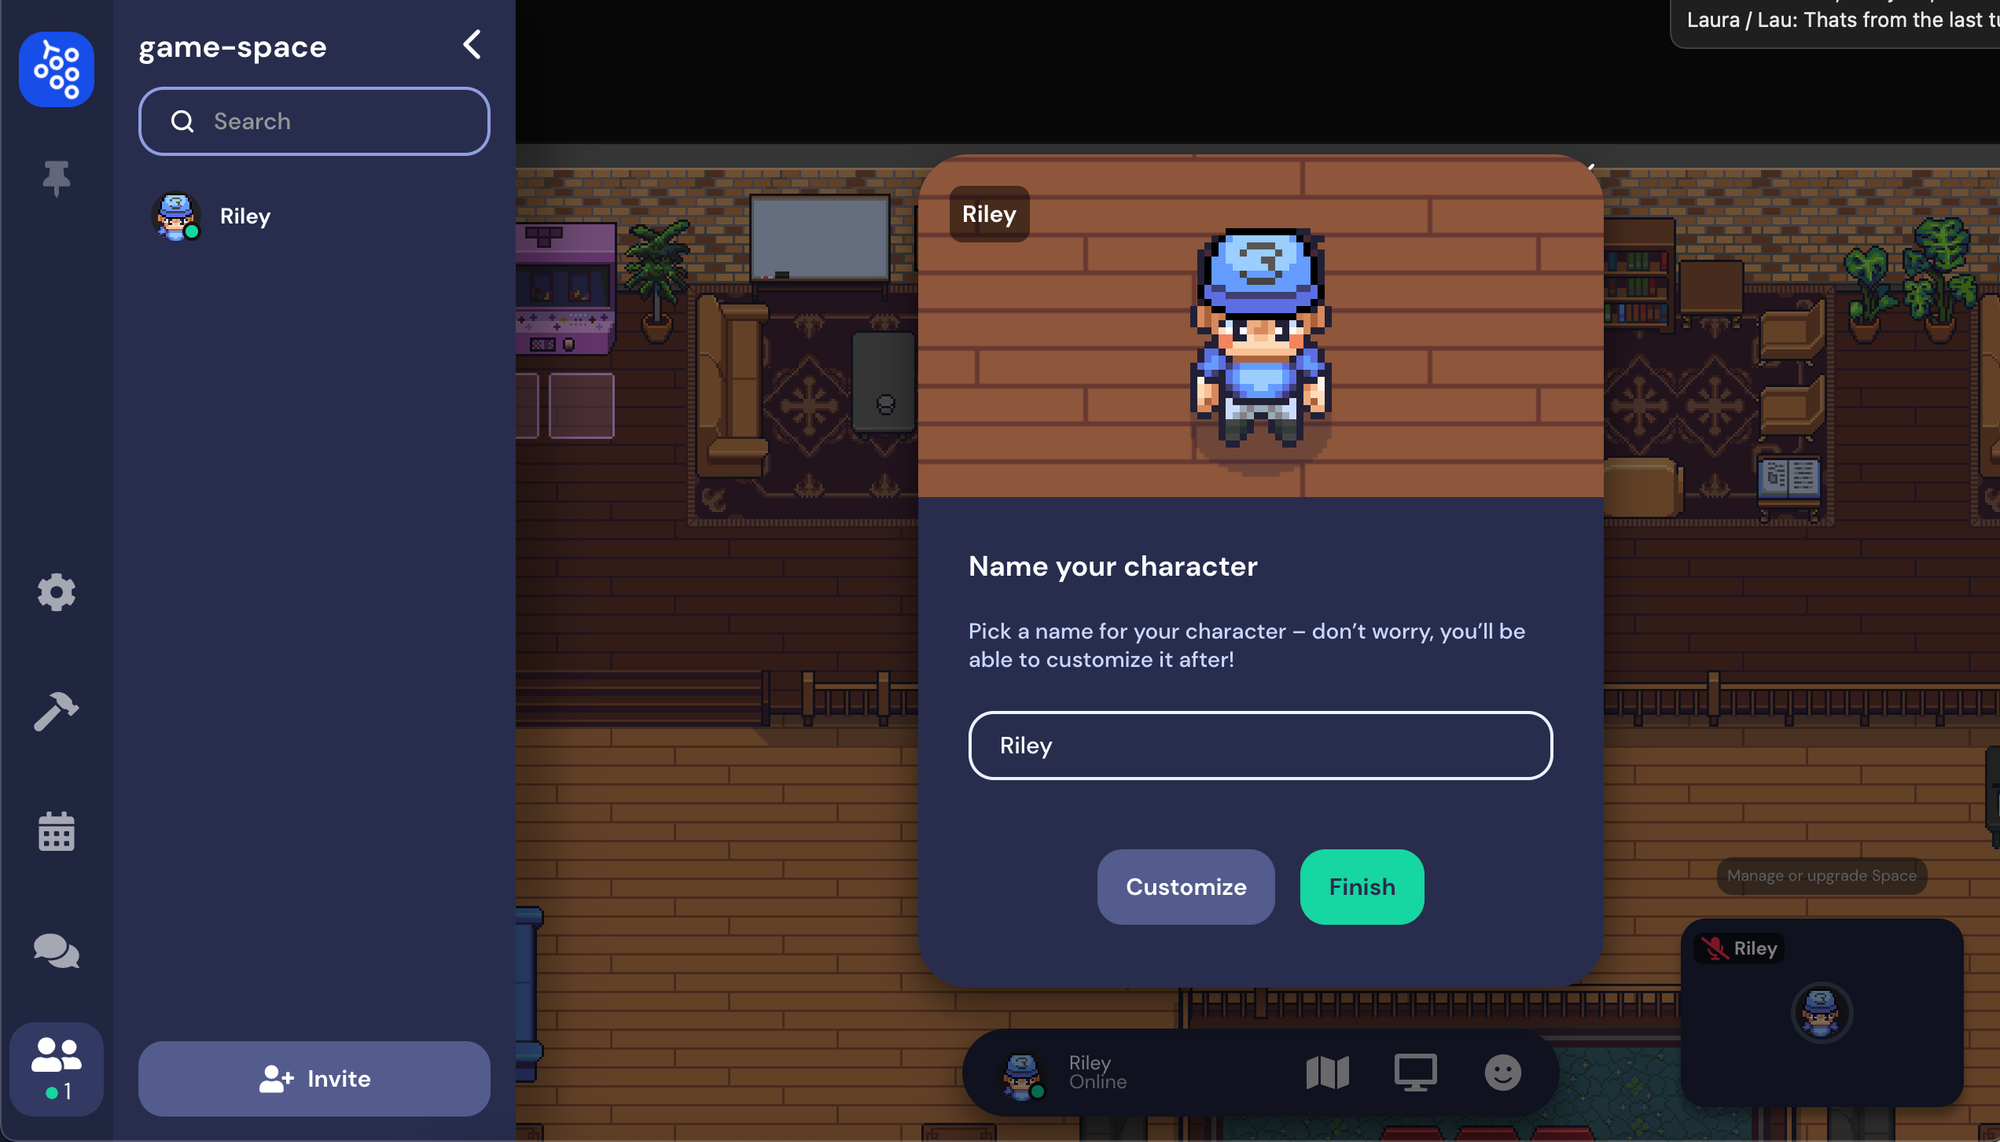
Edit your name. If you want to modify your character, click Customize. When satisfied, click Finish. Your changes are saved.
Video and Audio Settings Introduction
Gather Settings
1.
Every time you enter a Gather space, you will be asked to select your input devices (microphone and camera). There is a microphone pick up volume indicator, so users can test the sensitivity of their mic before entering the Gather space.
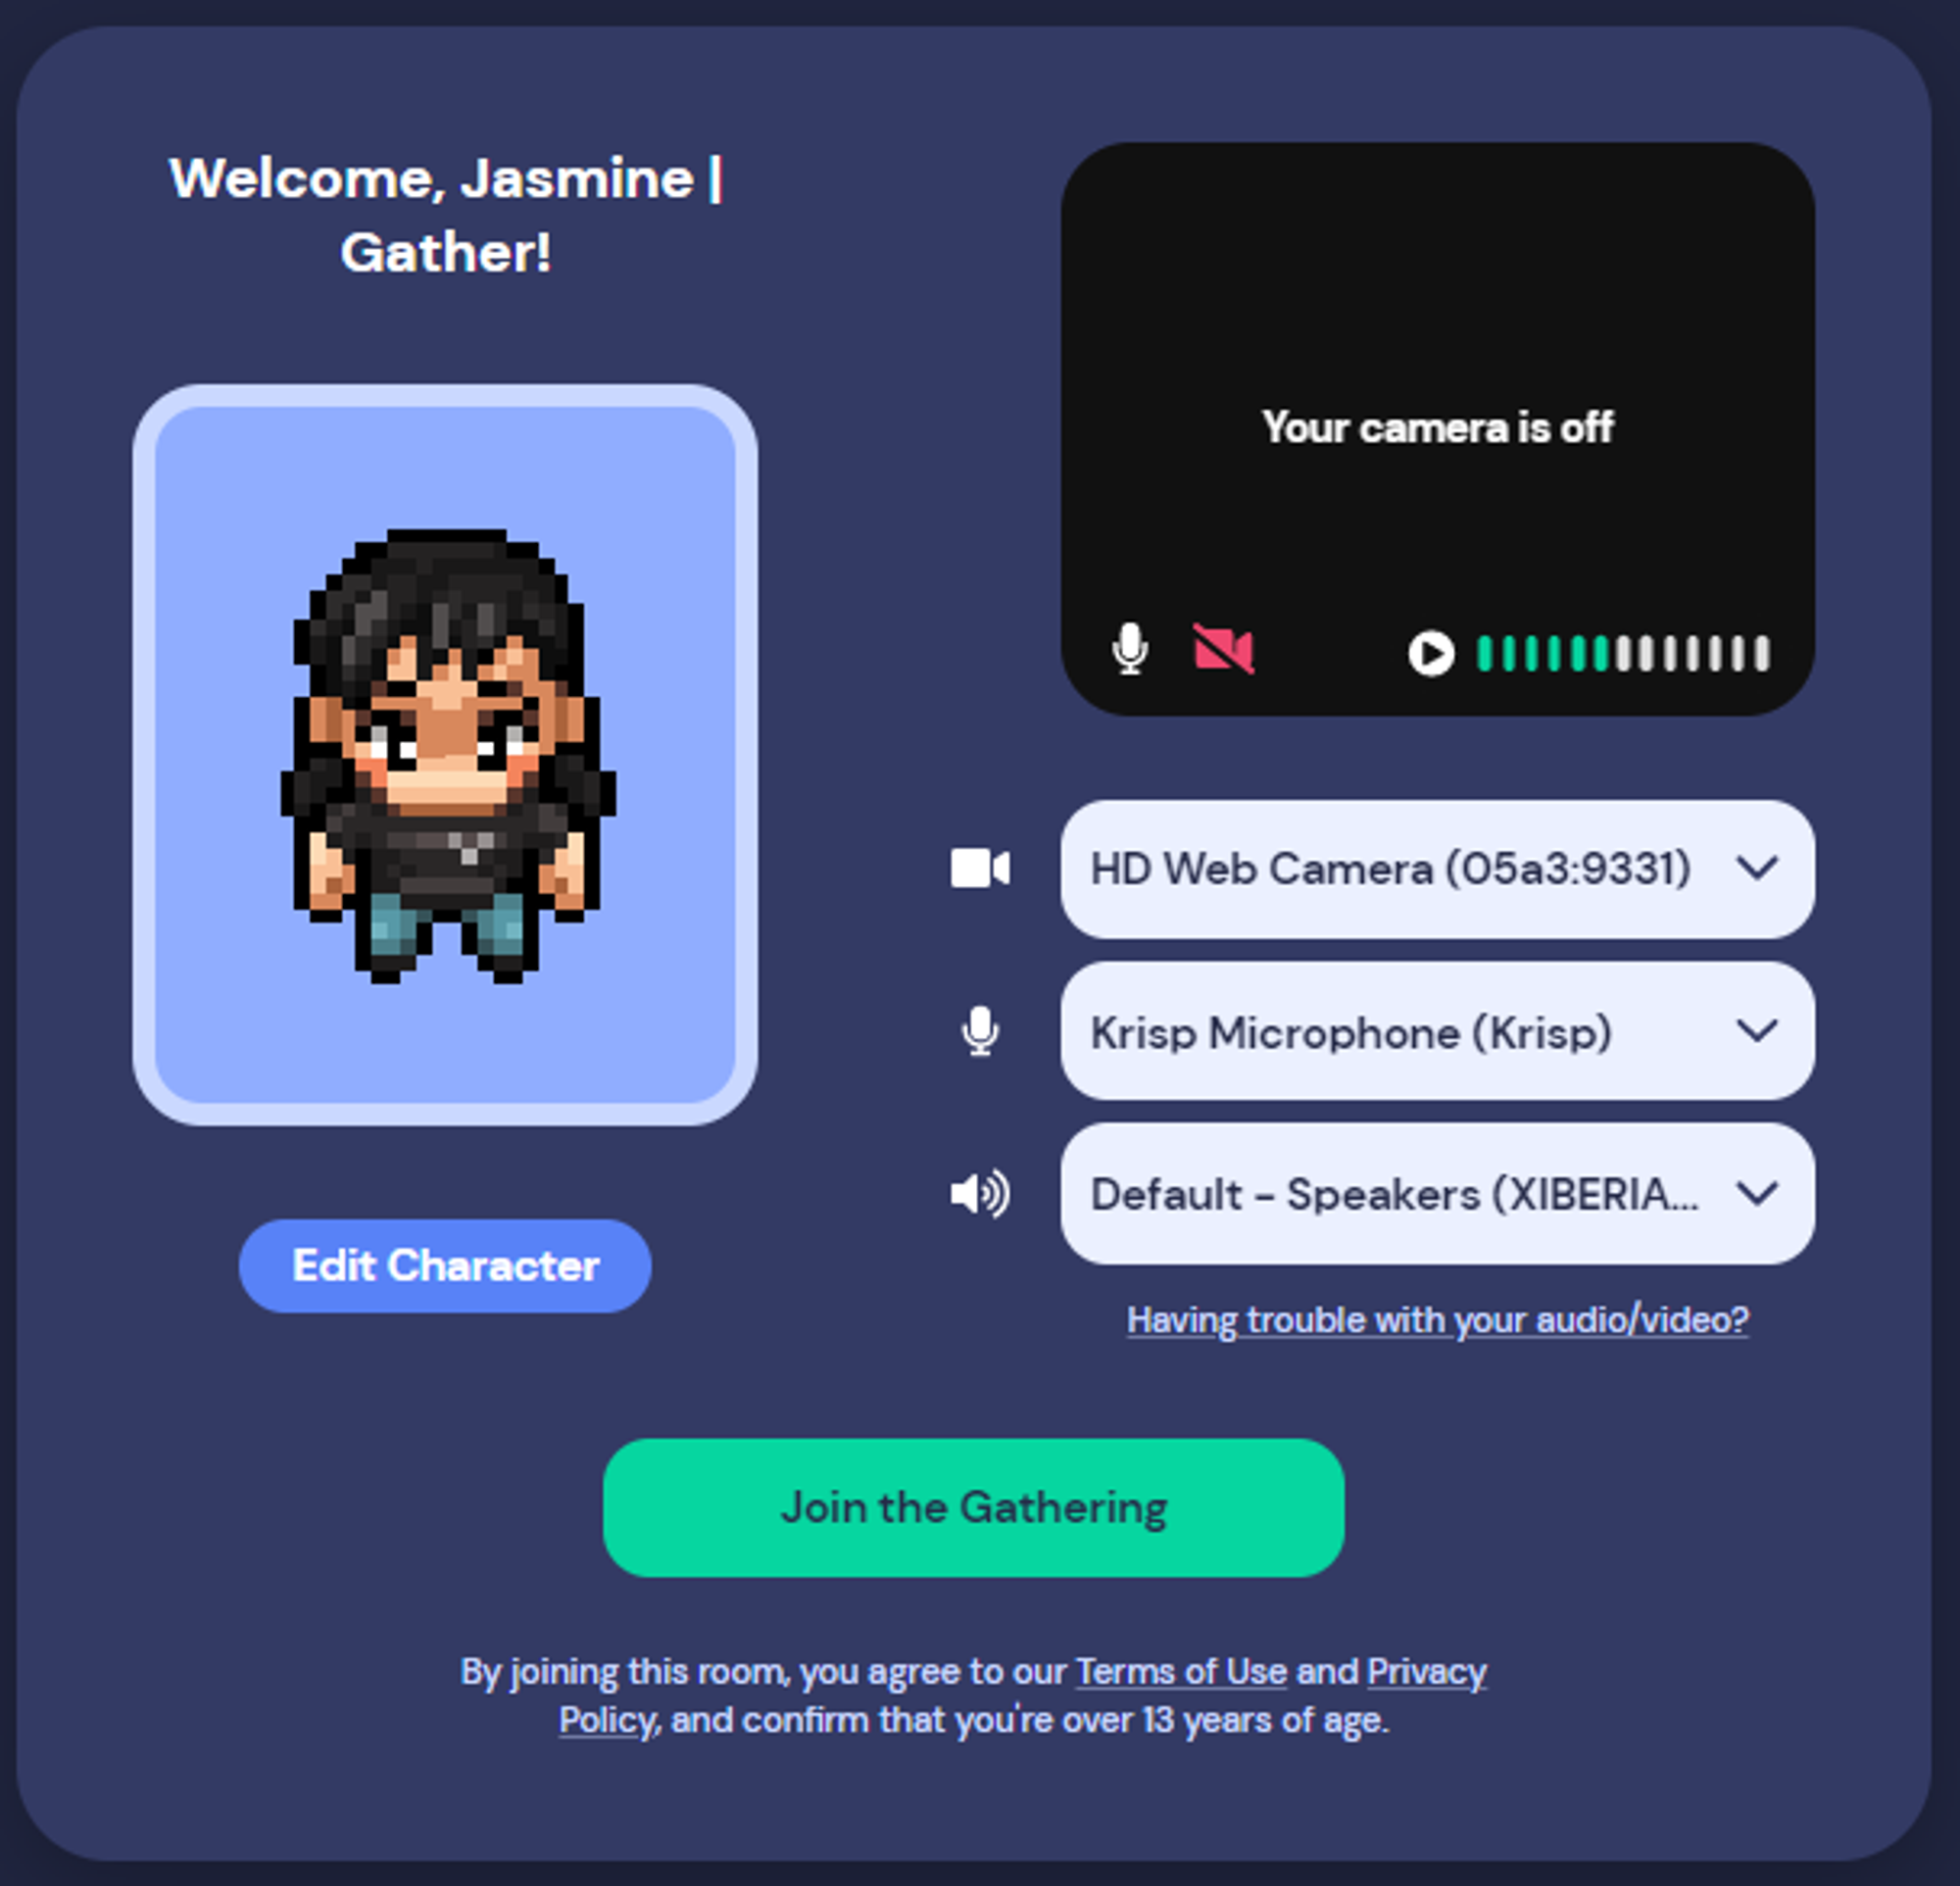
A screenshot of the input selection window that appears when you enter a gather space. The camera is set to 'HD Web Camera' in the example, and the microphone is set to (Krisp Microphone). Your hardware settings will be different. There is a 'Join the Gathering!' button at the bottom of the window.
2.
To change settings inside Gather, click on the cog on the left side bar to open your Space settings. In the upper left corner of that window, click 'User' to see user settings.
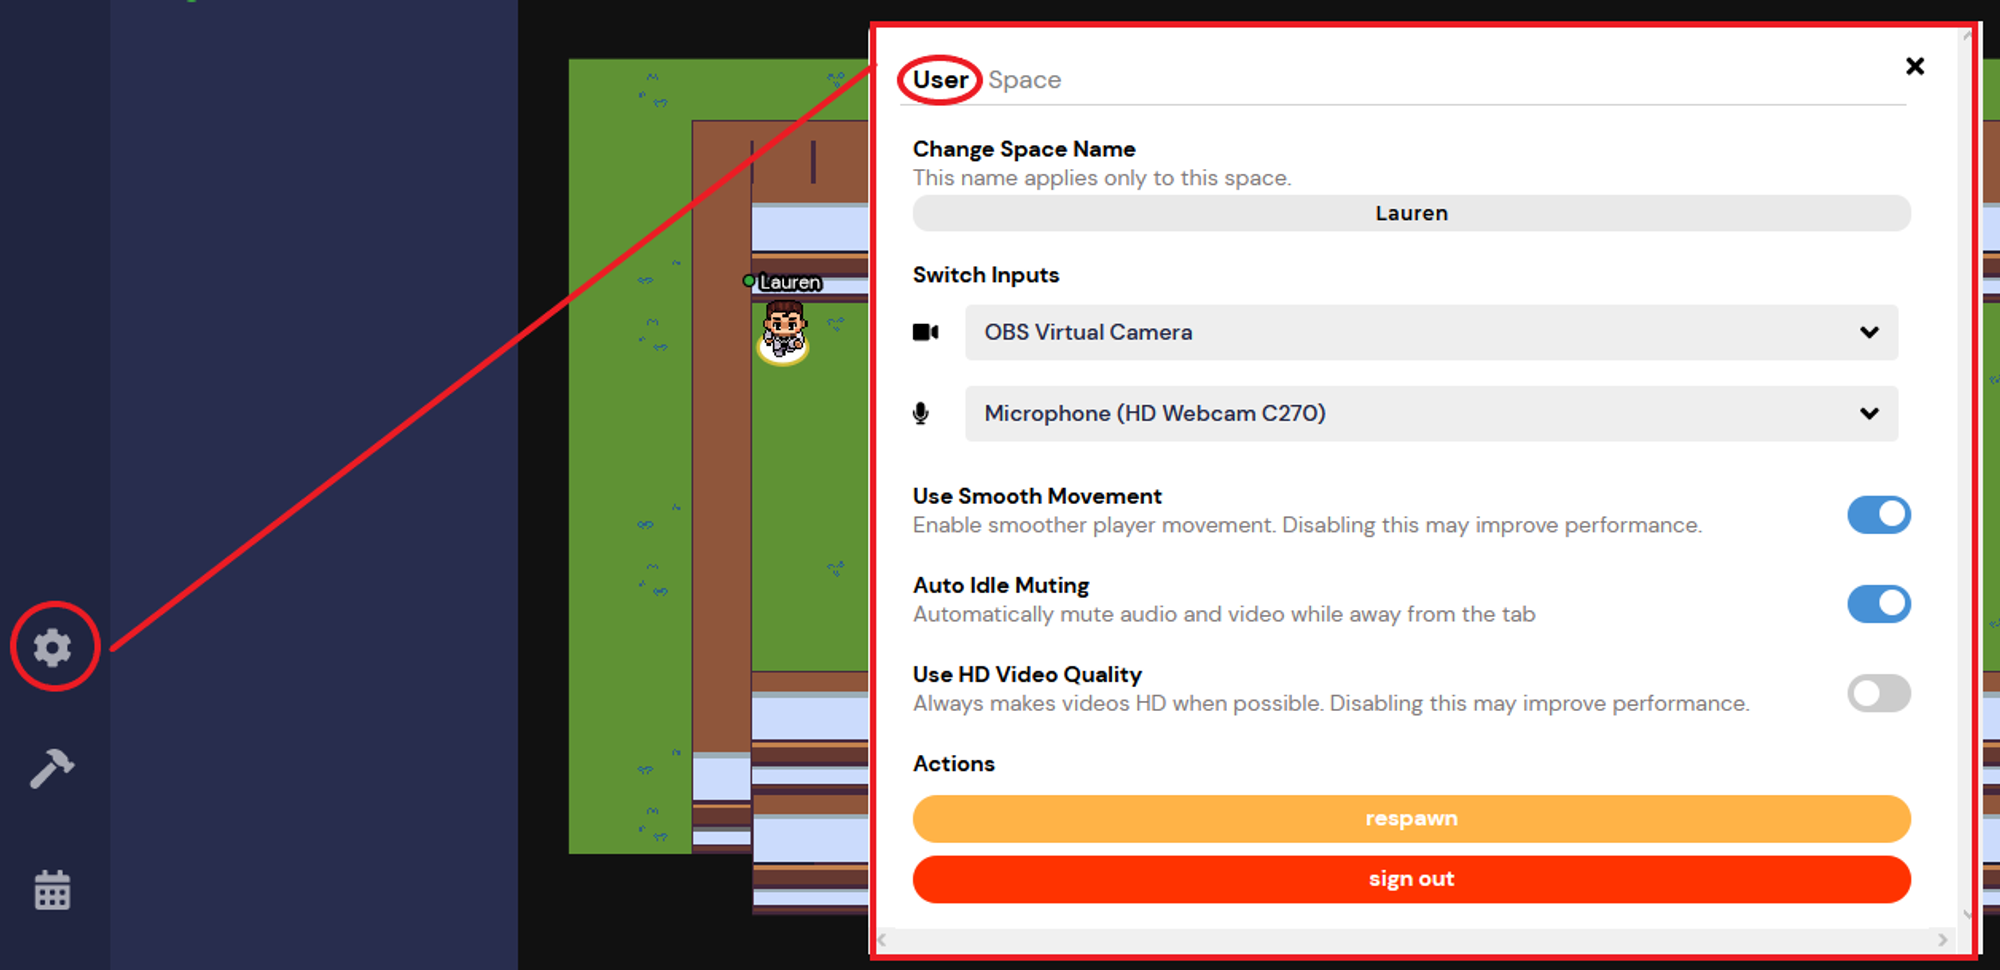
A screenshot of the options window, which you can open by clicking the gear icon, which is the first / top most option in the left side menu bar. In the window, there are two tabs for User and Space. User is selected, and the information below relates to the what is in the User options.

You can now test your microphone Audio Level and play it back to yourself in the user settings.
Several fields are relevant here:
Switch Inputs
This allows you to select which webcam and microphone to use for audio and video.
If you do not see your camera and microphone in the drop down menu, you may need to change your browser settings and permissions.
Smooth Movement
This is a feature that allows your avatar (and background) to transition smoothly from tile to tile as you move through your Spaces. With this turned off, your character and map will jump from tile to tile as you move through space.
As smooth movement may put additional strain on your machine and impact performance, we have offered the option to turn this off.
Auto Idle Muting
Auto idle muting will trigger whenever you are tabbed away and not connected to others. This means that in an office environment, if you're sitting in a desk next to your auto-muted coworker, tabbing away will also turn off your camera to maximize your privacy. When you return to your Gather browser tab, you will automatically be unmuted and your camera will turn back on.
The first time you tab away from your Gather tab, you will see this message when you return:
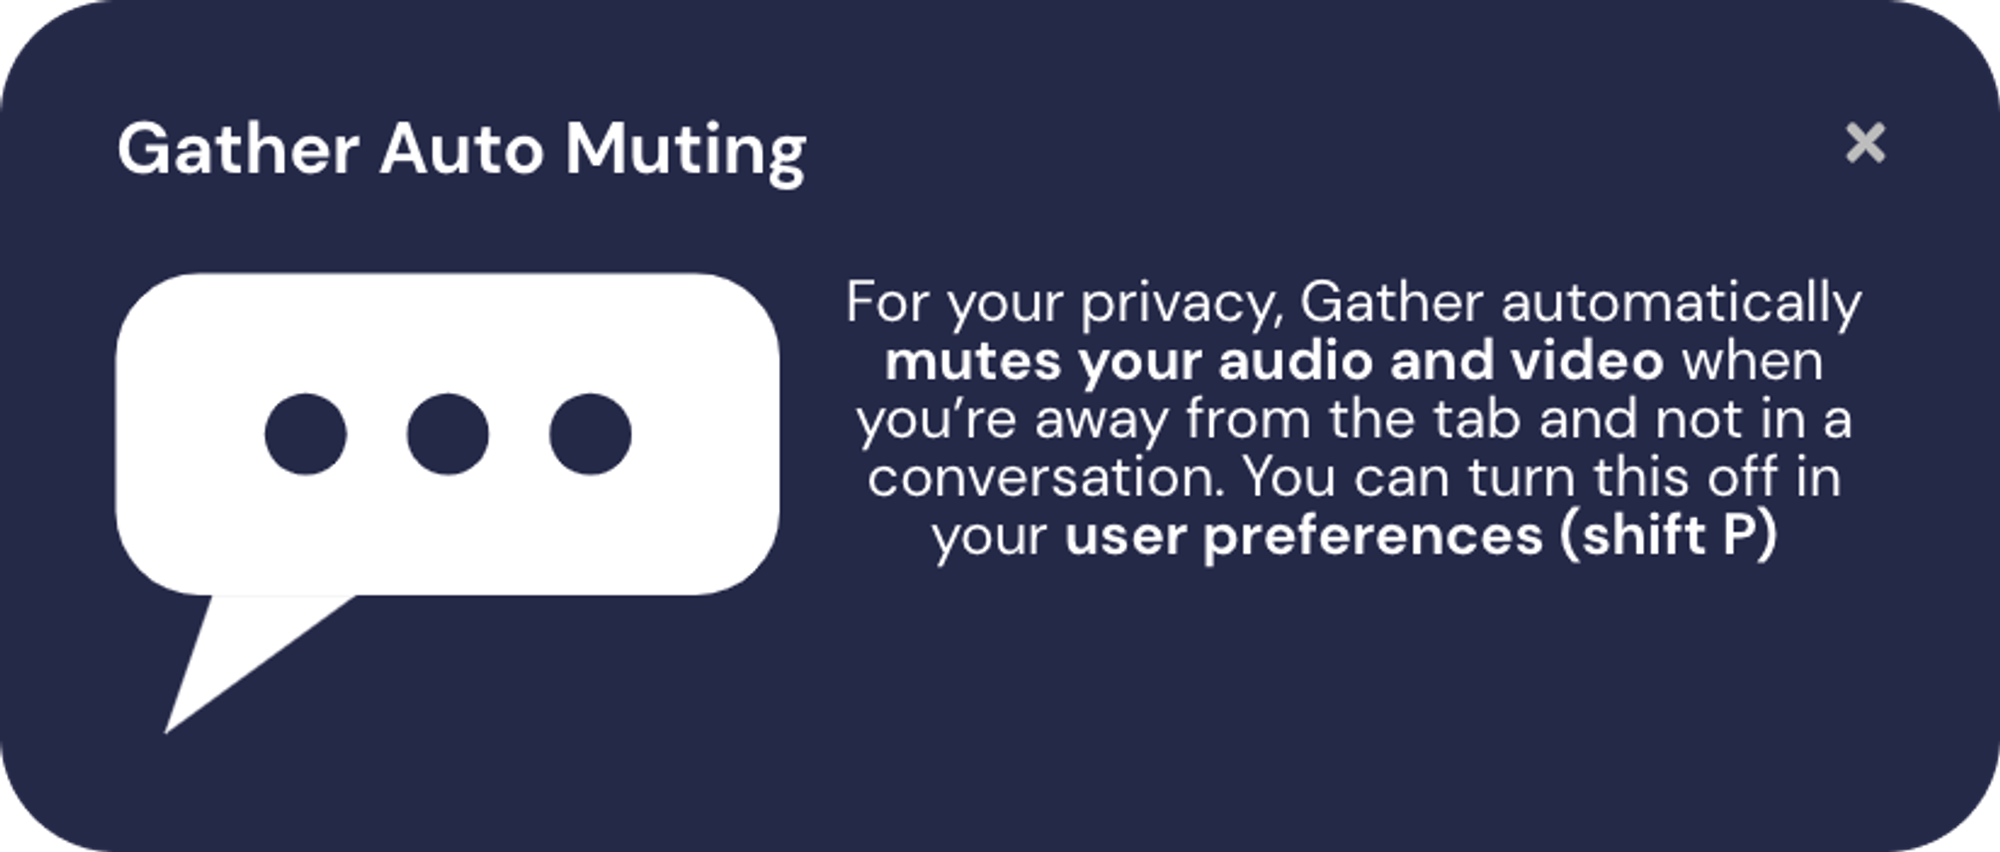
A screenshot of the Gather auto muting alert window
If you disable this in your user settings, you will always have your camera and microphone on, even when you are tabbed away from Gather.
When you are inside of an iframe and not connected to others, you may also experience being automatically muted. This is due to the iframe being in "focus" as opposed to the Gather Application itself which has a similar effect to being tabbed away. When you close the embedded object or click on the sidebar to put gather back into focus, Gather should automatically unmute you.
Use HD Video Quality
By default, you will always see an HD Quality video if you are connected to only one person (if they are transmitting an HD video stream). When others join your conversation, your video quality will automatically switch to standard quality to help with general performance. You can instead change your settings to always make all videos HD whenever possible in your user settings.
This will make your computer work harder to show videos, and take up more of your network, but the video quality will improve significantly!
How to View and Navigate Your Video Calls
In Gather, when your avatar approaches others, a video call automatically starts between you and the people you approach. All videos will initially appear at the top of your screen. In an open area, you will be connected to everyone within 5 tiles unless you activate Quiet Mode. When you are in a Private Area, you will be connected to everyone who is also inside of the private area.
When there are multiple participants in one gathering, a select number of video call windows will show at the top of your screen. The number of video participants shown depends on the size of your browsing window and resolution of your screen.
Video Carousel
You can scroll between the videos manually by clicking the arrows to the left and right of the videos shown. This is called the "video carousel."
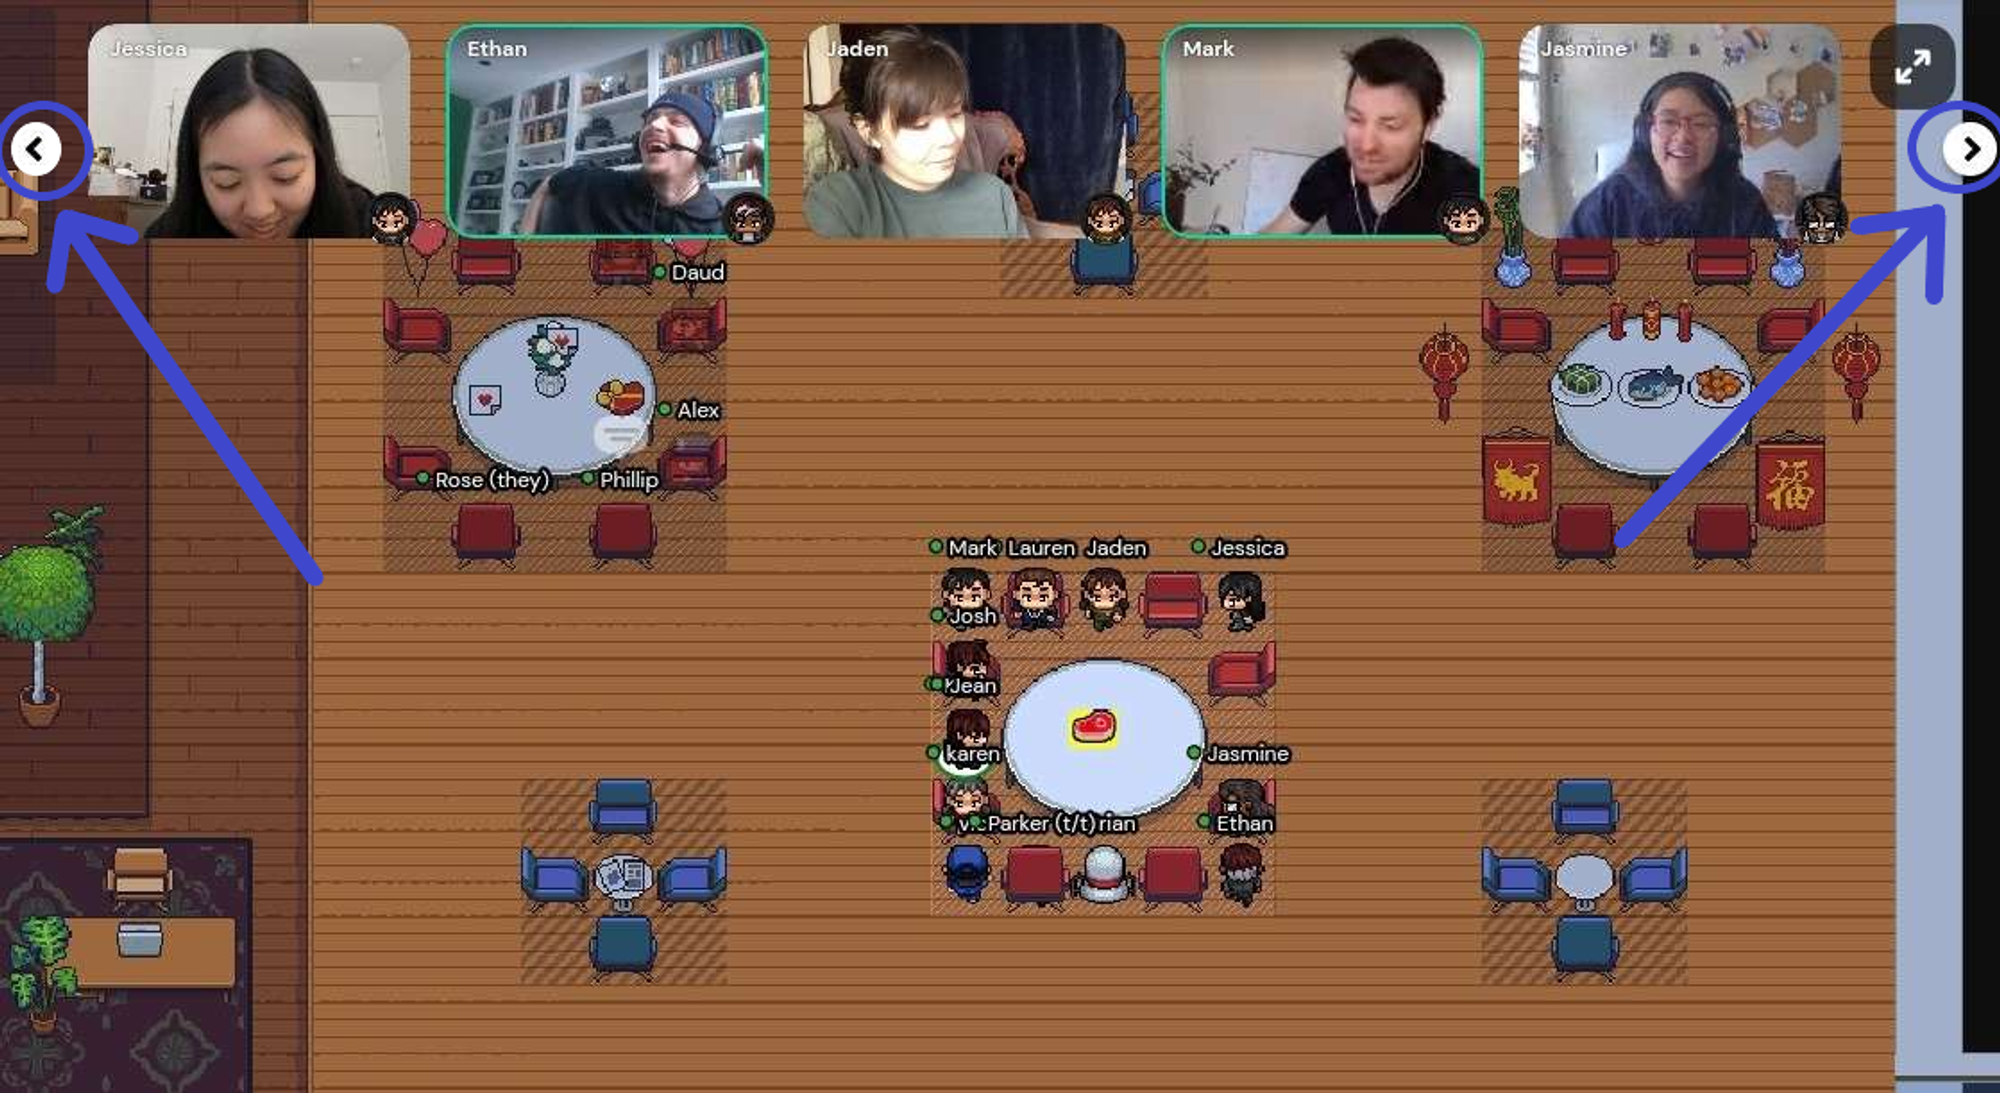
You can navigate through your video carousel by clicking the arrows on either side of your screen.
Grid View
To increase the number of videos visible to you or to enlarge the videos you are currently seeing, you can enter Grid View by clicking the expanding arrows icon. Grid View will display up to 9 videos in a grid format at the same time with their names and avatars visible. To exit Grid View, click the collapsing arrows icon in the upper right of your screen.
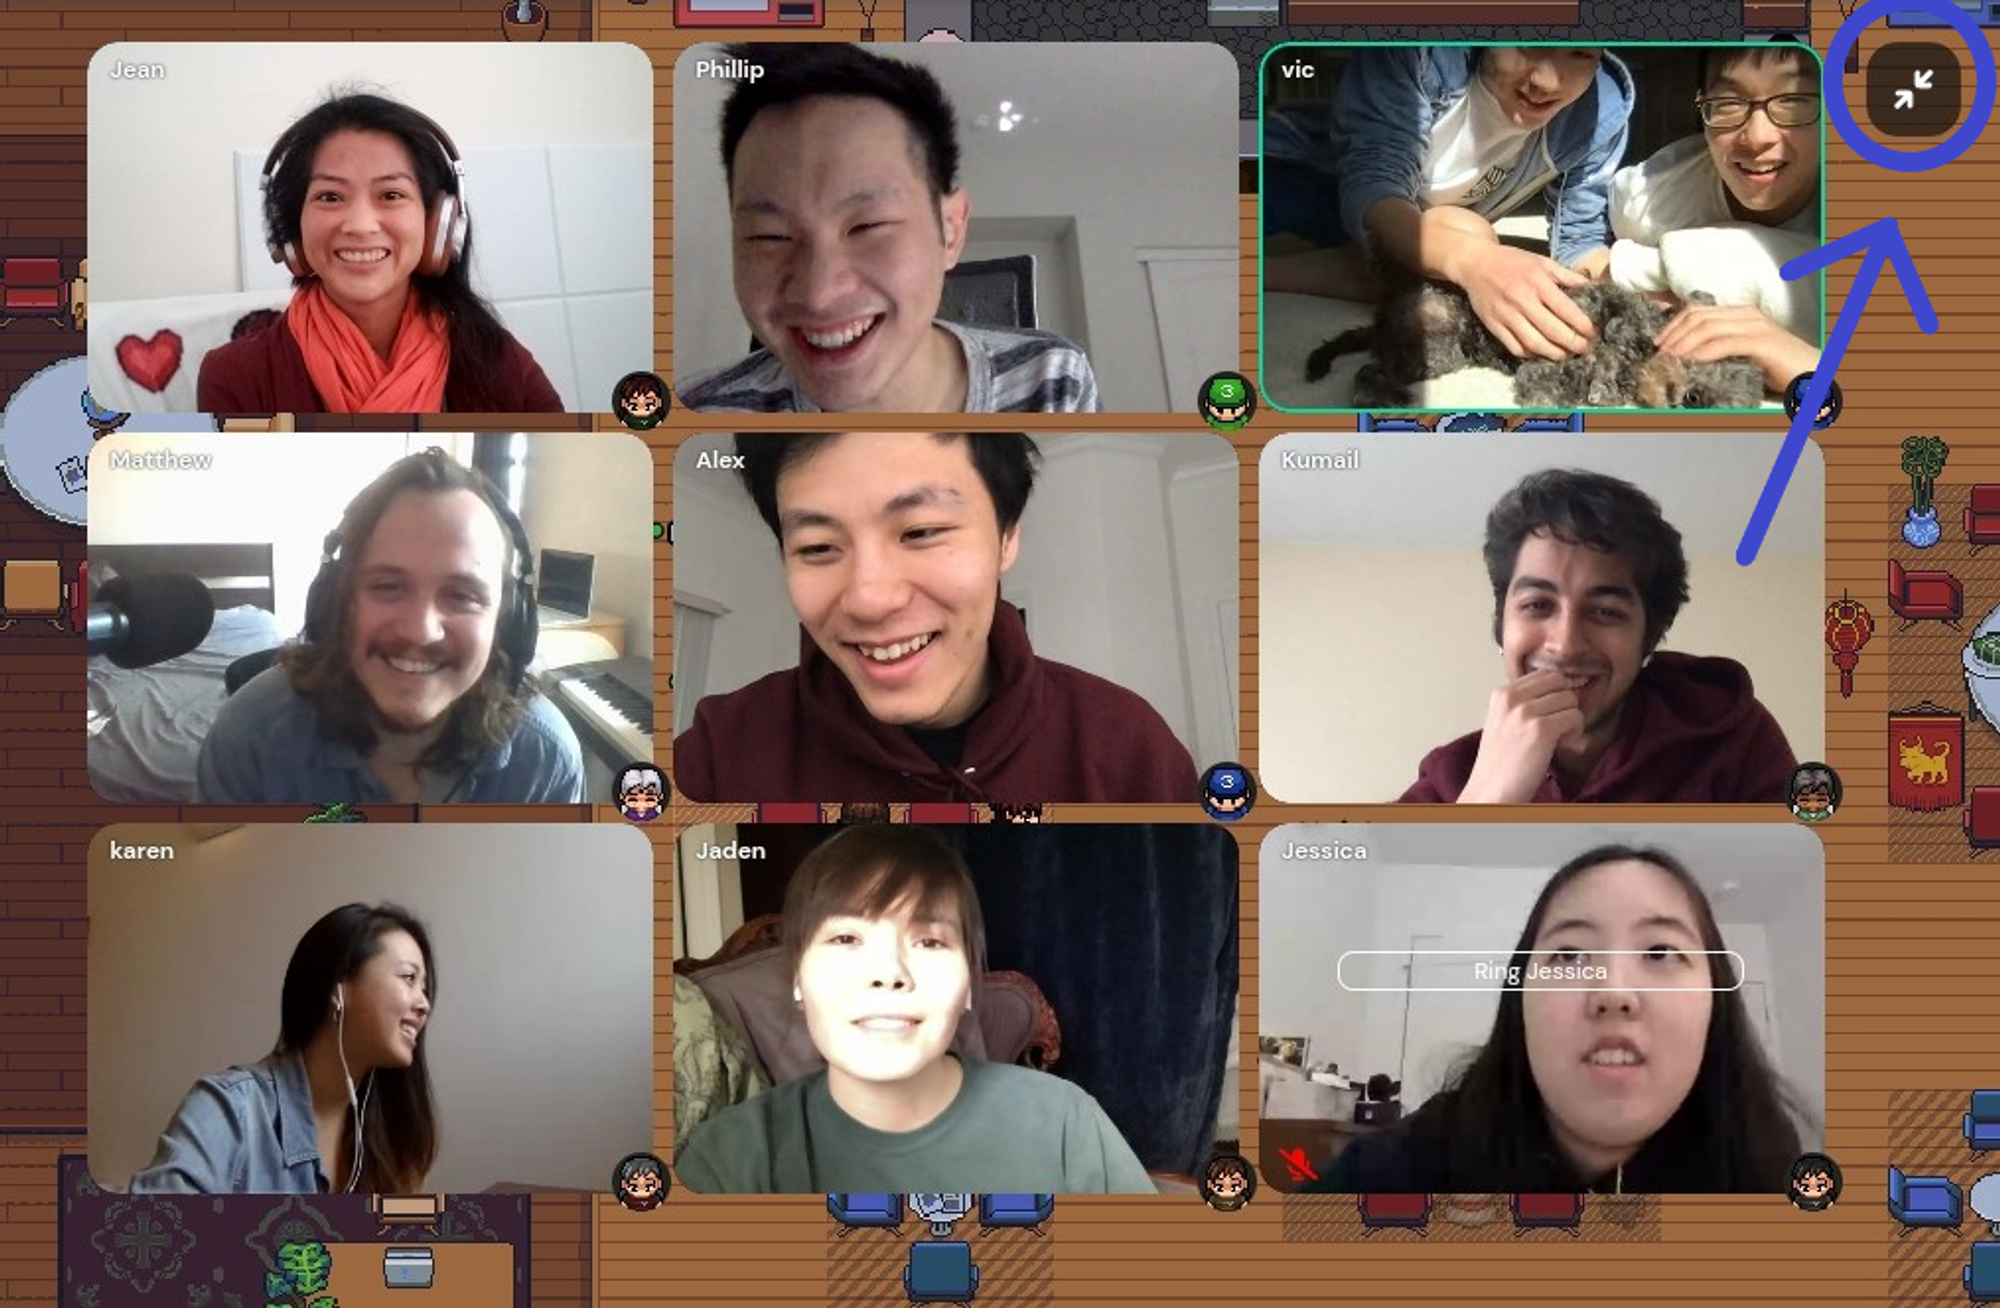
When you are in Grid View, you can collapse back to the regular Video Carousel by clicking the button in the upper right corner of the screen.
Video Prioritization
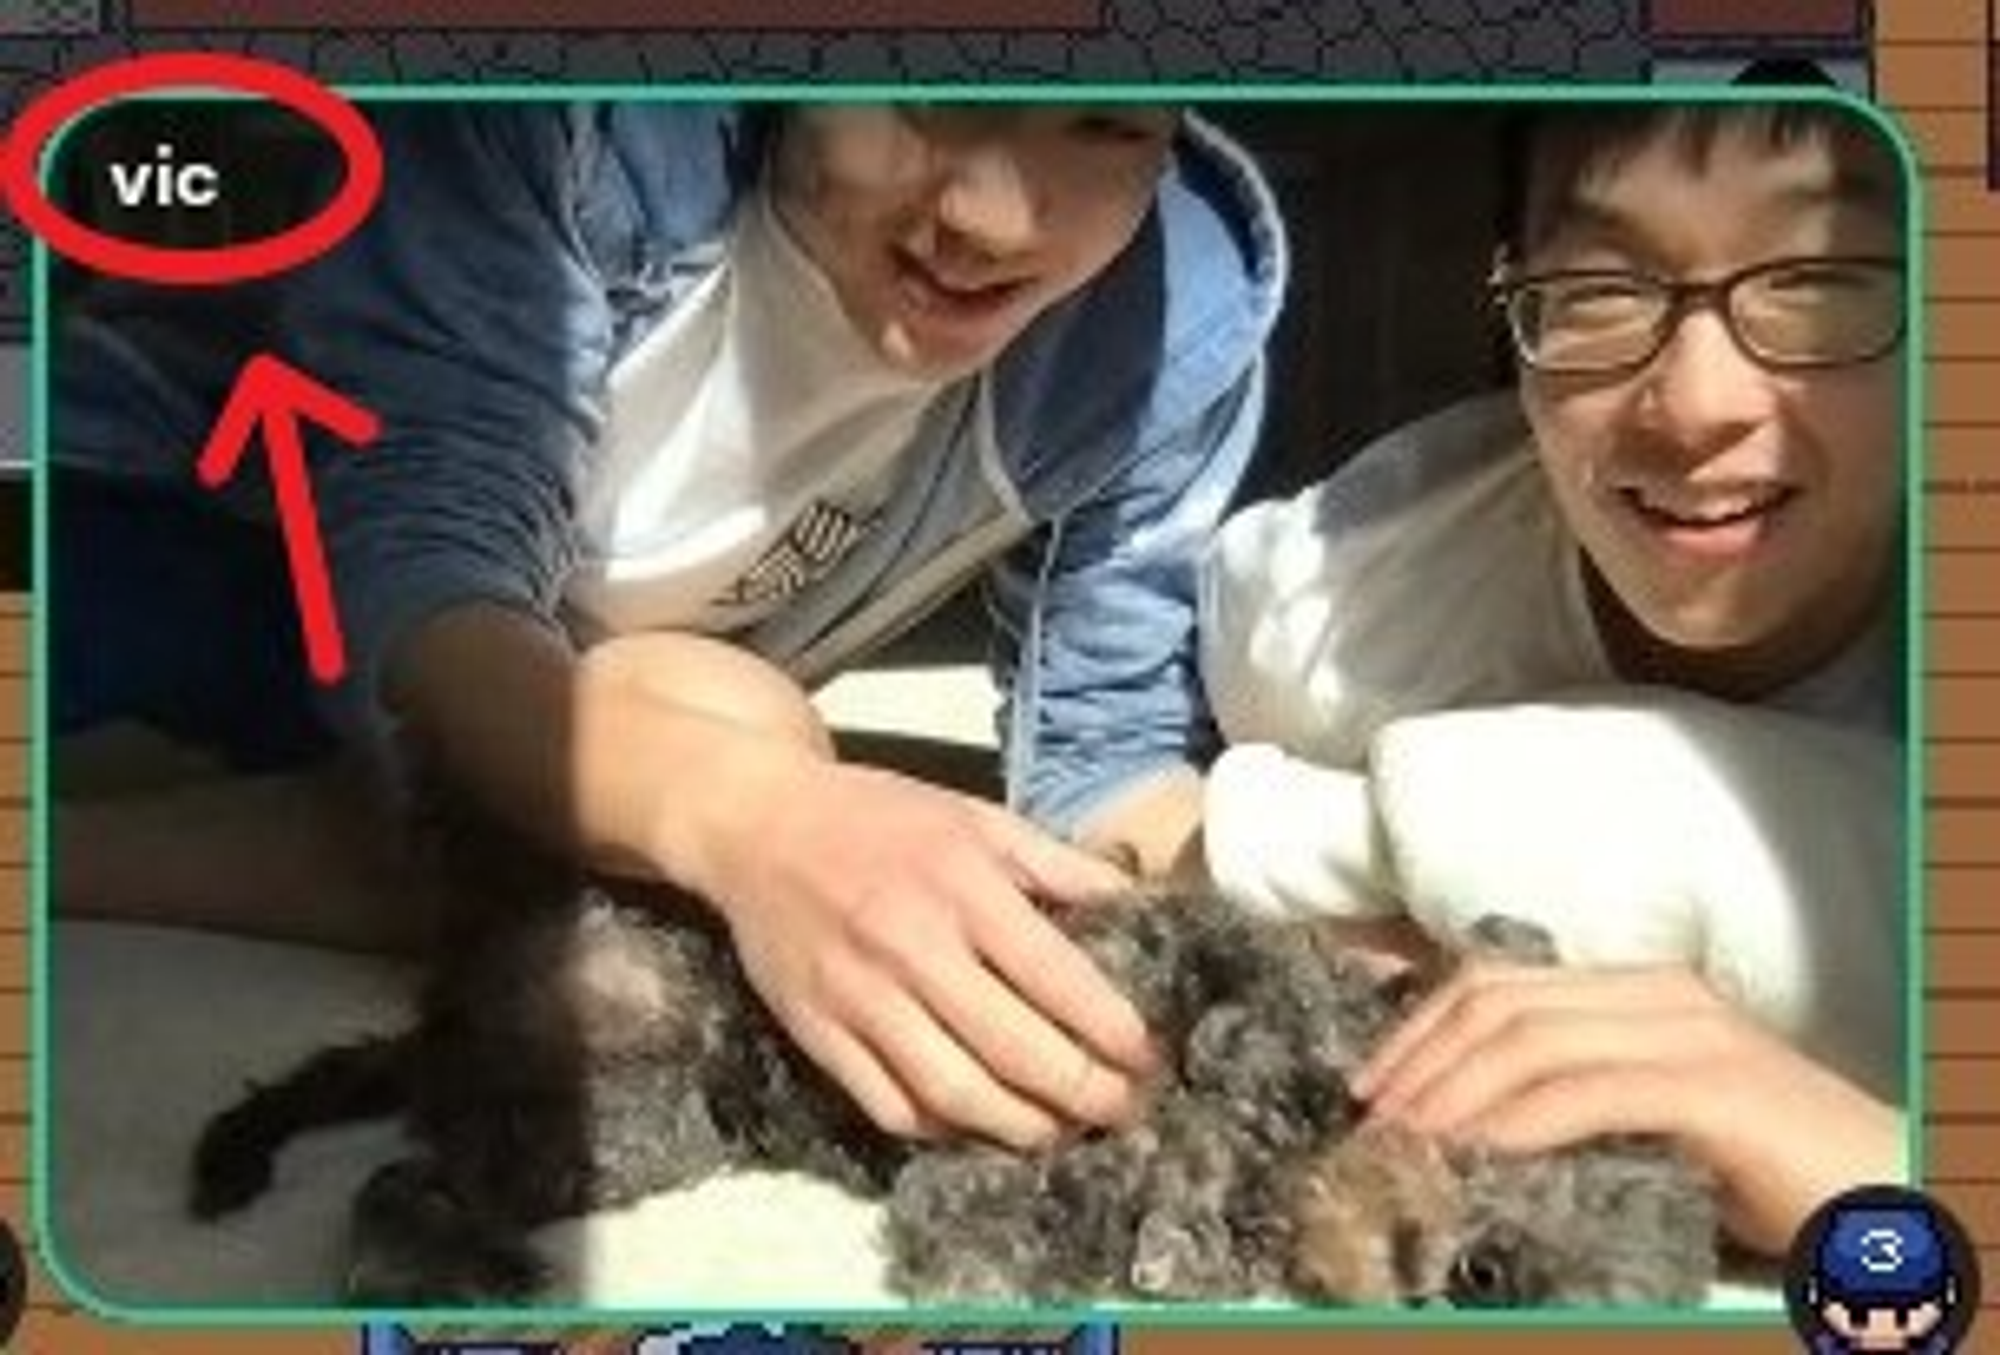
When someone first joins an ongoing group conversation, they will appear at the end of your video carousel. Whenever they speak, their video will be brought to the front of your carousel if they aren't already visible on your screen. This helps sort the videos you see so that the most active contributors to a conversation will automatically be brought to the front of your carousel. When anyone speakers, their video preview will also be outlined in green.
Enlarge a Video
To focus on one person's video (or screen share), click on that person's stream. The rest of the videos will display in a vertical row on the right of the screen. If the Calendar, Chat, or Participants panel is expanded, collapse it for the largest view.
How to use Emotes
You can easily respond to the current situation and let others know how you are feeling by using emotes!
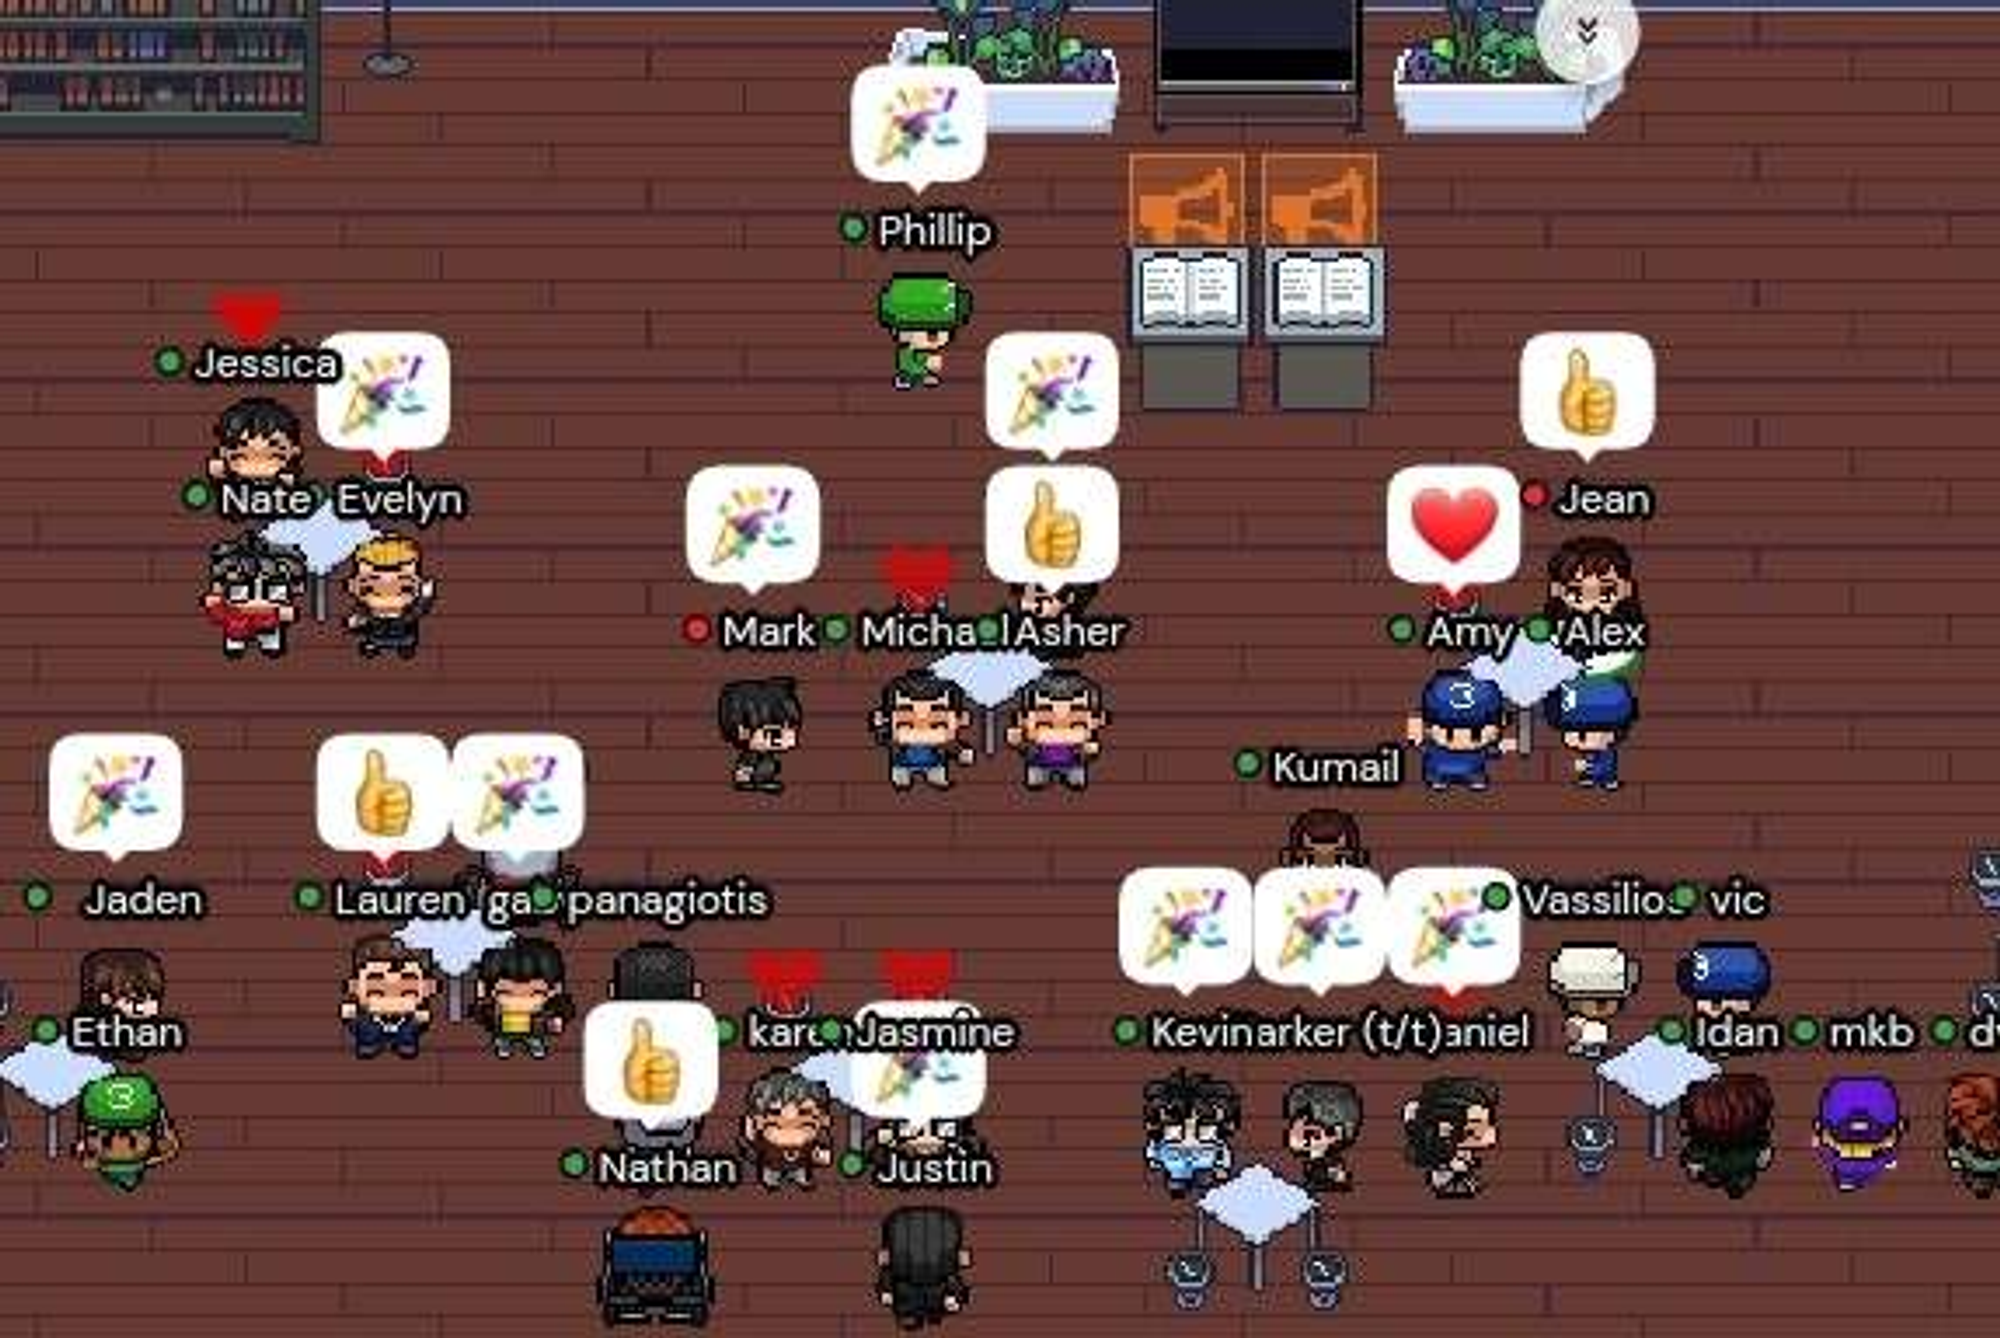
A room of people using several different emotes at the end of a meeting.
You can access emotes by clicking on the Emotes Icon on the far right side of your Control Panel and selecting the emote you wish to display. You can also quickly and easily switch between emotes by using the associated numbered hotkeys!
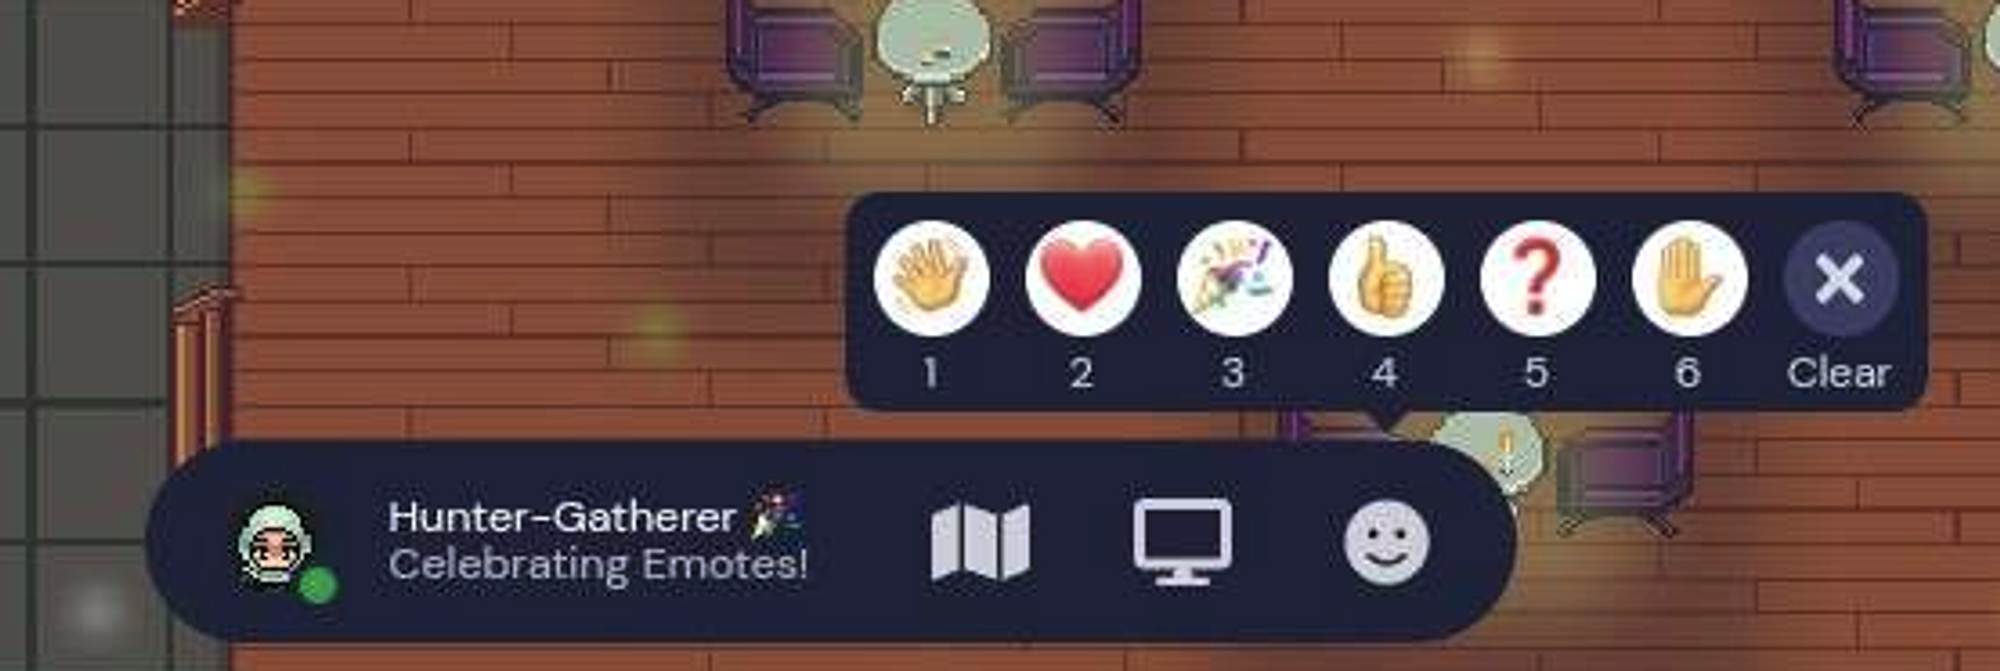
Note: The graphic for the Emotes will vary depending on your operating system
When using the keyboard shortcuts for your emotes, you will see a preview for the one you selected before it is displayed above your avatar's head. This is to help make sure you have the right one keyed up before it appears above your avatar!
An animated preview of what it looks like when you use the number hotkeys to activate your emotes.
Note: The raised hand (#6) will stay raised until you clear it. All other emotes will disappear after 3 seconds.
Raised Hand
To raise your hand, you can either select it from the Emotes Menu or press the number 6 on your keyboard. While your hand is raised, your name will move up to the top of the Participants list. For the raise hand emote, you have to press the number 6 again for the emote to disappear. Alternatively, you can click on the raised hand emote in the emote menu or the clear all button to lower your hand
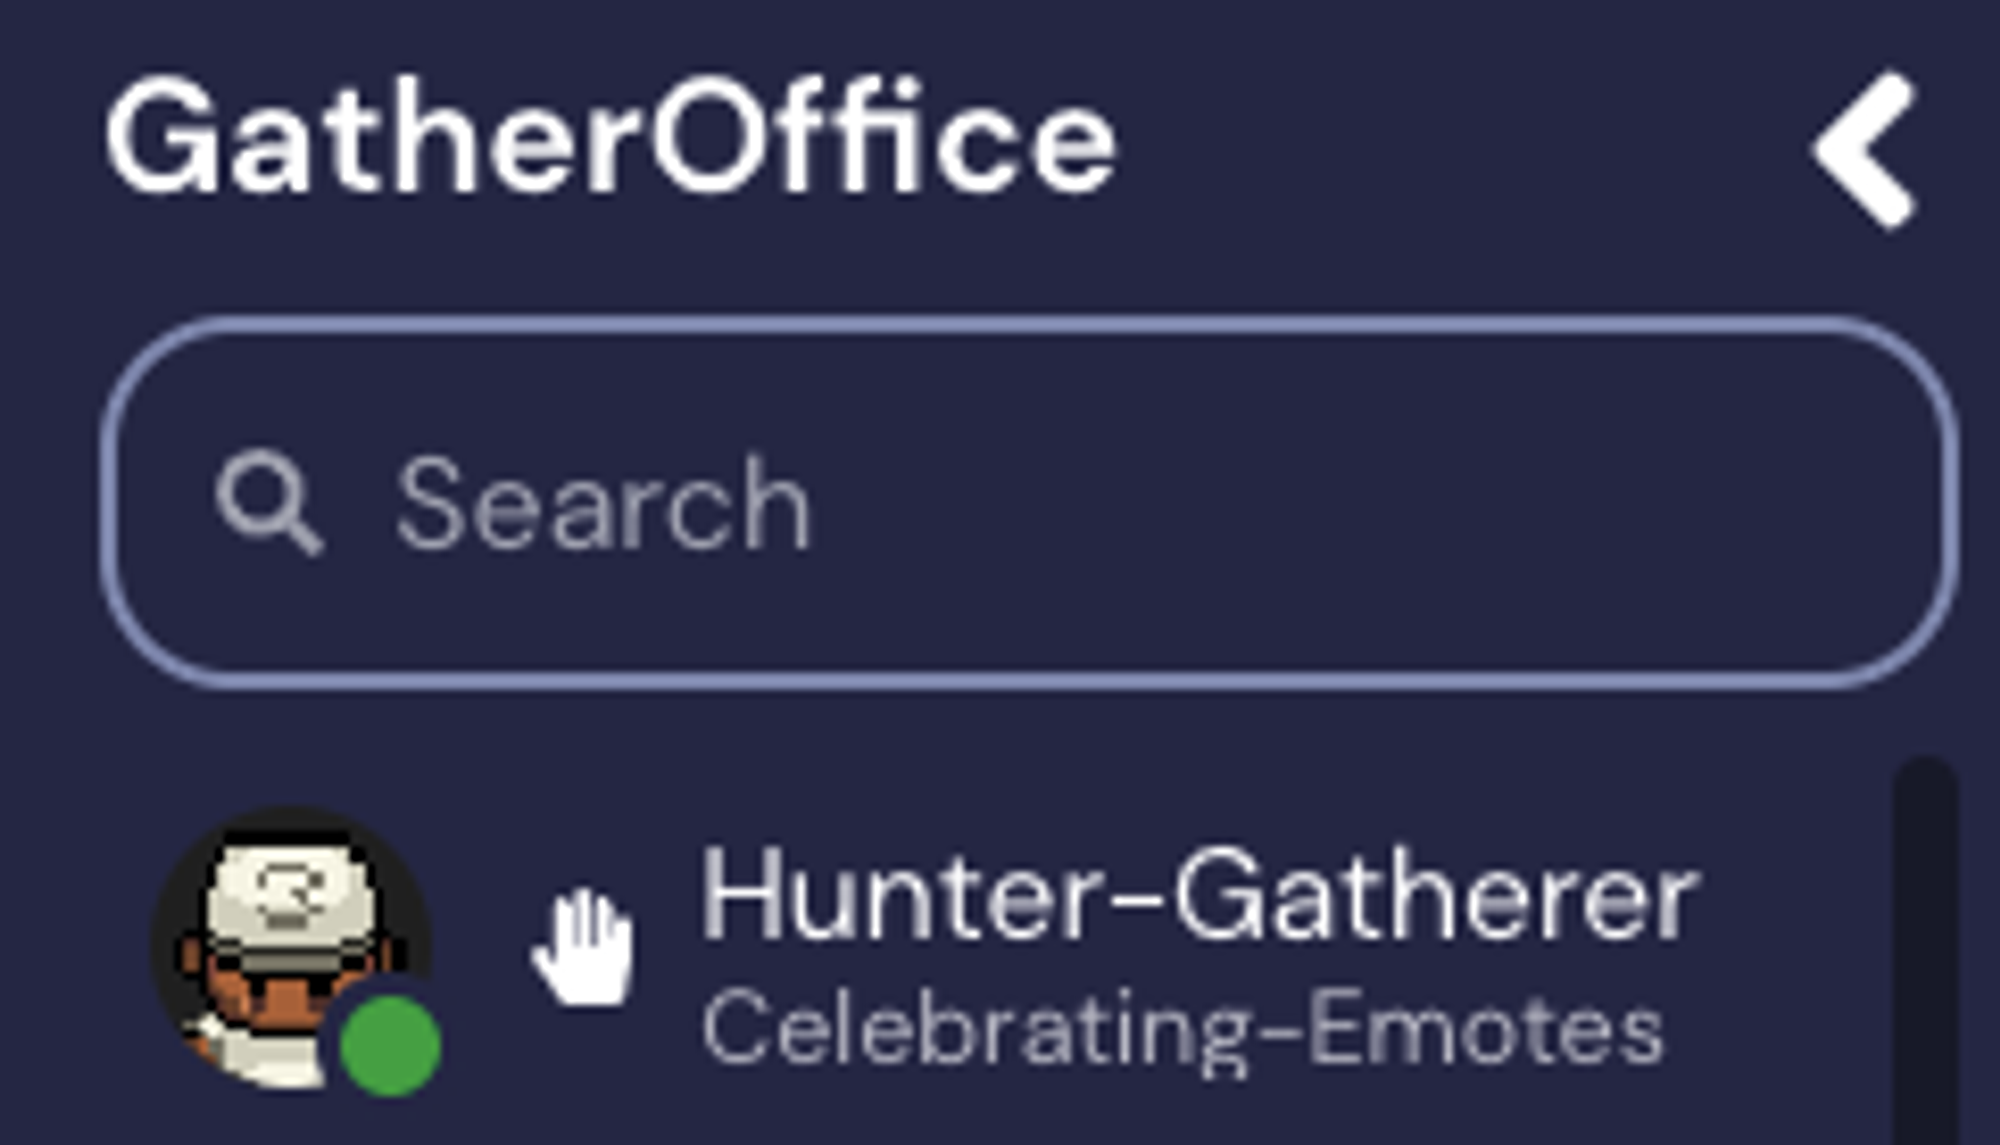
When you raise your hand, a hand will appear next to your name and bring you to the top of Participants list.
Follow Feature
The Follow Feature allows someone to easily follow another person without having to move their own character around a space. When you are in follow mode, you automatically follow the person you chose to follow. To exit follow mode, press any arrow key to move away from the other person.
To activate follow mode, click on the person's name in the Participants List and select 'follow.'
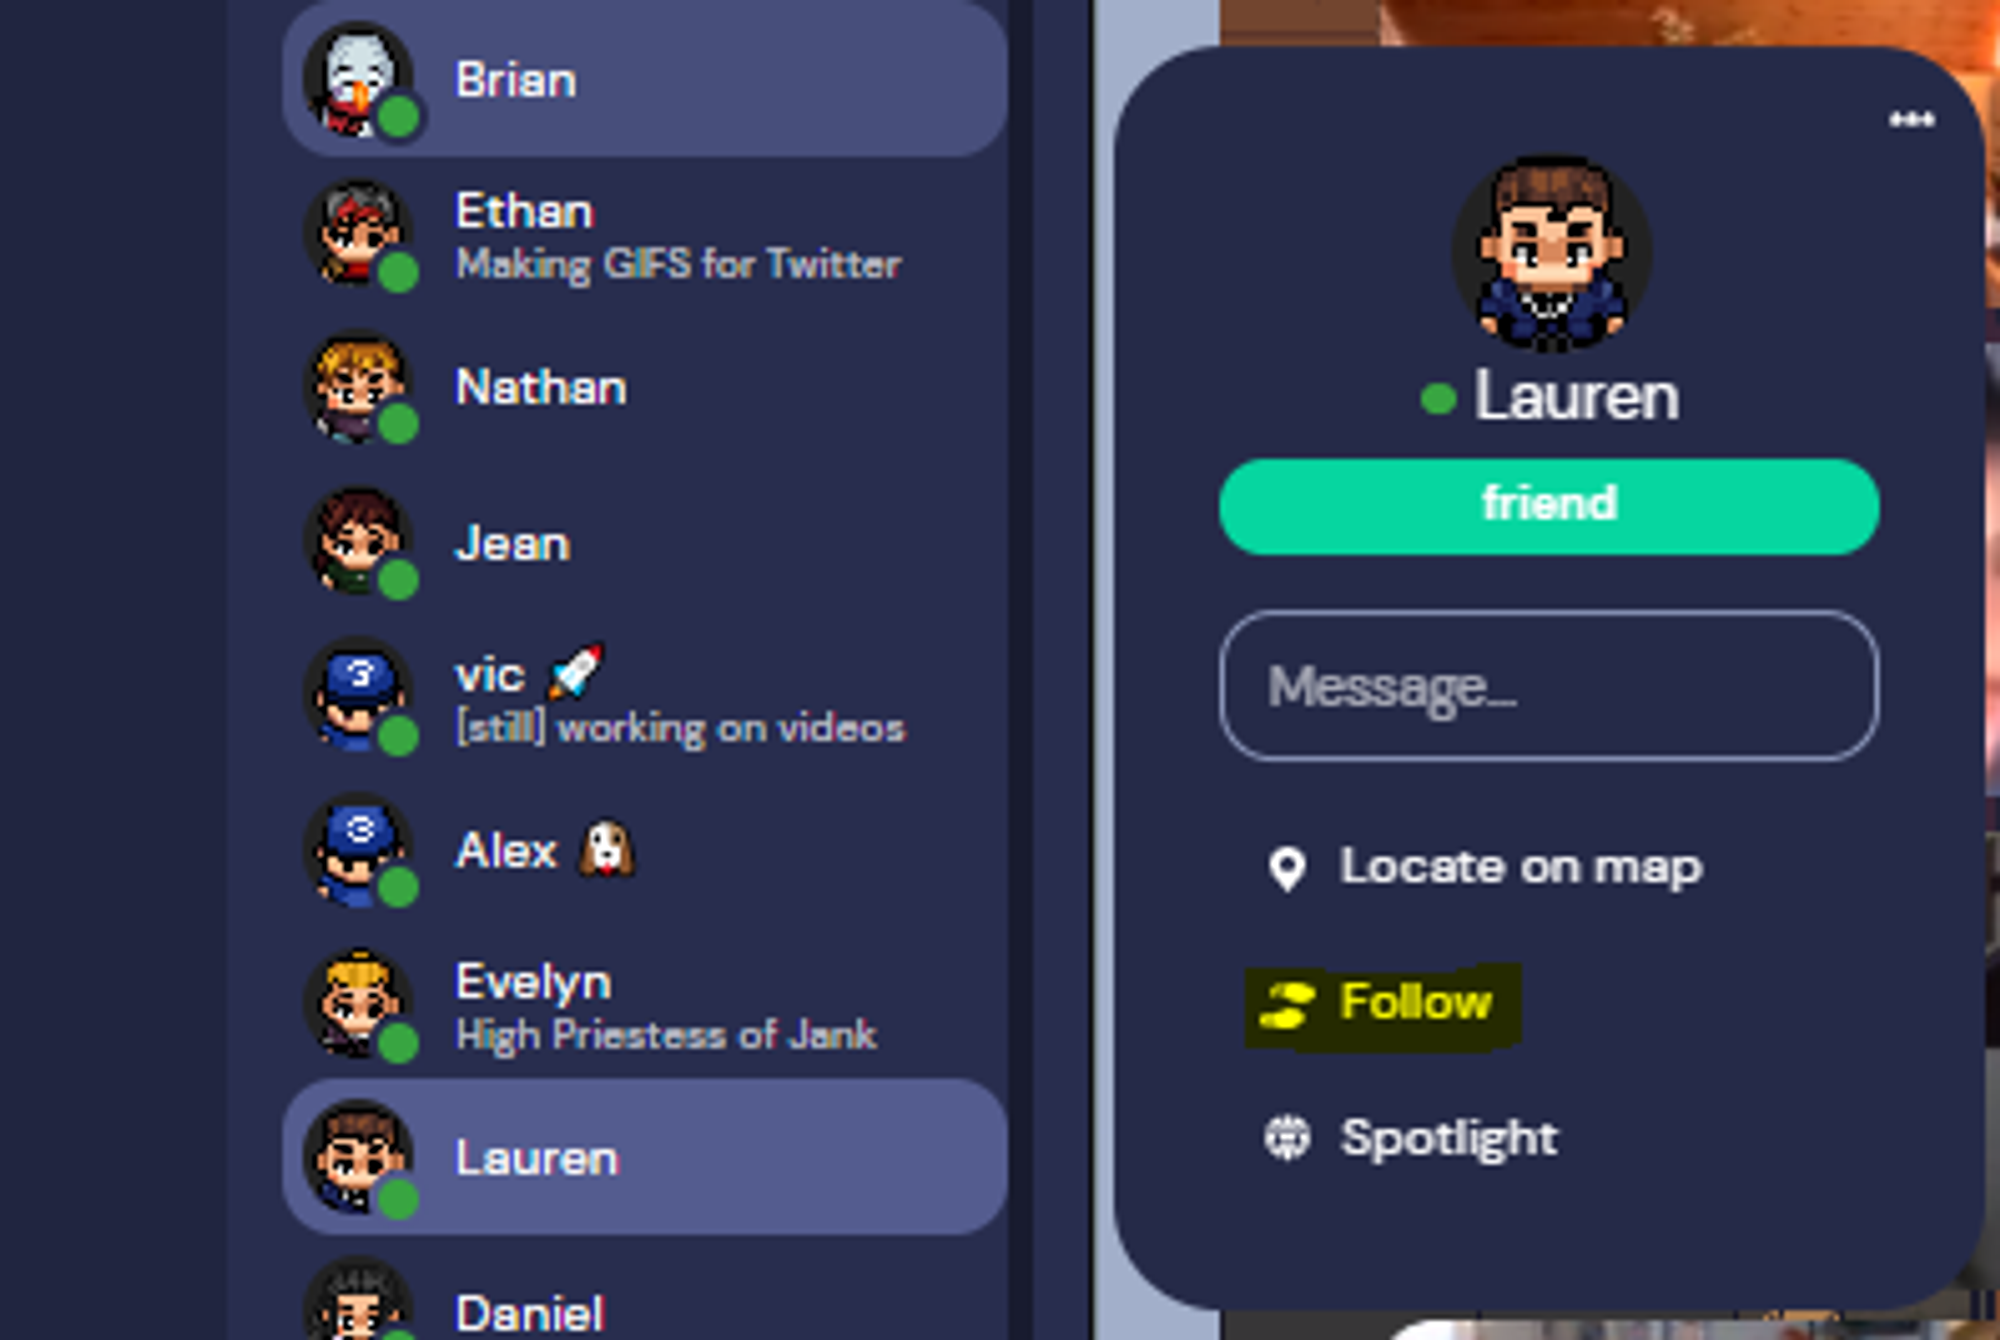
You can follow someone by clicking on their name in the participant's panel and selecting the "follow" option.
Alternatively, you can click on their name inside of their video conversation to open the same module.
You can click on a person's name inside of their video to open up their User Menu.
To stop following someone, press any arrow key on your keyboard.
Messaging
Users can send and view messages using Chat in the Left Nav Menu. Here, you can view past messages, as well as send messages of your own.
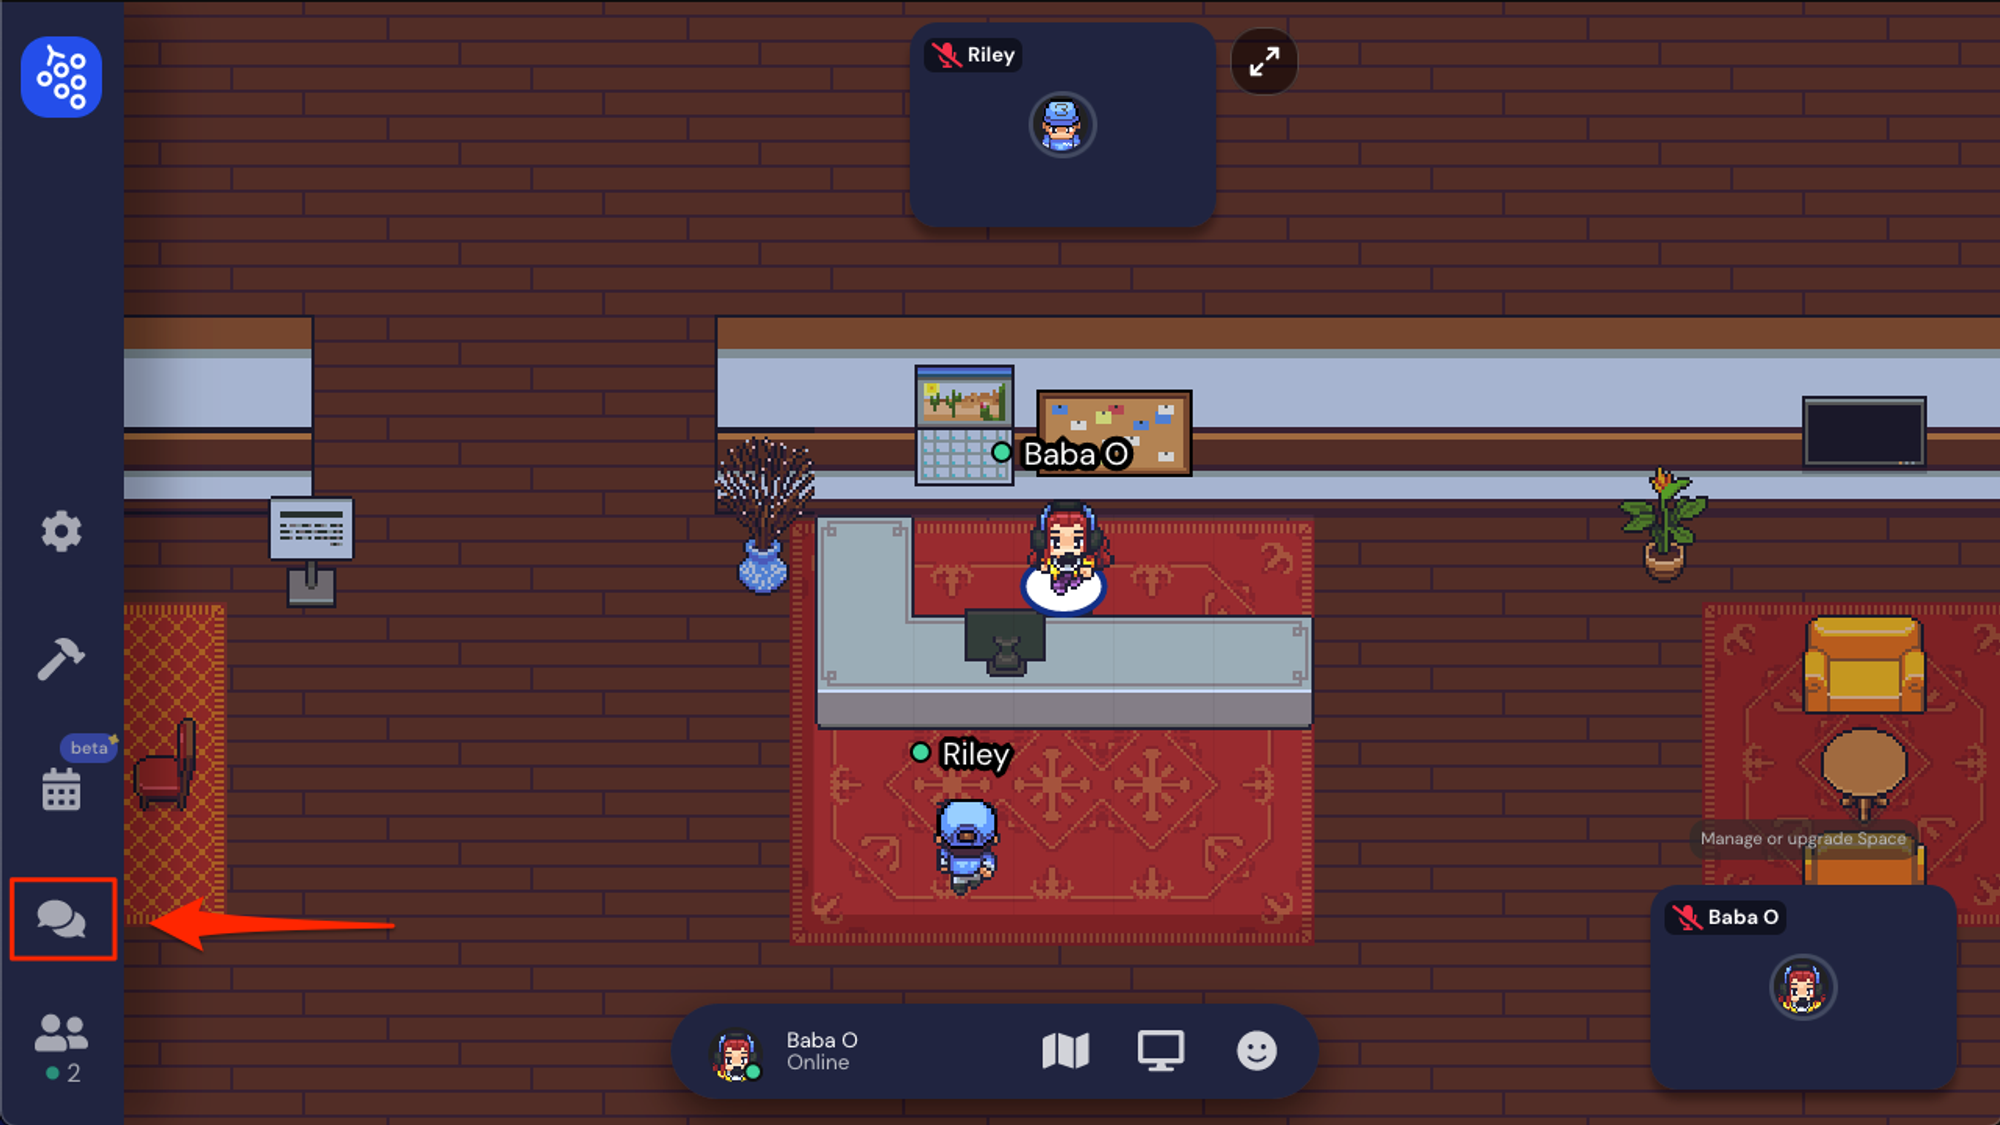
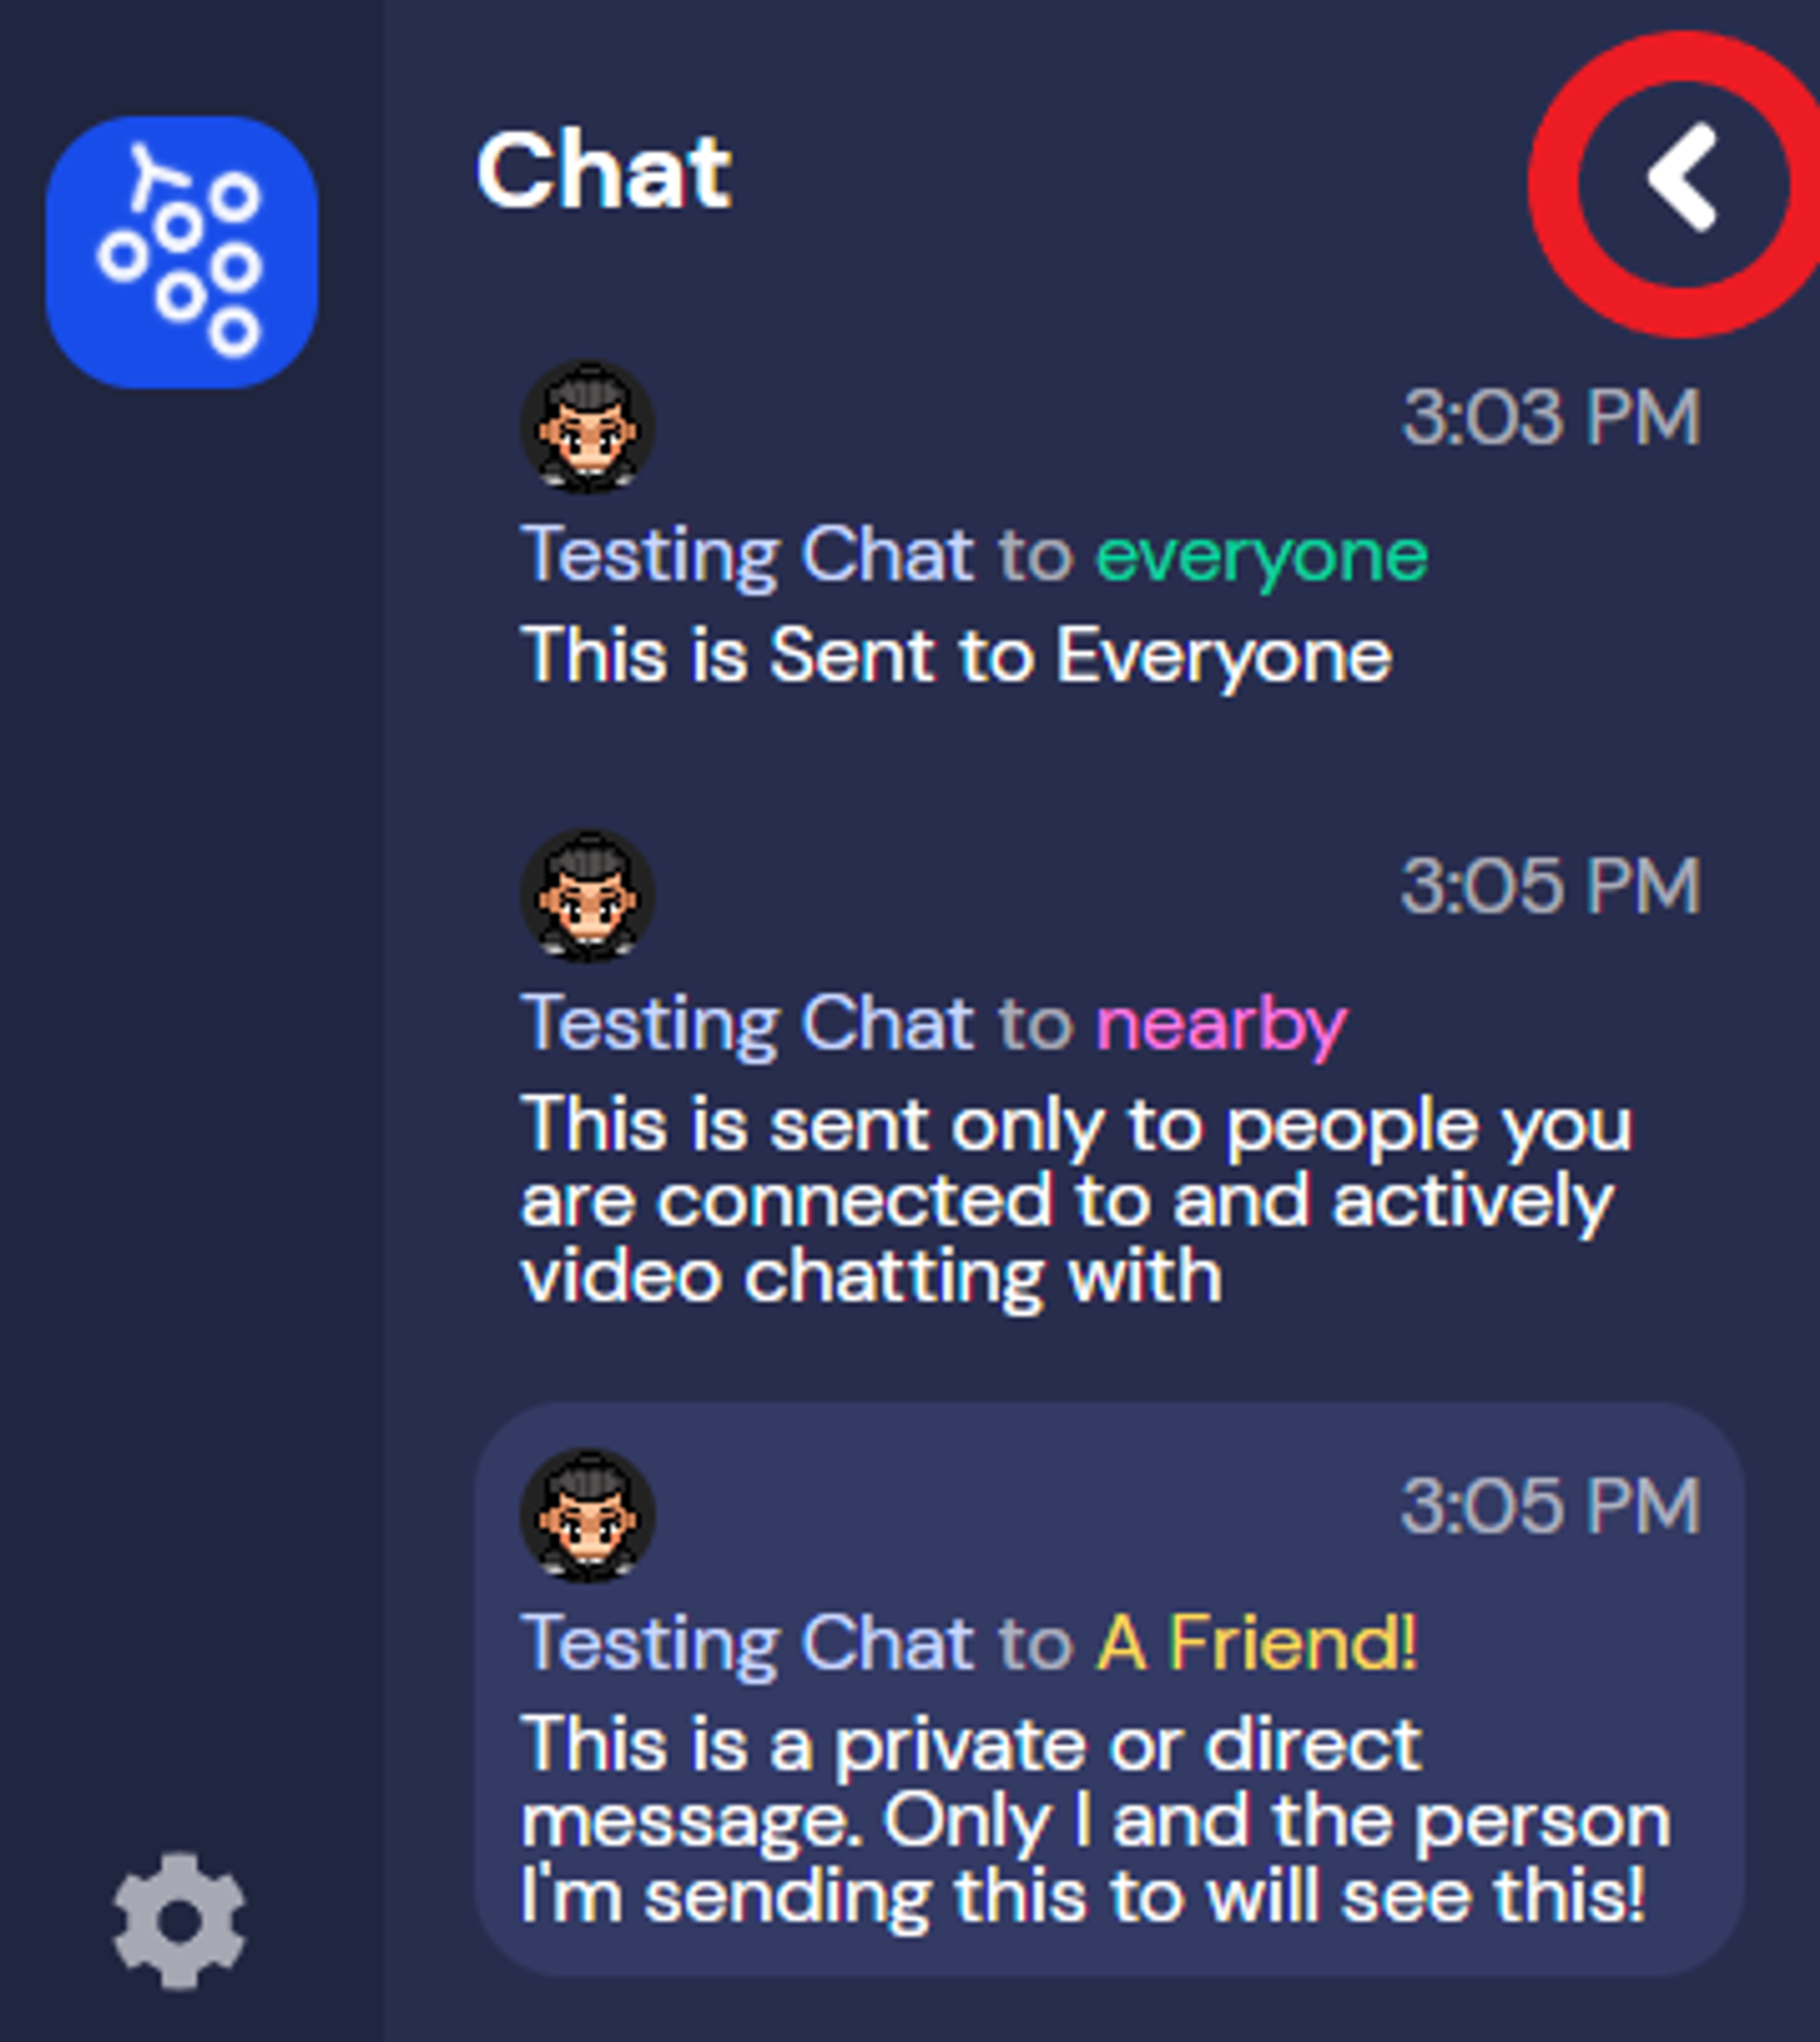
Click Chat in the Left Nav Menu to send text messages to everyone, those nearby, or to someone specific.
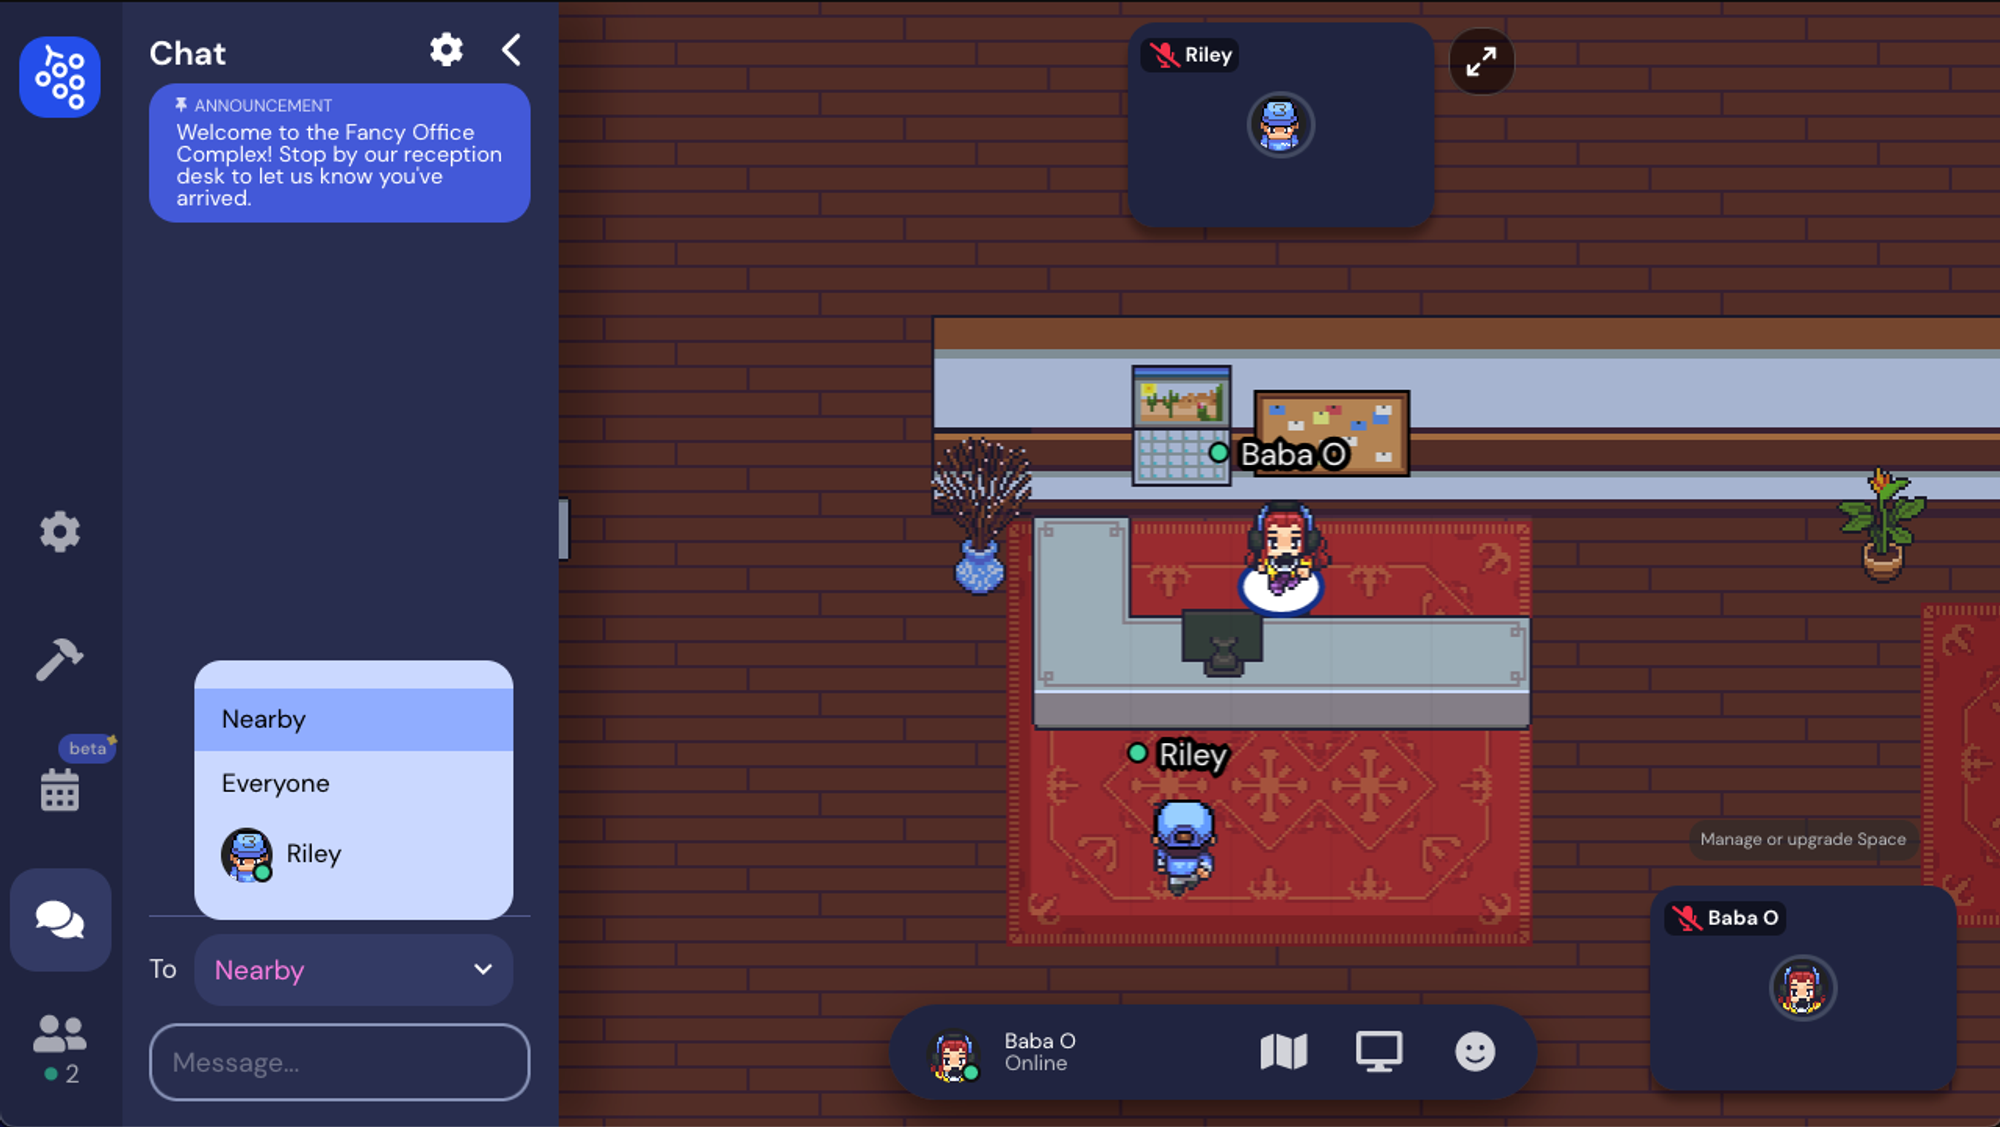
There, you can send messages to three different kinds of recipients, which you can toggle using the options located in the drop box at the bottom of the Chat Panel.
These options allow you to send a message to:
1.
Everyone - Your message will appear in the chat panel for every user in the space.
2.
Nearby - Your message will appear in the chat panel for every user that you are currently video chatting with. This could be whoever is standing within your interaction distance, or whoever you are in a private space with.
3.
Individuals - The remaining options will display the names of other users in the room. You can scroll through this to select a user to send a private message to. You can also click on a users name in the chat history to make them the recipient of your next message.
You can also click on a person's name in the chat panel to automatically start private messaging them.
Note that you can only send private messages to users that are currently online and in the Space with you.
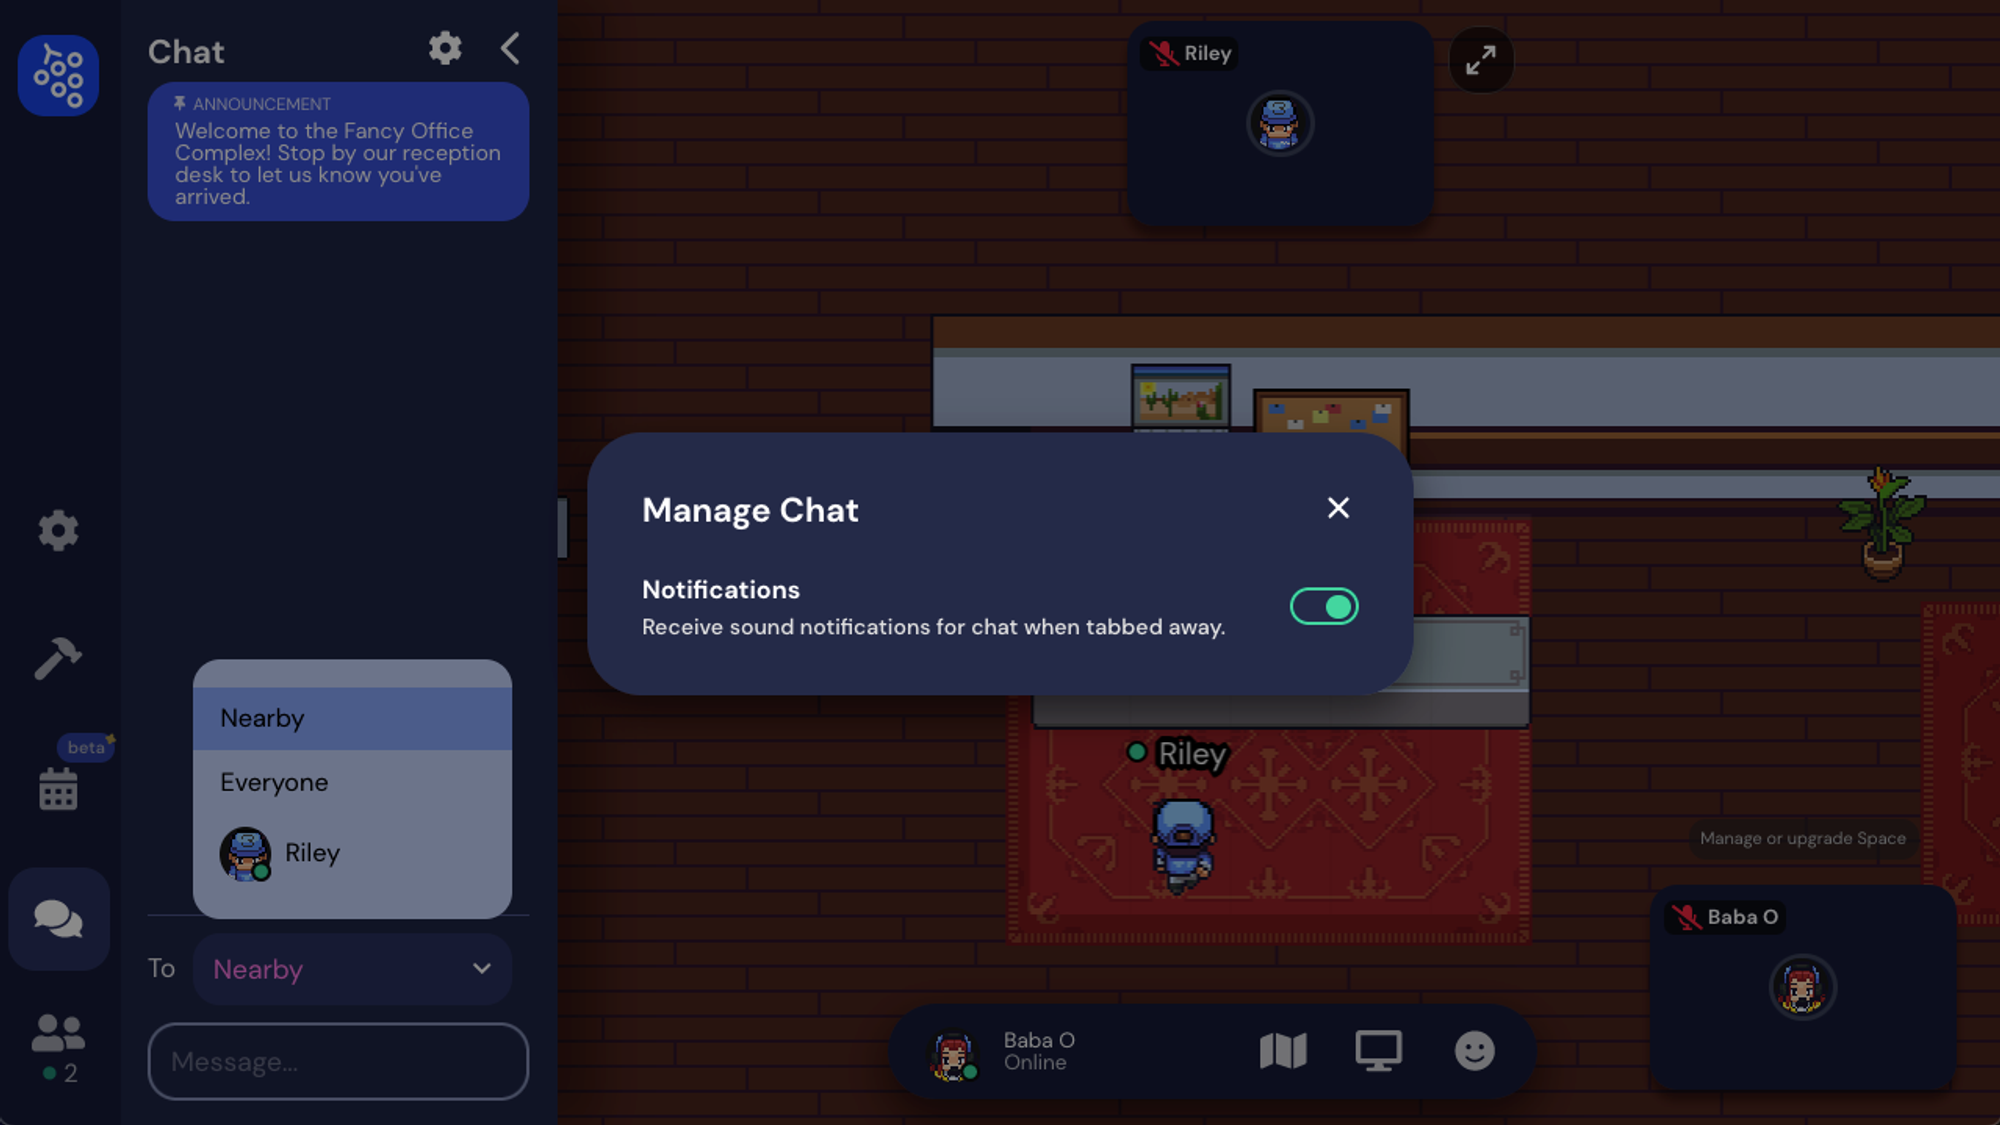
Click the arrow to close the side panel.
To close the side panel, click the arrow in the upper left. This works for Builder mode, the Calendar pane, the Chat panel, and the Participants list.
Status Messages
You can set status messages for others to see in the Participants pane! To edit or set a status message, click on your name in the control panel at the center of the bottom of your screen.
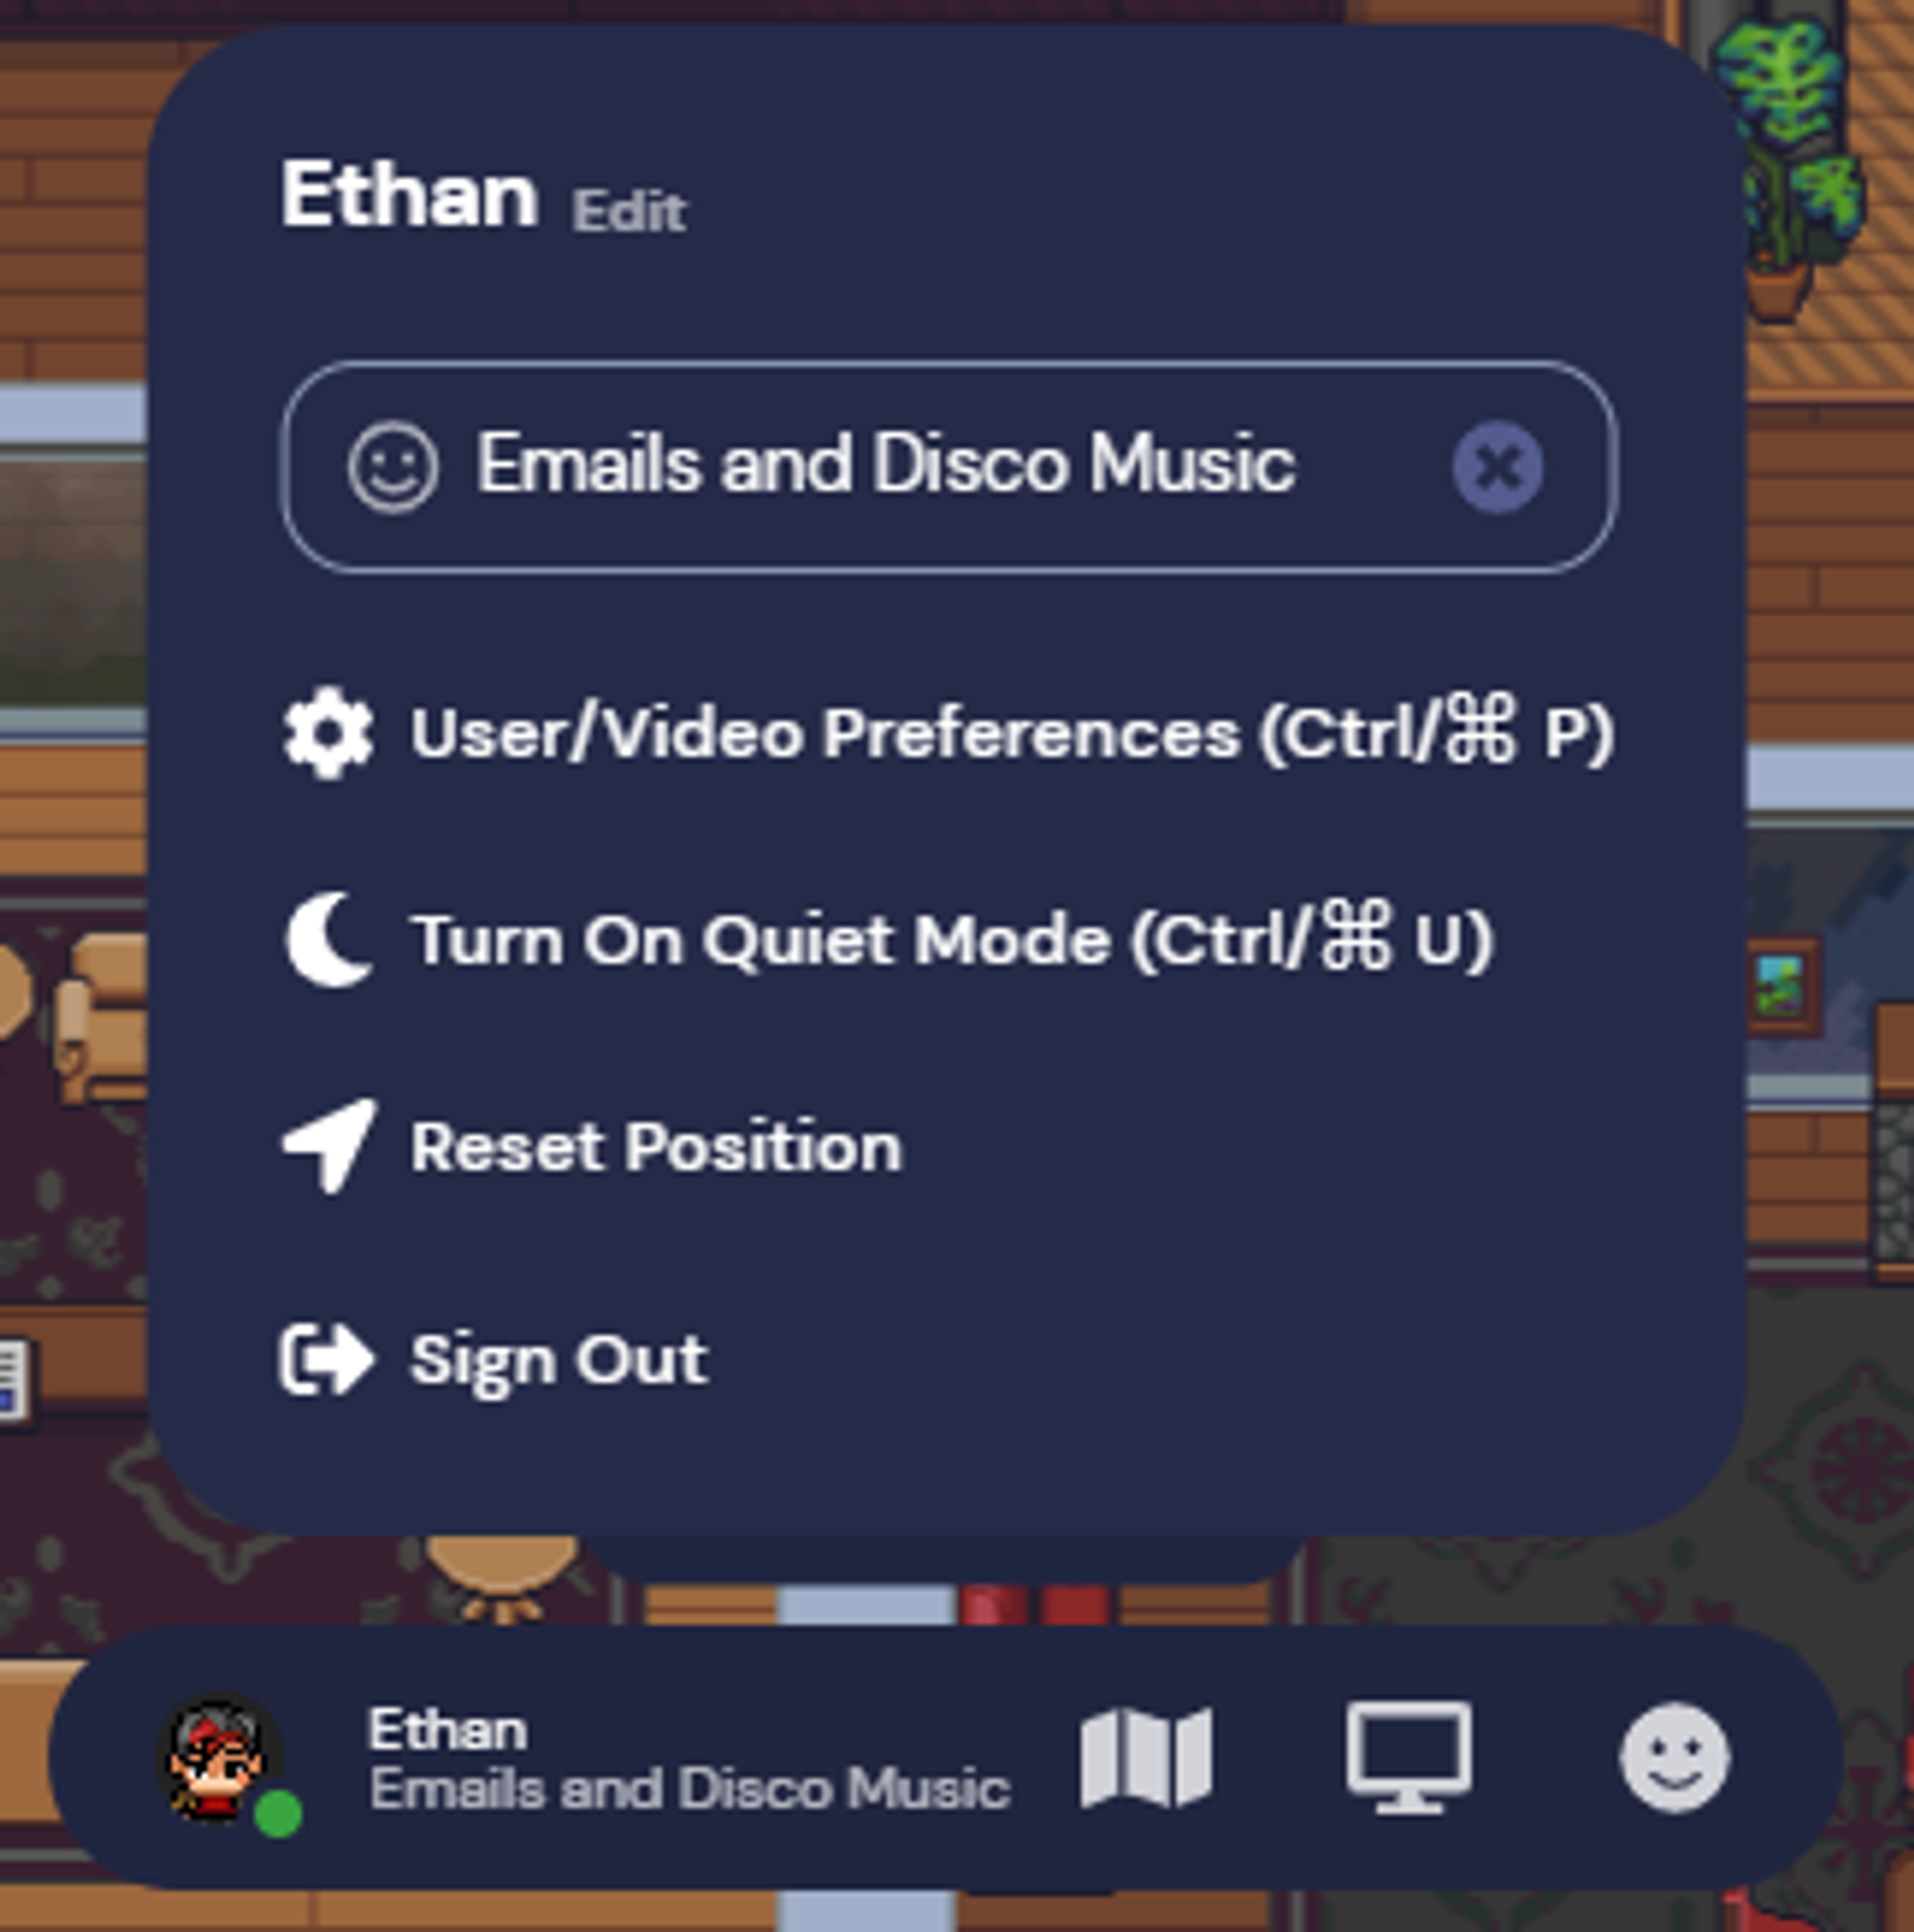
Edit your status by clicking your name at the bottom of the screen
Text Statuses are displayed under each users name in the Participants Tab. The set emoji will appear to the right of your name. To have an emoji appear below your name, include it in the status text box. (Press windows key+. (period) to open the emoji panel on a Windows Machine).
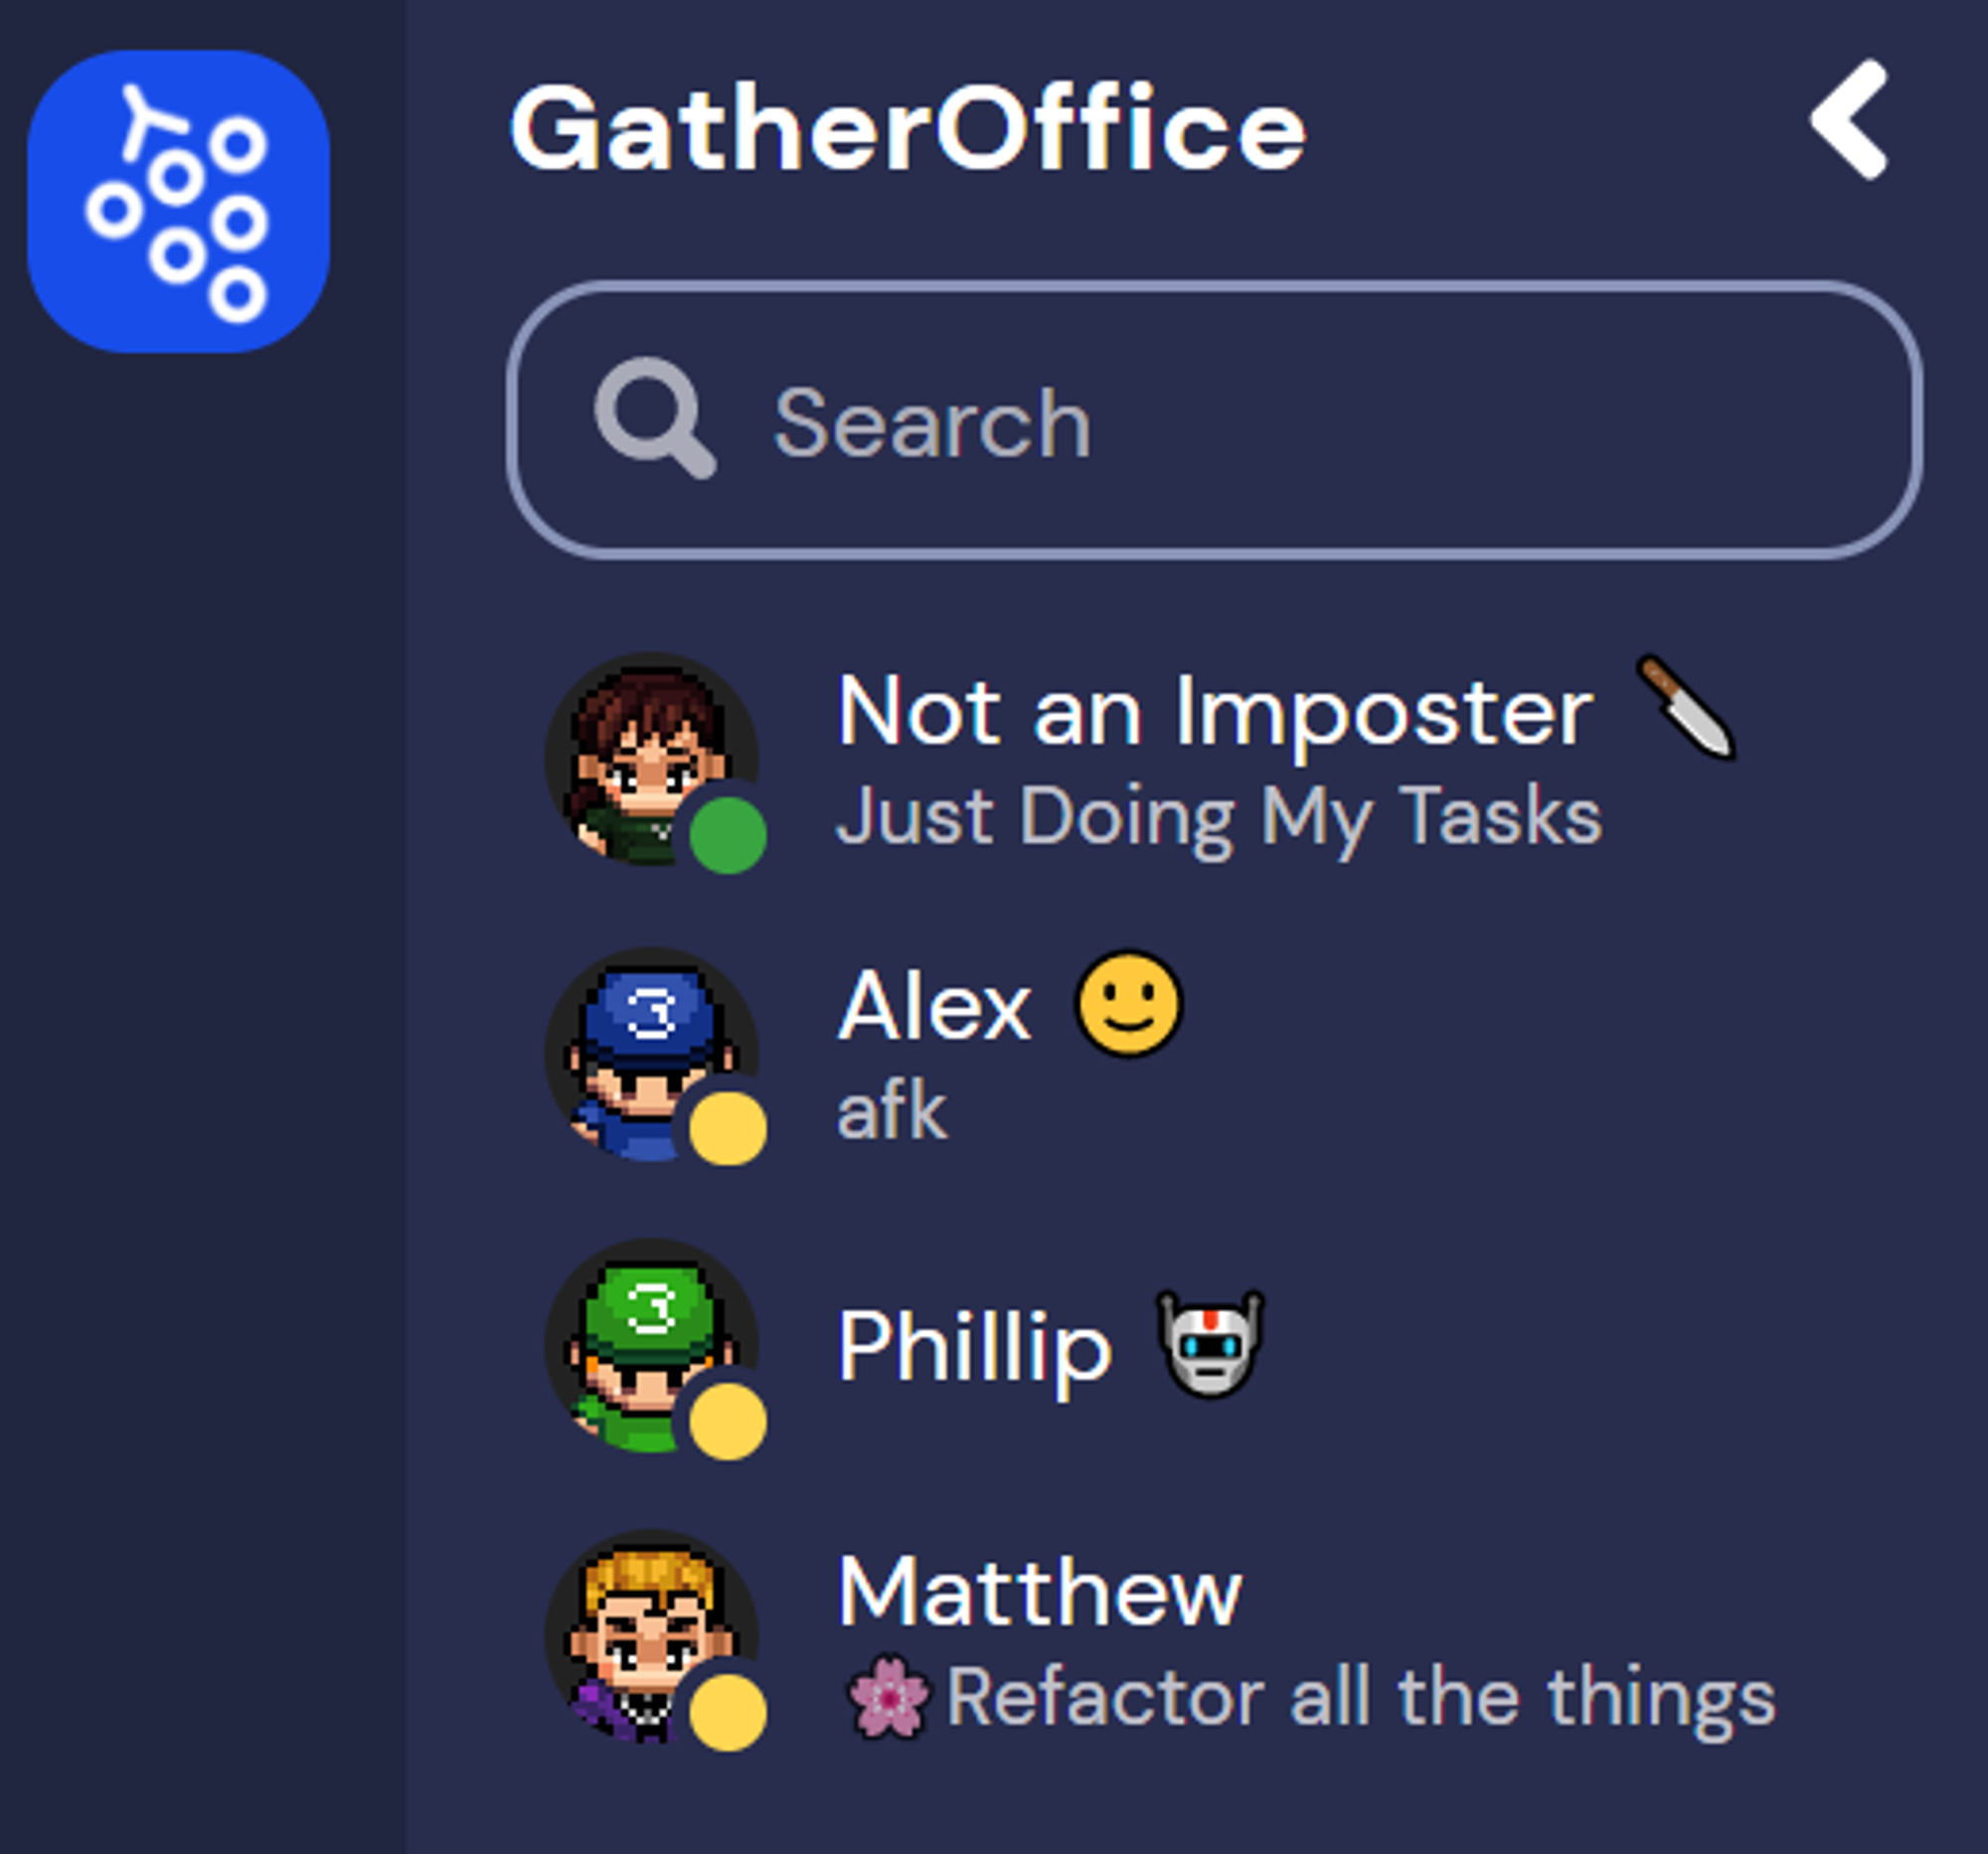
Status messages will appear in the Participates Pane under your name
All of your past status messages will be saved so you can easily search and reselect old status messages! They are listed in the order that you first used them, not necessarily based on what was most recently used

You can search your past status messages to easily reuse them!
Turning off another user's video and audio for yourself
If there is another participant who you do not wish to hear or see you can mute them or turn off their video. To do so, hover your mouse over their video box and click on the microphone and/or video camera icons to mute and/or turn off their video for yourself.
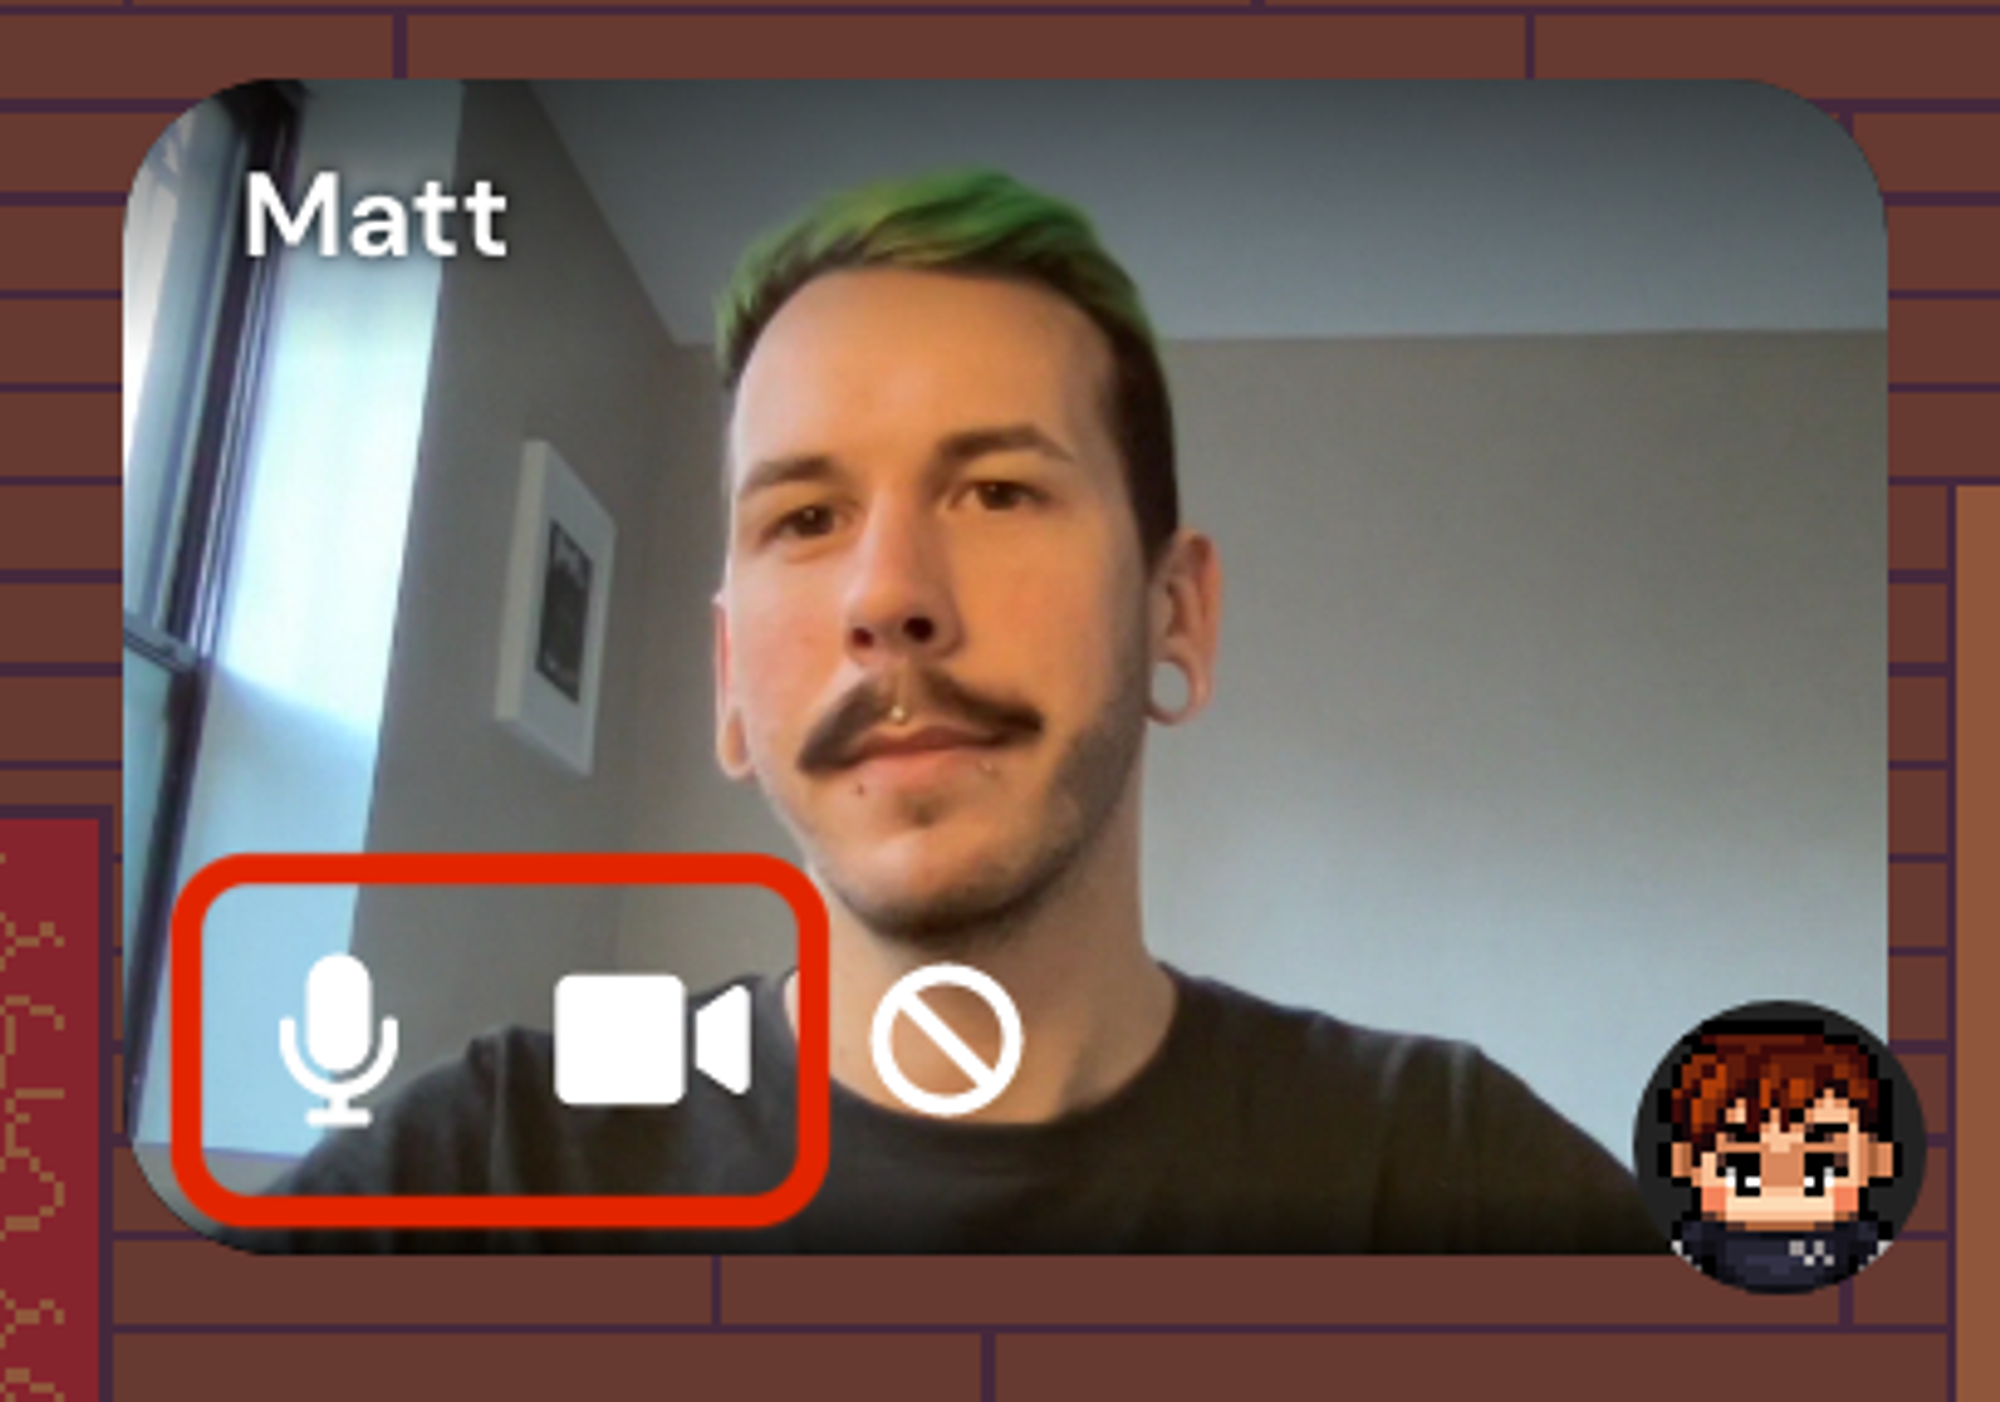
When you hover your mouse over another person's video, it will display the "microphone" and "video" buttons you can use to mute or turn off their video.
Doing this will only mute their audio/video for yourself and no one else in the space. They will still be able to see and hear you, and everyone else will still be able to see and hear them. To turn their audio/video back on you would follow the same steps.
Note that if you turn off another person's audio or video for yourself, if they leave your range of conversation and return, it will reset the setting so that you will be able to see and hear them again.
Ring Feature
The Ring Feature is available when a user in the space is muted.
The Ring Feature's main function is to call the user's attention back to the Gather tab. When clicked, there will be a short audio ring played to grab their attention.
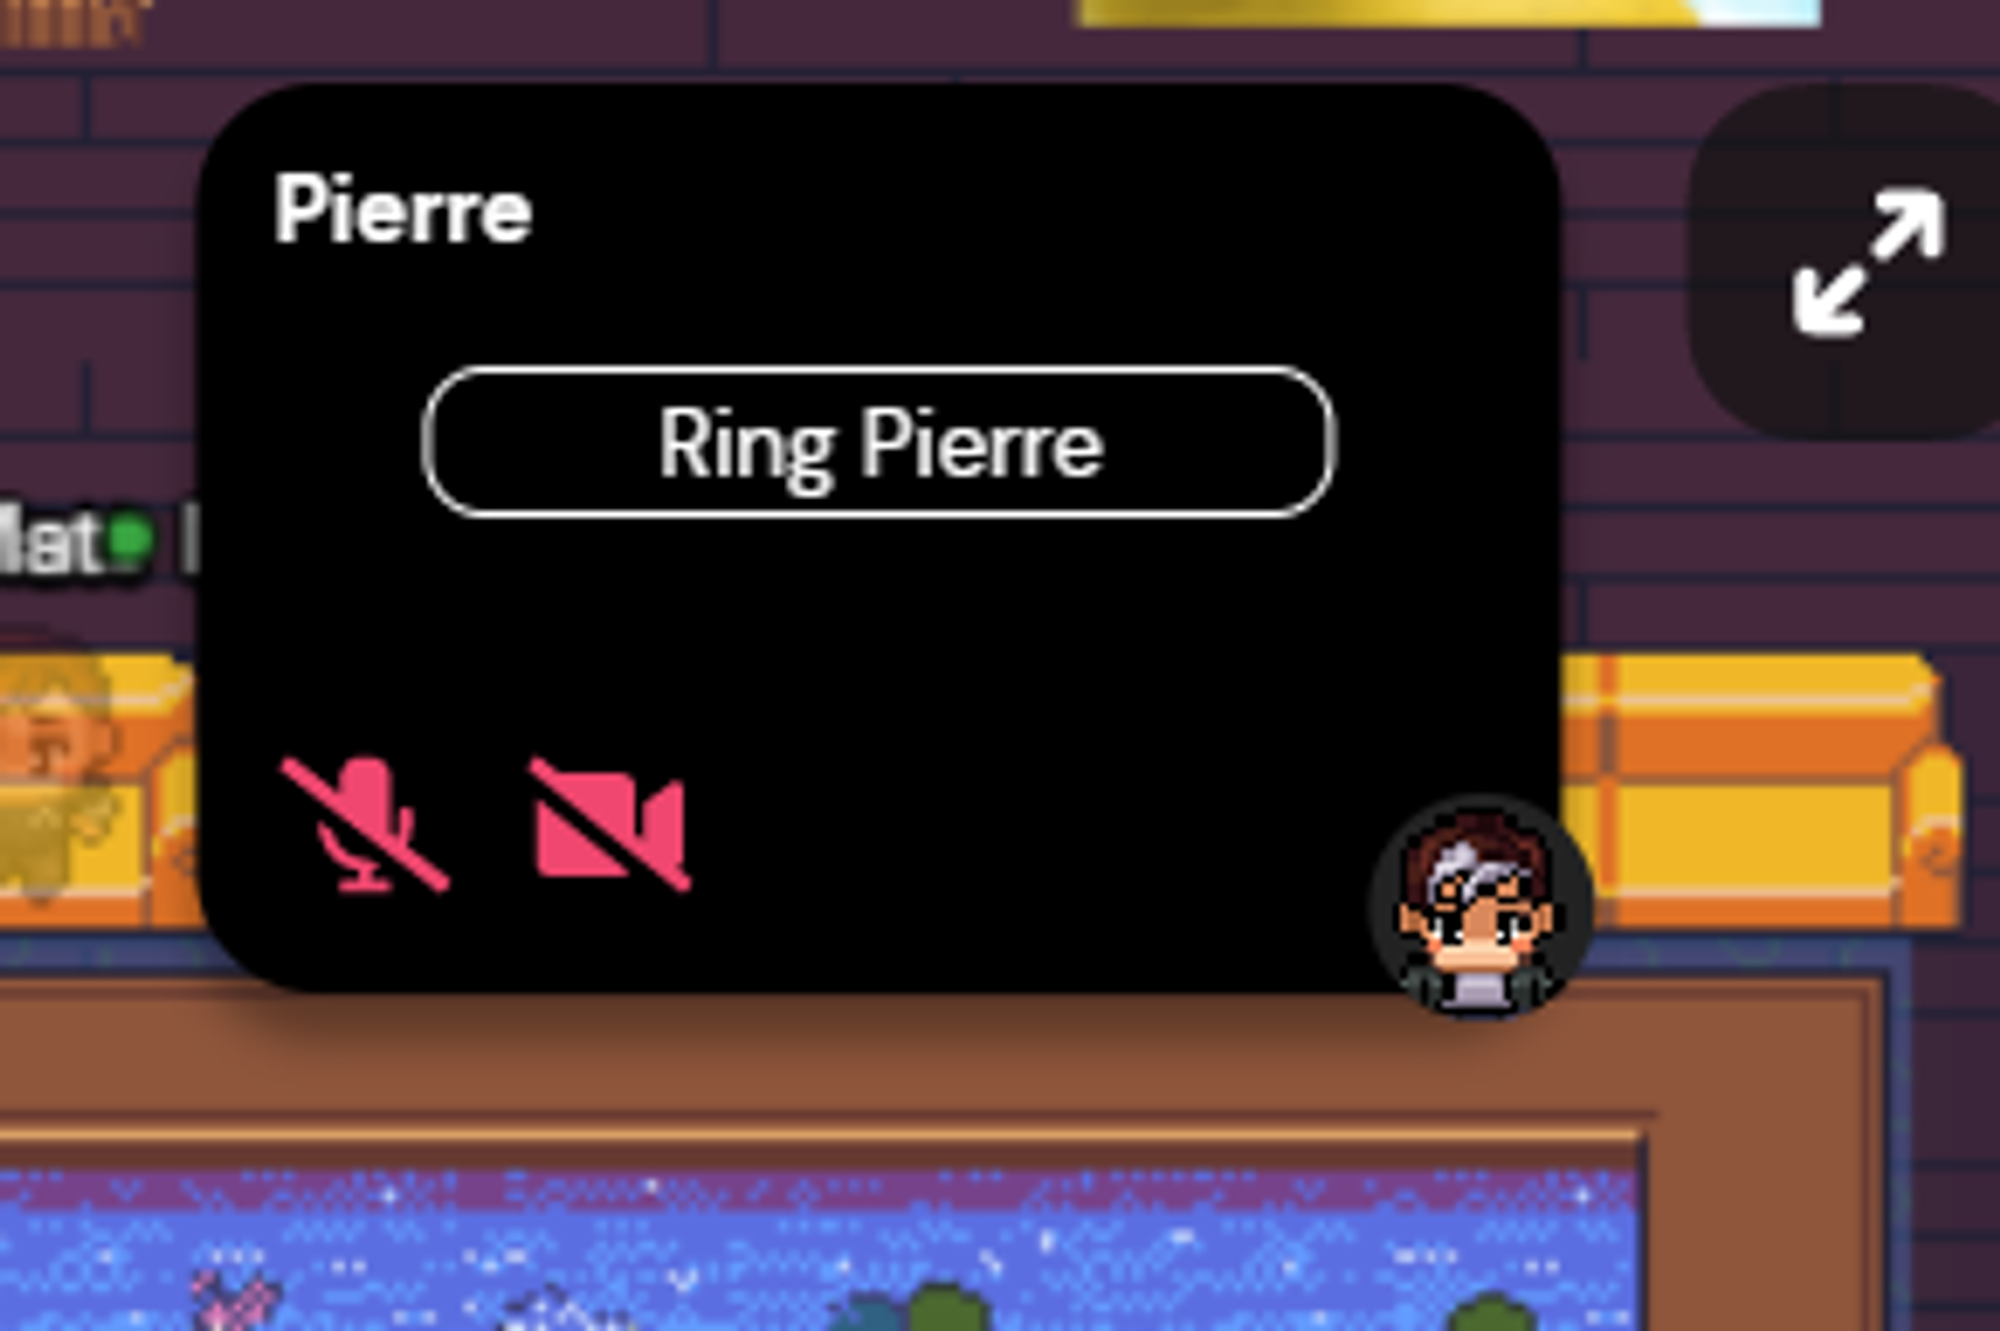
Ring Feature on a User that is double muted
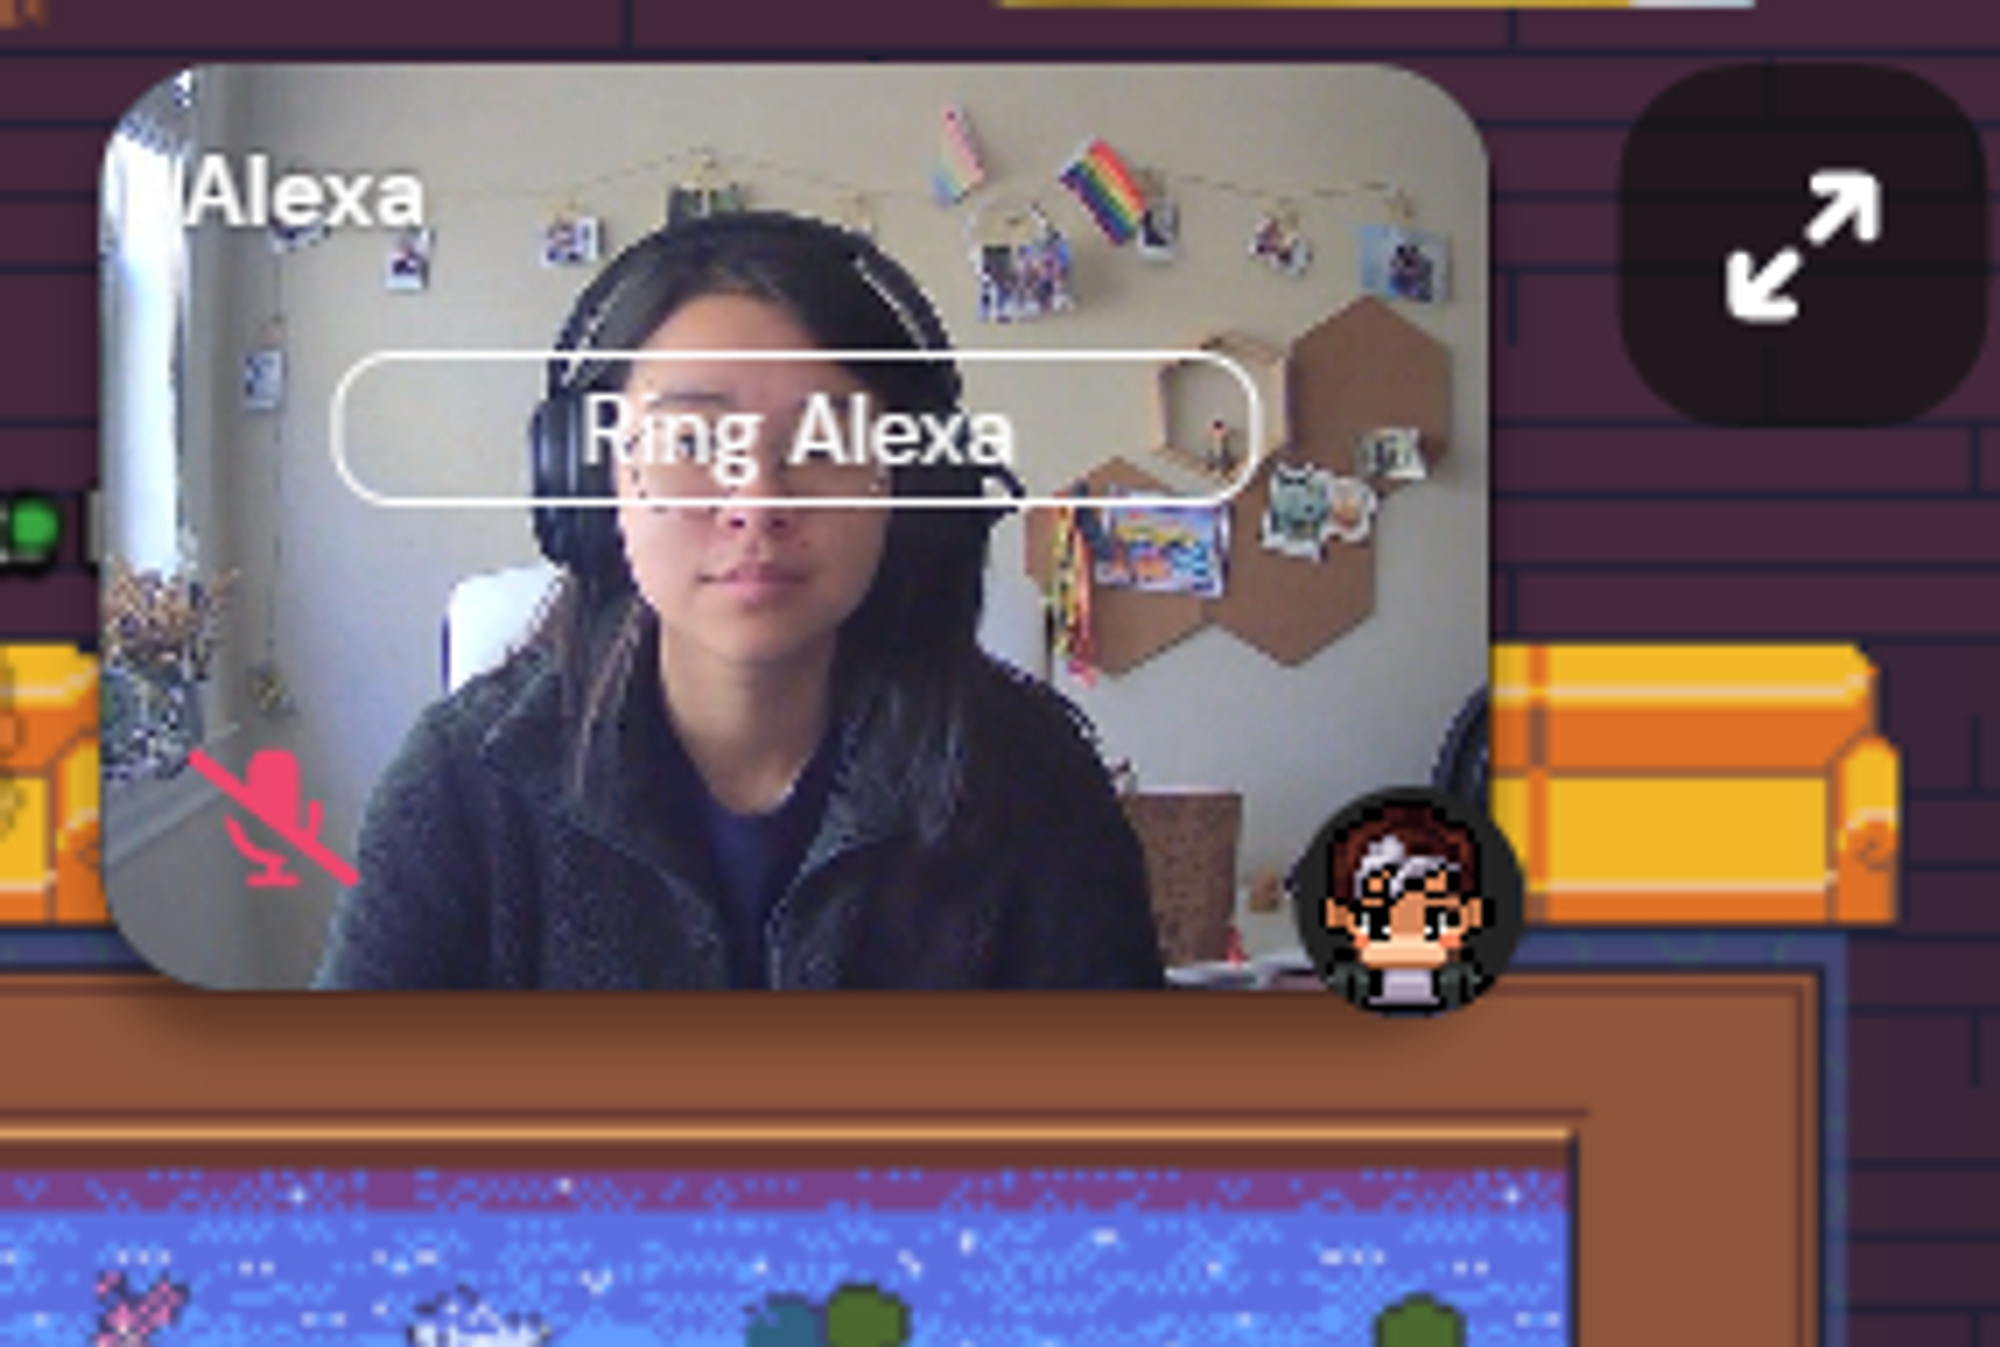
Ring Feature on a User that is only muted one-way.
Conversation Bubbles
A bubble is a temporary conversation between you and another person. Need to get a word in, but don't wanna disturb the flow or the larger meeting going on? Break out into a bubble. Bubbles are great for a speedy whisper with your neighbor without talking over the current group conversation.
How to Start or Join a Bubble
Right clicking or double clicking on another avatar in the space to open the Context Menu. Then click Start Bubble!

A gif demonstrating how to start a bubble. Two users stand in a room. The first user clicks on the second user and selects 'Start Bubble', and then the first user's avatar automatically walks over and enters into a semi-private conversation.
People outside your bubble will still be able to hear you, albeit very softly (and with transparent video). People can join and leave bubbles freely, even across private spaces.
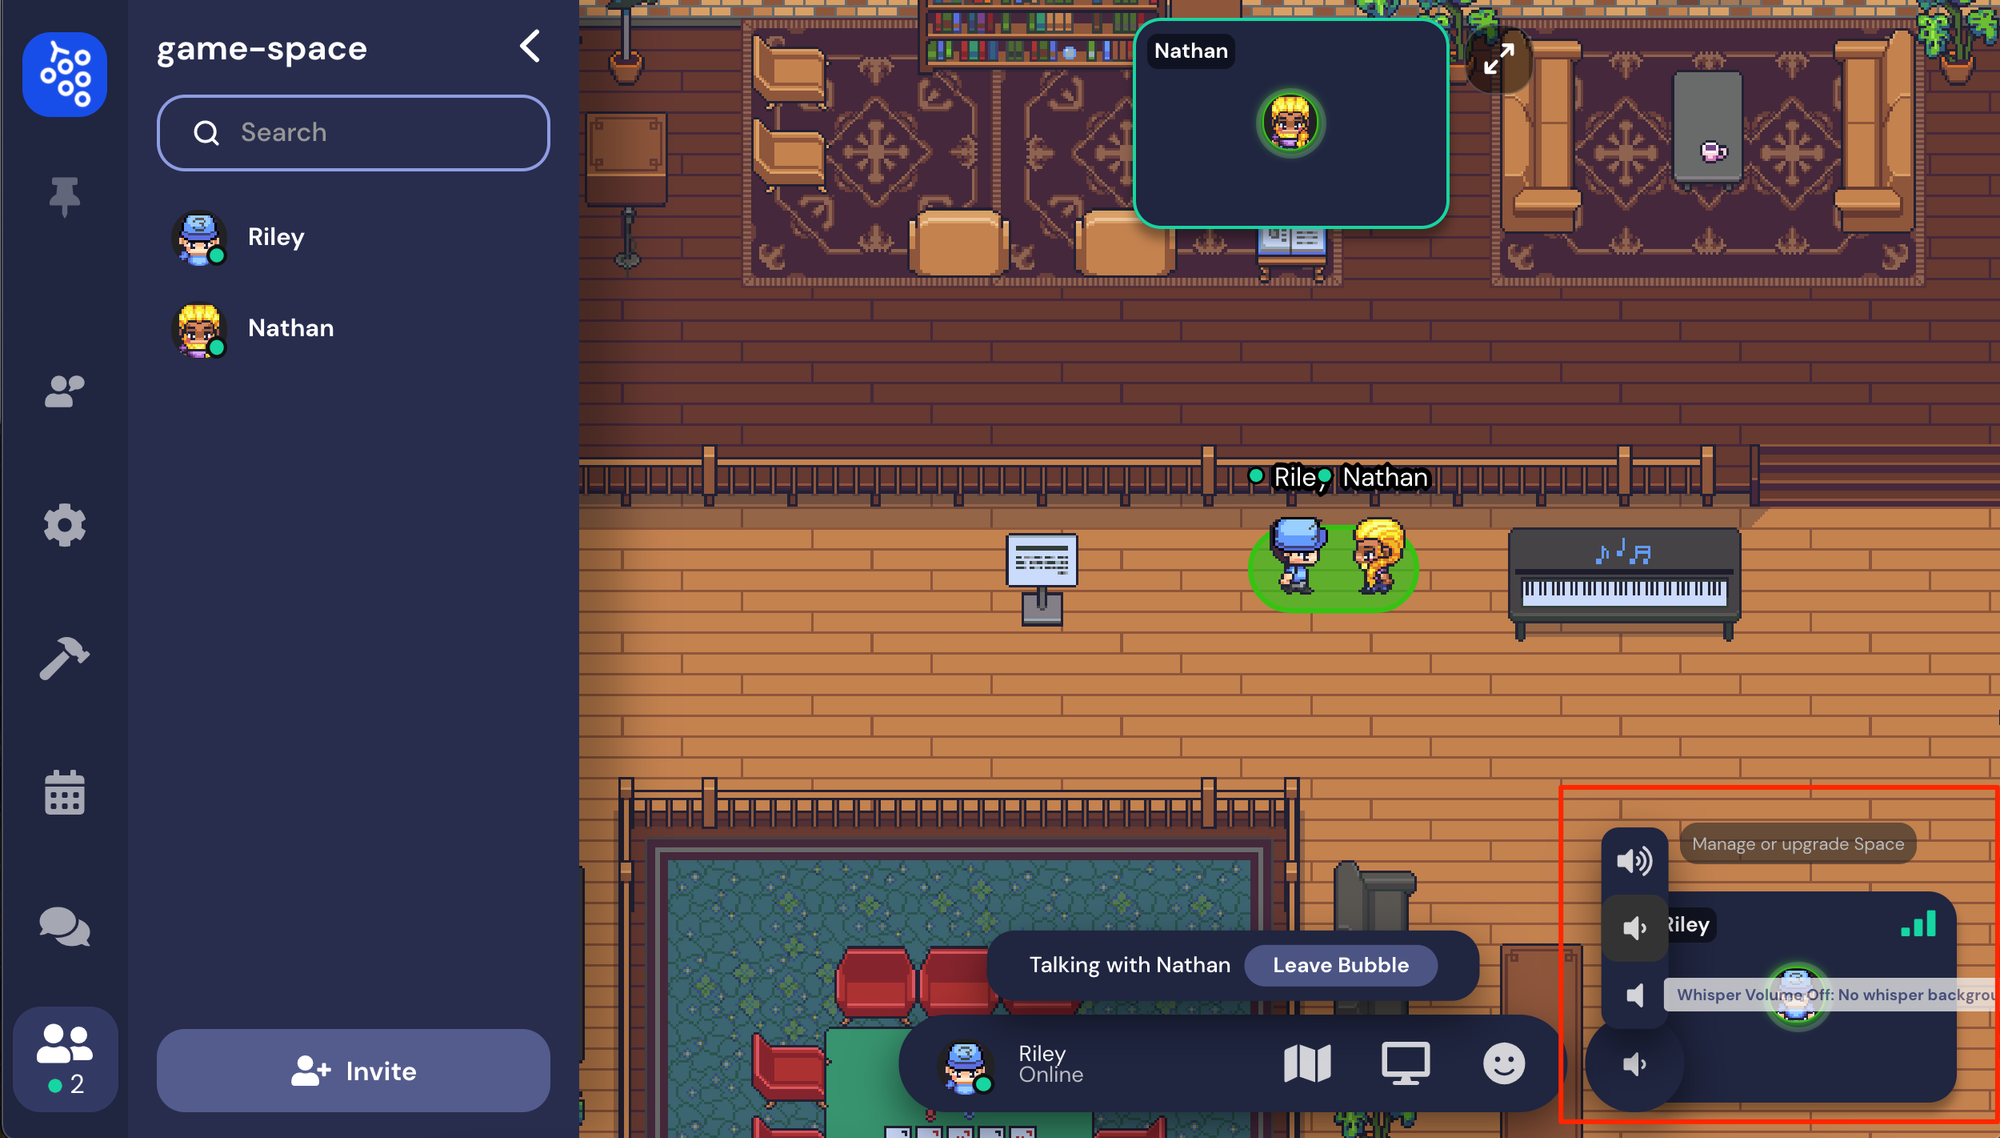
When bubbled, you can control the volume of conversation outside your bubble.
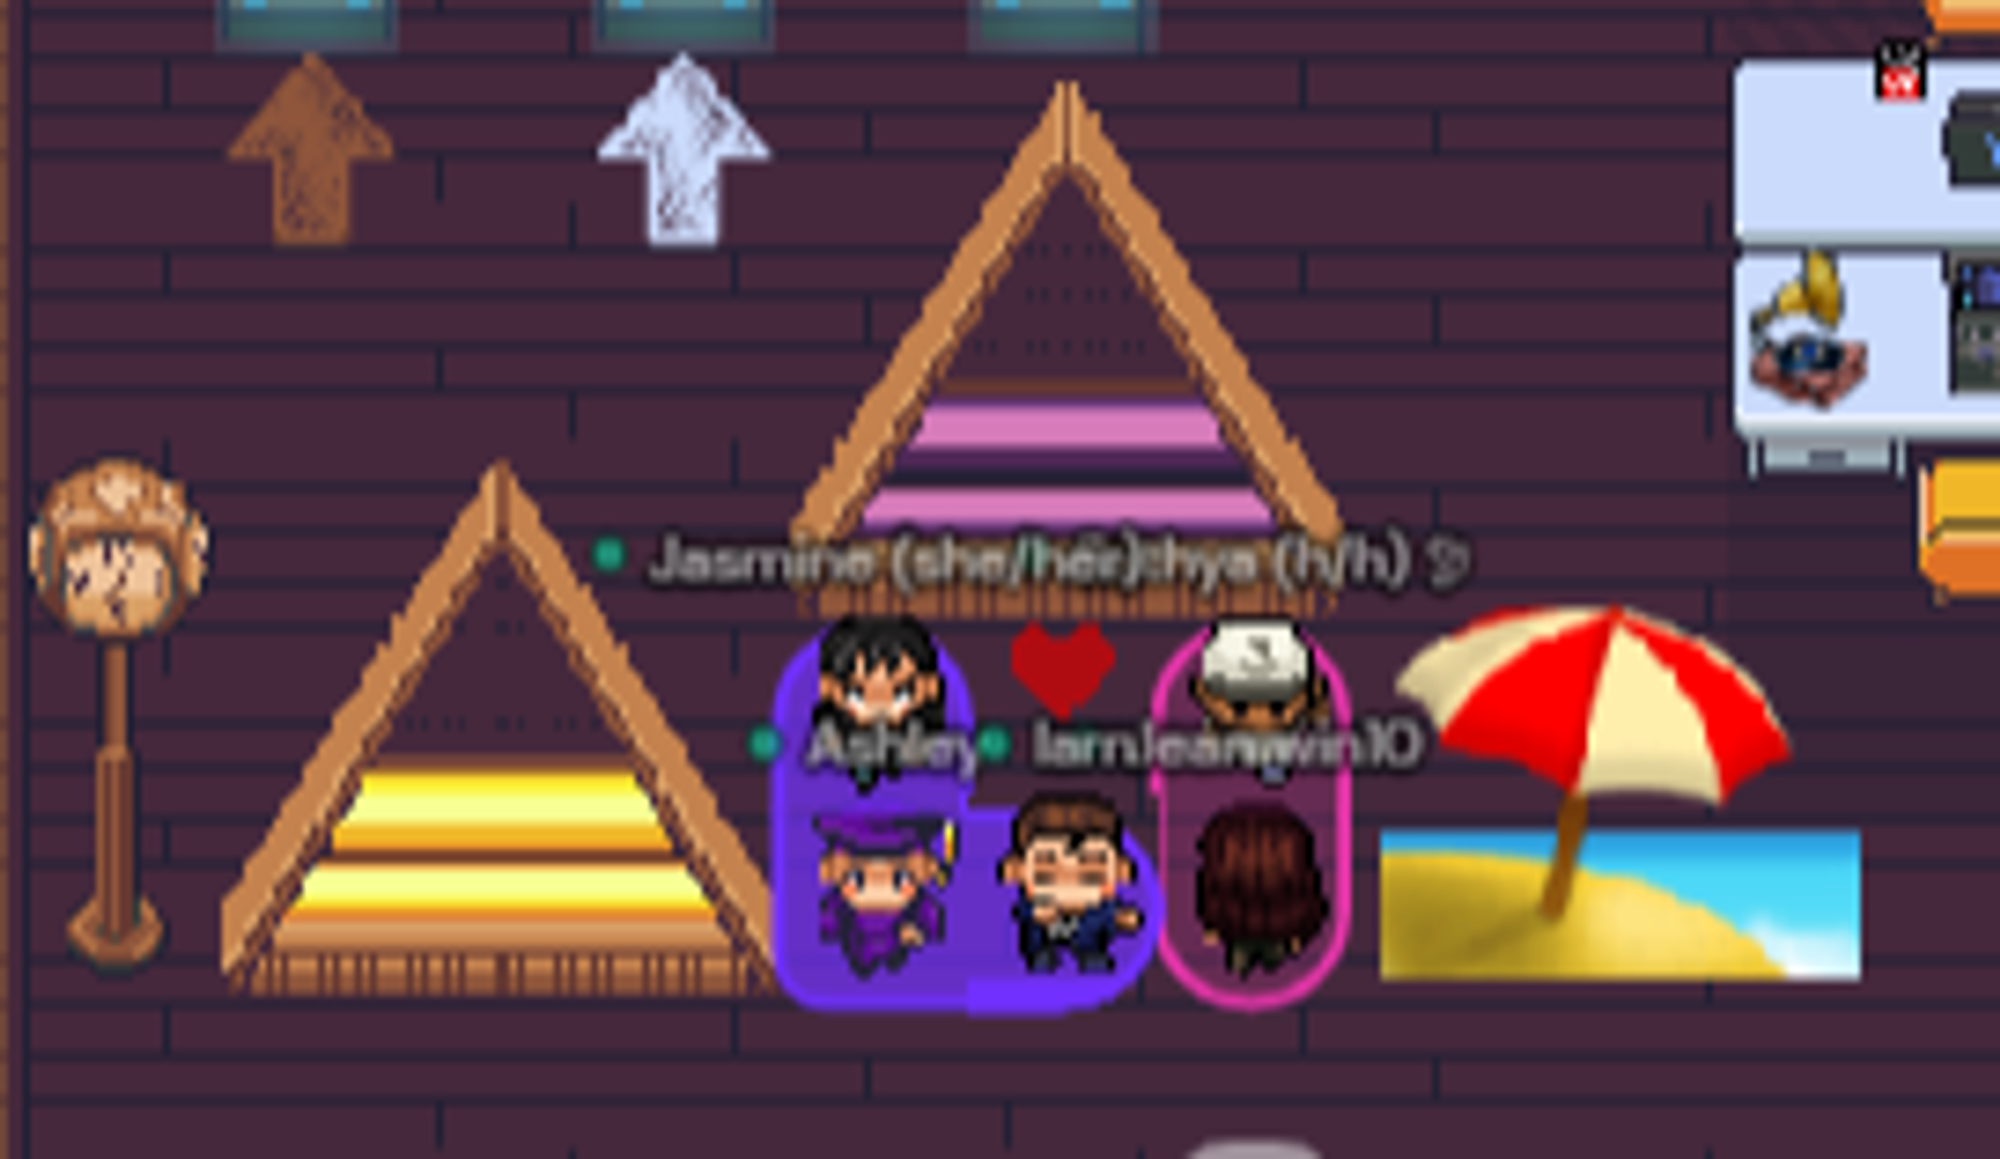
Host multiple bubbles as well!
Screen sharing in a bubble will broadcast your screen to everyone who could see you in a normal conversation.
How to Leave a Bubble
1.
Move your avatar away by using the arrow keys or WASD keys
2.
Click the Leave Bubble button
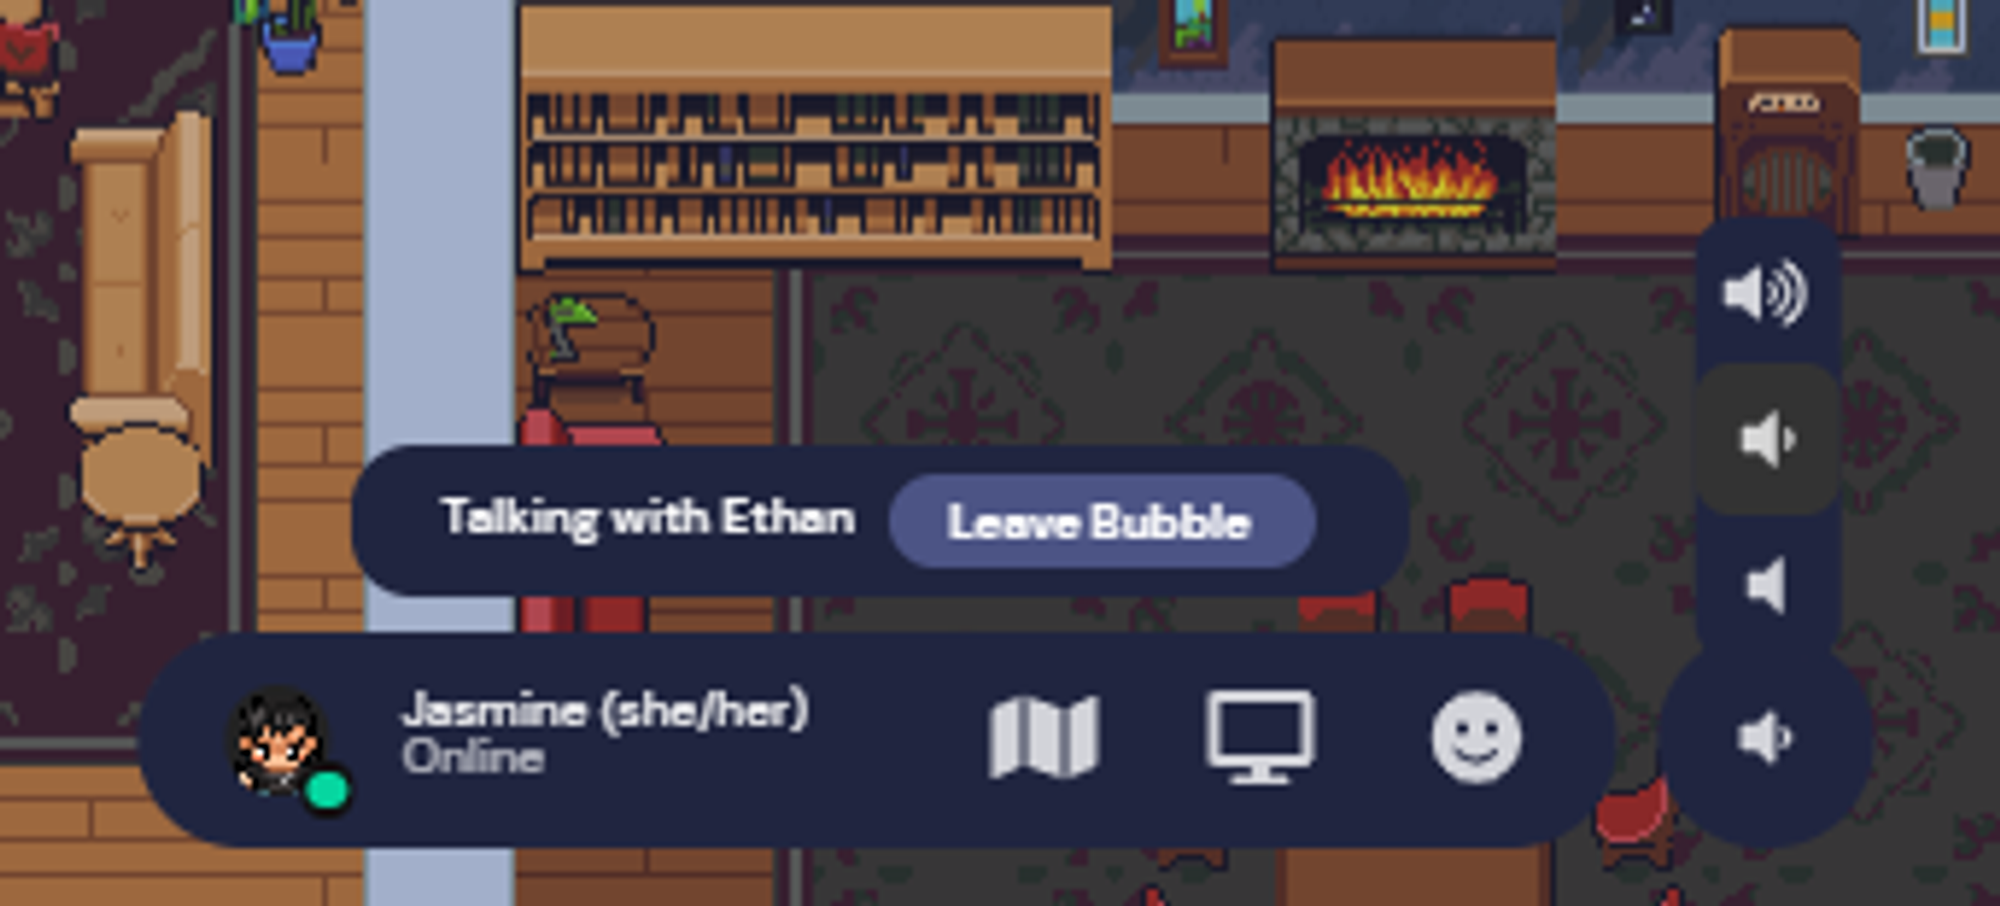
Leave Bubble button